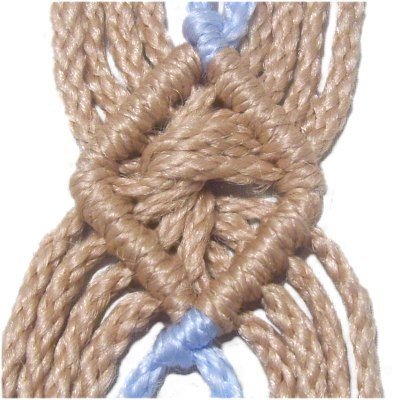
The interior of the diamonds feature other
decorative knots.
Click on the link or image to view the
page.
Top of Unique Diamonds
When you make the Unique Diamonds on this page,
you start by creating the top
portion, as described in the following
steps.
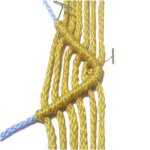
A different color was used for the two holding
cords (light blue), to
make the images easier to understand.
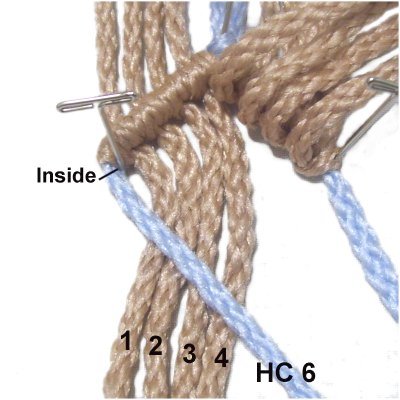
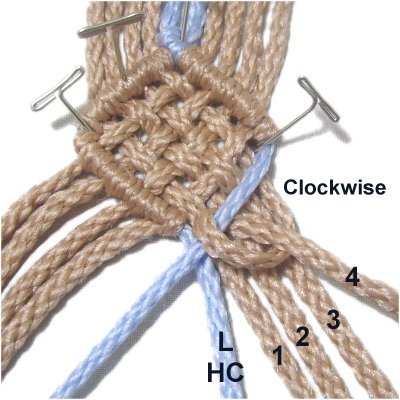
Step 1: Secure the
holding cords vertically to your
board. On each side, secure 4
working cords.
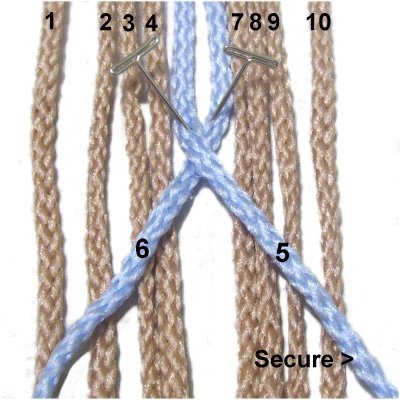
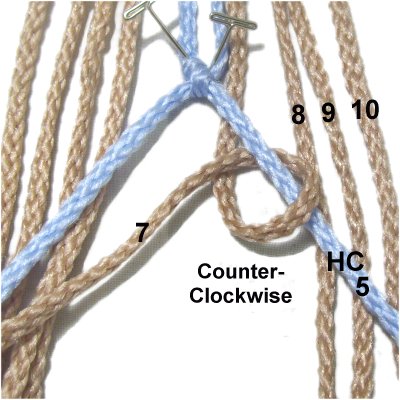
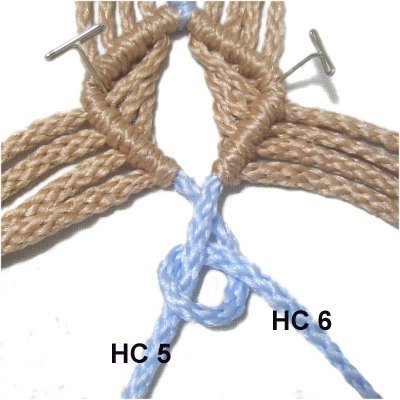
Mentally number the cords 1 - 10.
Cross holding
cord 5over
cord 6, heading right. Stretch it
so it has tension, then secure it.
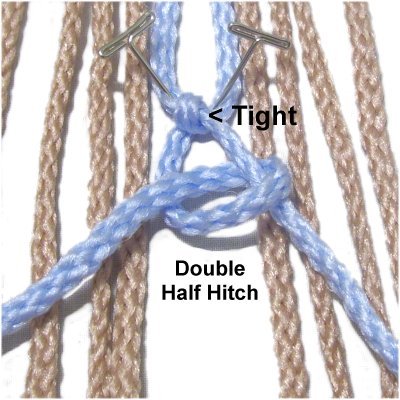
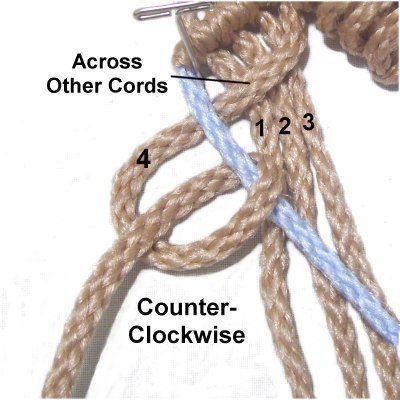
Step
2: Attach
cord 6 to holding cord 5 with a
Double Half Hitch (DHH), rotating
counter-clockwise.
Both Half Hitches should be TIGHT.
Your Diamonds will look much more
appealing if the rows of knots are
firm.
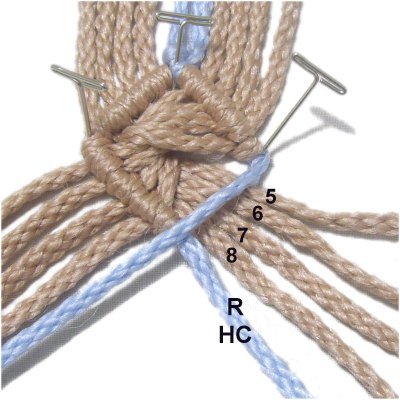
Step 3:
Secure BOTH holding cords at
the top and bottom, with lots of tension, so
the rows you will be making are
straight.
The angle of the holding
cords determines the shape of the Unique Diamonds,
so adjust each one until you are
satisfied. Make sure both sides have
the same slant.
Attach cords
7 - 10 to holding cord 5 with
DHH, rotating counter-clockwise.
Make sure the knots are neatly arranged
without overlapping (see next image).
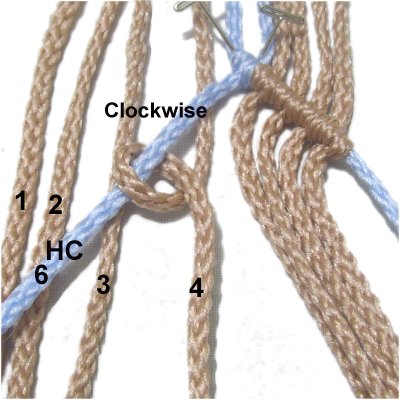
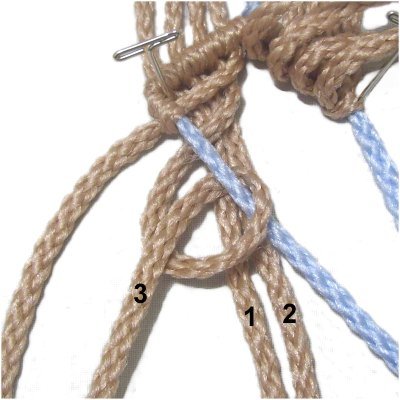
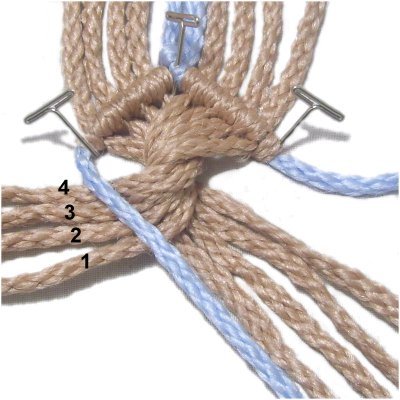
Step
4:Attach cords
4 - 1 to holding cord 6 with
DHH, in that order.
The knots should be tied clockwise,
since you are moving right to left.
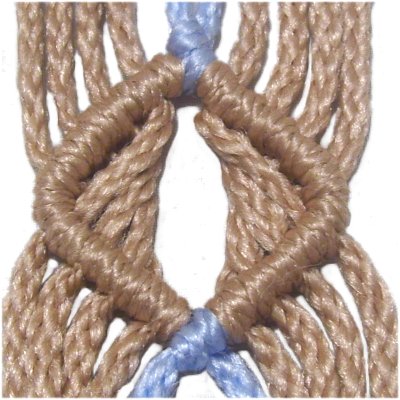
Step
5: Secure the top portion
of the diamond at the top and on the
corners.
Only the working cords are used for the
center area.
Center Area Designs + Bottom
You will now learn three techniques for filling
the center area (inside) of these Unique
Diamonds. The bottom portion is
included in the instructions for each technique.
You have to pay close attention to the details
with these designs, so take your time creating
them. Proper tightening and careful
positioning of the holding cords is very
important.
Window Technique
The first design is called the Window
Technique. The cords are folded away from
the center, which leaves a large space. It's easy
to make and quite unique.
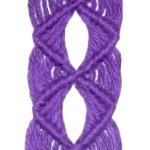
The most challenging part is keeping the corner
angles sharp. That's easier to do if you use
1mm to 3mm flexible
material, such as the cotton shown in the next
image.
Olefin in 4mm size was used in these examples, so
the corners were rounded.
The Window
Belt is a Macrame project
featuring this technique, if you want to
give it a try.
Click on the link or image to view the
page.
Step
1: Create the Top
Portion as described in the first
set of instructions.
Moveholding
cord 6
towards the center (right), resting on top
of cords 1 - 4. Secure it with
tension.
Designer's
Tip: To help form a sharper corner, you
can place a pin to the inside
of the holding cord next to the last DHH
in the upper row (see image above).
When you tighten the knot in the following step,
it should rest against
the pin. There should be a tiny gap between the
top and bottom row.
Step
2: Move working
cord 4across
cords 1 - 3.
Attach it to holding cord 6 with a counter-clockwise
DHH.
Step
3: Attach working cords
3 - 1 with DHH (in that order).
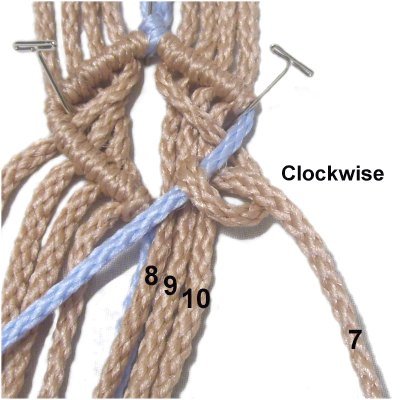
Step
4: Move holding
cord 5
towards the center (left), and secure it
with tension.
Attach cords
7 - 10 to it with aclockwiseDHH.
Step
5: Close the diamond by
attaching holding cord 6 to holding cord 5
with a clockwise
DHH.
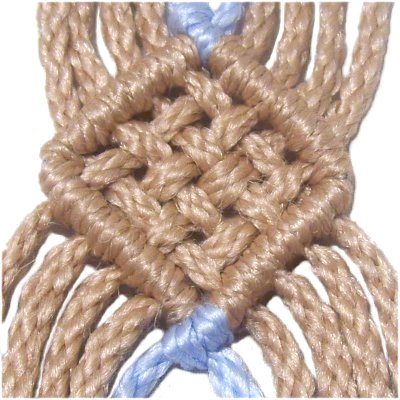
Weaving Technique
Description: Unique Diamonds
can be made with weaving. For a small size
you would weave each cord, as described
below. For a large diamond, you could weave
groups of two or more cords.
The key to making this design appealing is to make
sure the working cords are tight and straight as
you create the bottom portion.
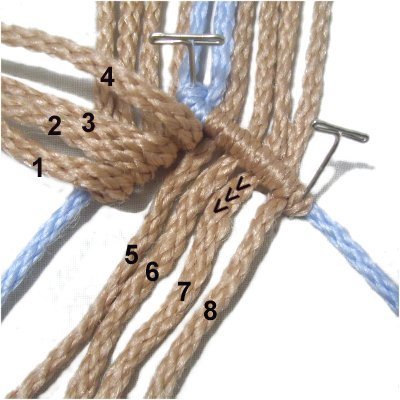
Step 1: Make the Top Portion
of the diamond. Keep the holding cords
secured after you are finished.
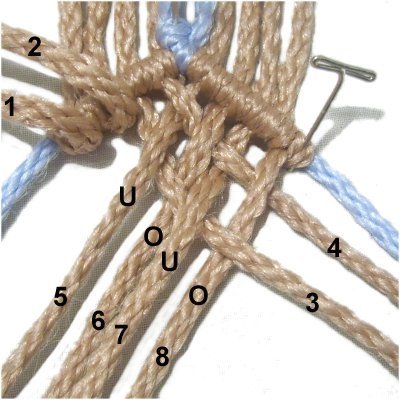
Mentally number the working
cords 1 - 8.
Fold cords 1 - 4 out of the way.
Arrange cords 5 - 8 diagonally, heading
left.
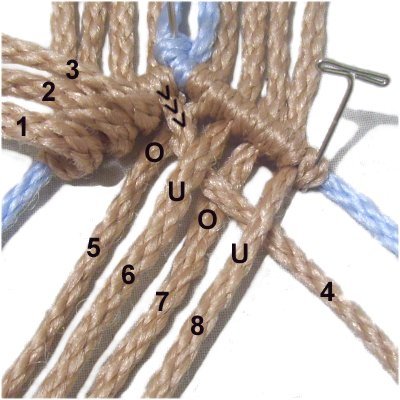
Step
2: Weavecord 4over
- under - over - undercords 5 - 8 (left to right).
Step
3: Weave cord
3under
- over - under - over cords 5 -
8.
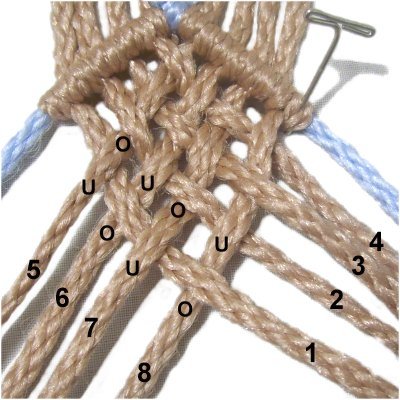
Step
4: Weavecord 2over
- under - over - undercords 5 - 8.
Weave cord
3under
- over - under - over.
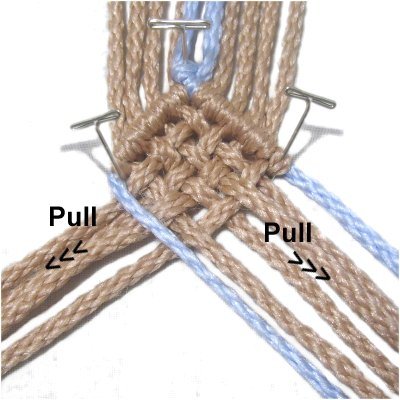
Step
5: Pull each working cord
firmly to tighten the weaving, then secure
them to your board.
Move the left holding cord towards the
center, following the angle of the
weaving.
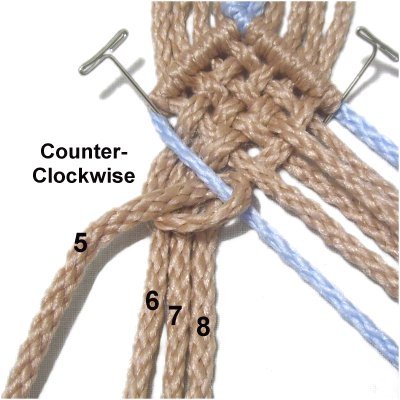
Step
6: Attach cords
5 - 8 to the left holding cord
with counter-clockwise
DHH.
Pull each cord before tightening the first
Half Hitch, so it's straight and has
tension. Then tie the second knot.
Designer's
Tip: Make sure the top portion of
the diamond remains straight as you pull the
working cords. You can place a pin in the
middle of the row.
Remember that these Unique Diamonds will look
better if the knots are tight and do not overlap.
Step
7: Move the right holding
cord towards the center. Attach cords
4 - 1 to it with clockwise
DHH (in that order).
Pull each cord before tightening the first
Half Hitch.
Attach the left holding cord to close the
diamond.
Twist Technique
Description:
This is one of the most unique Diamonds I've
seen. It was found in a Macrame book written
in 1899.
The working cords are twisted and flipped upside
down. There are other ways to rotate the
cords, but the method shown below works the best.
Step 1:
Create the Top
Portion of the diamond. Place pins
on the last DHH on each side.
Mentally number the working cords 1 - 8.
Curve cords 5
- 8 around 1 - 4, then bring them towards
the right. Turn them upside
down so that the bottom of the
cords is face up, and cord 5 is at the
back of the group.
On the left, turn the cords upside down,
too. Cord 4 should be at the back of
the group.
Step
2: Bring the left
holding cord towards the center.
Attach cords
4 - 1 to it with counter-clockwise
DHH, in that order.
Pull each cord to remove the slack before
tying the knots.
Step
3: Move the left holding
cord towards the center.
Attach cords
5 - 8 with clockwise
DHH. Pull firmly on cord 8 before
you attach it.
Attach the right holding cord to close the
diamond.
By using any
text or images on Free Macrame Patterns, you are
agreeing to ourTerms of Use.