Description:
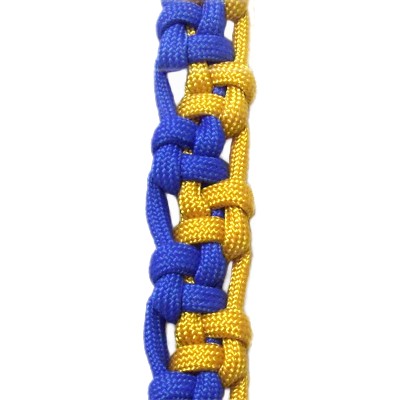
The Tumbling Box Bar is an
interesting sennit featuring reverse
Half Hitches. Since you tie them in
both directions, box-like designs are
formed. Be sure to use two colors.
The loop at the top is made with a Slipknot,
and there is a Square Knot,
too.
This design can be used to make Macrame
bracelets, belts, leashes, straps, etc.
Paracord (550) was used in the example
shown. Be sure to read Cord
Preparation to learn how to
prepare the material if you decide to use
it.
This
knot design came from the Fusion
Knotswebsite. Click the image or link
to visit.
The video gallery contains many unique
combination knots as well as historical
knots.
Preparation:
To practice,
cut 1 cord of each color, at least 60 inches
long. Prepare the tips to prevent
unraveling, in the most suitable method for the
material you are using.
When using the Tumbling Box Bar in a project, the
cords should be cut to 8
x the finished length you are planning to
make.
Cut both cords longer if you plan to make a button
knot for a clasp.
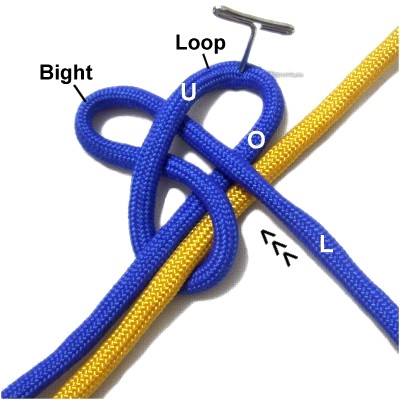
Step
1: Make a loop with Cord
A, crossing right over
left.
Arrange the loop so the left
half is 2 inches longer than the
right half.
Place Cord
B next to the loop, arranging it
diagonally.
The center
of it should rest close to the crossing
point of the loop.
To make a
Slipknot, fold the left
half of cord
A to form a bight.
Pass it through the loop over
- under.
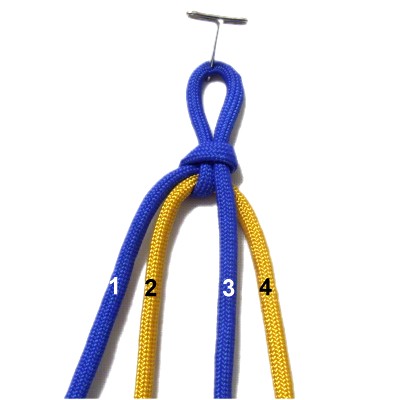
Tighten the loop by pulling on the
bight. Then pull the left half until
the bight is 1/2-inch in size.
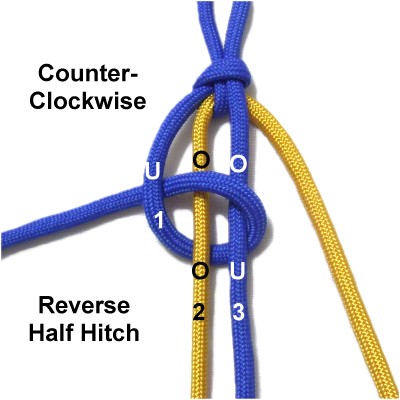
Step
2: Make sure the two colors
alternate as shown.
Mentally number the cords 1 - 4.
Step
2: Use cord
1 to tie a REVERSE Half Hitch:
Bring the cord under
- over cords 2 and 3,rotating counter-clockwise.
As you pull it left, pass under
cord 1.
Designer's
Tip: All the reverseHalf Hitches in the Tumbling Box Bar are
tied as described above (under - over - under).
Some knots will be tied clockwise, and others
counter-clockwise, depending on which cord you are
using.
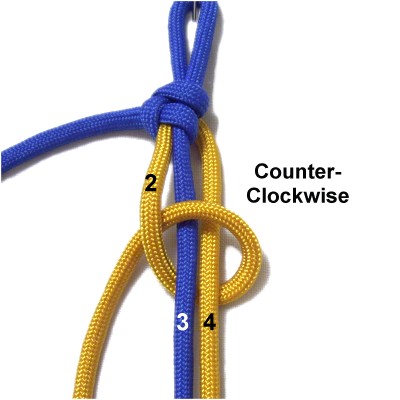
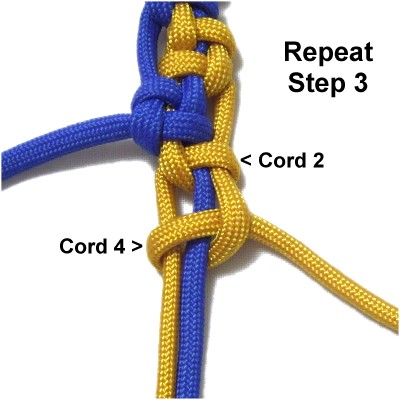
Step
3: Tie a counter-clockwisereverse
Half Hitch with cord
2, around cords 3 and 4.
Tighten it gradually,
keeping cords 3 and 4 as straight as
possible.
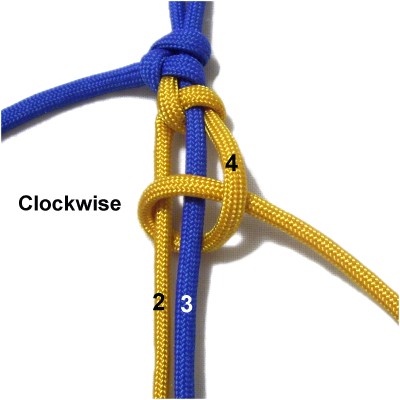
Make the next
reverse Half Hitch with cord
4, rotating clockwise
around cords 2 and 3.
Tighten gradually, keeping cords 2 and 3
straight.
Designer's
Tip: When tightening, it's
important to remove all the slack, especially when
using slippery material like Paracord.
Be careful not to tighten the Half Hitches too much.
The goal is to end up with a box-like shape, as
seen in the next image.
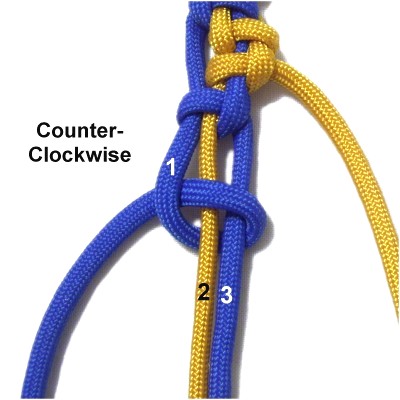
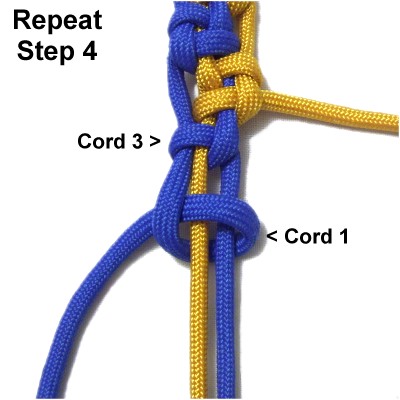
Step
4: Use cord
3to tie a clockwise
reverse Half Hitcharound cords 1 and 2.
Make sure cords 1 and 2 are straight while
tightening.
Use cord
1 to tie a counter-clockwise
reverse Half Hitch around cords 2 and 3.
Keep cords 2 and 3 straight while
tightening.
Step 5:Repeat
step 3 to tie the next two Half
Hitches for the Tumbling Box Bar.
You use cords 2 and 4, which are the two
halves of Cord
B.
Step 6:
Repeat step 4 to make the next
pair of reverse Half Hitches.
You use cords 3 and 1, which are the two
halves of Cord
A.
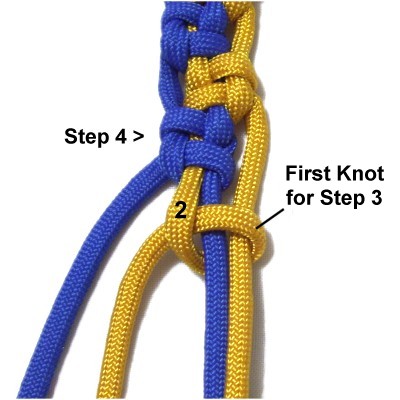
Step
7:Repeat
steps 3 and 4 several times,
until the sennit is the size you need.
Make sure you stop on step
4.
Then make the first knot for step 3, which
is tied with cord
2.
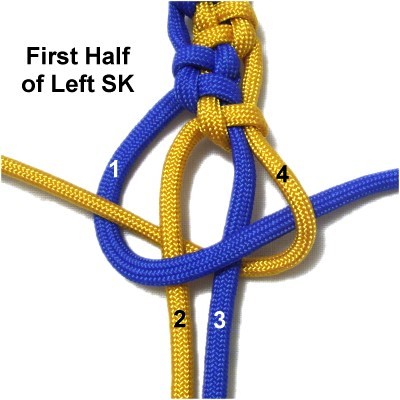
Step
8: Tie the first half of a
LEFT SK:
Move cord
1over
cords 2 - 3 and under
cord 4, heading left to right.
Move cord
4under
cords 2 - 3 and over
cord 1, heading right to left.
Tie the second
half of the SK:
Move cord
1over
cords 2 - 3 and under
cord 4, heading right to left.
Move cord
4under
cords 2 - 3 and over
cord 1, heading left to right.
Step 9:
Finish off the cords in the manner most
appropriate for your project.
When using the Tumbling Box Bar for a bracelet,
you finish off cords 1 and 4. Securing them
to the back of the sennit works well.
Cords 2 and 3 are used to make a button knot for
the clasp.
By
using any text or images on Free Macrame
Patterns, you are agreeing to ourTerms
of Use