Description:
The Stitched Monkey Bar is a unique
variation of the Oat Spike
design. It's also related to Endless
Falls.
This decorative knot pattern is formed by
alternating from front to back each time you tie a
new knot.
The loop at the top is optional, but is the best
way to start the bar if you need a clasp for a
bracelet or belt.
This
design was found on the Fusion
Knots website.
Click on the image or link to visit the
site.
The video gallery contains tutorials for
many interesting combination knots.
To practice the Stitched Monkey Bar, you need
two cords (different colors), each at least 45
inches long.
When using this technique for a project, multiply
the finished length by 10, and cut the
working cord to that length.
The holding cord should be at least 36
inches longif you intend to make a button knot to form
a clasp.
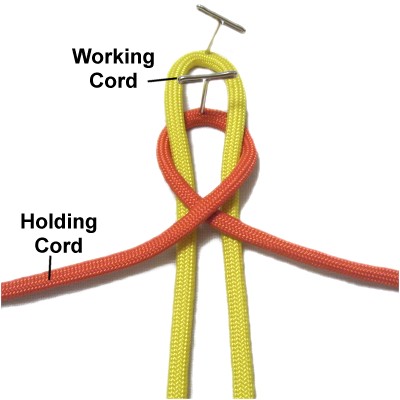
In the example shown, the working cord is yellow
and the holding cord is orange.
Step
1: Fold the working cord in
half and secure it to your board in the
center.
Place the holding cord under
it and secure it in the center, too.
Bring both halves of the holding cord on
top of the working cord, and cross them right over
left.
Move both
halves of the working
cord backward, over
the crossed area of the holding cord.
Pass them through the area
between the two halves of the
working cord.
Move them under
the crossed area of the holding cord as
you pull them toward you.
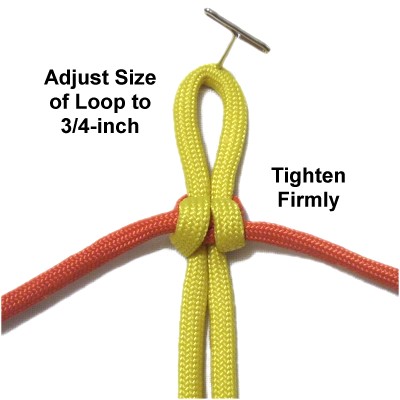
To tighten the
knot, pull both halves of the holding cord
first, followed by the working cord.
Adjust the size of the loop to 3/4 inches
if you plan to make a button knot at the
other end (for a clasp).
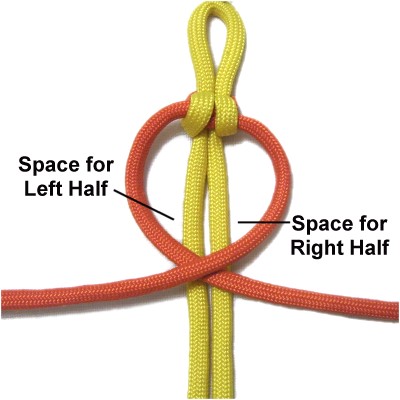
Step
2: Move the holding
cord on top of the working cord
and cross the two halves right
over left.
This image shows the spaces where the two
halves of the working cord will go in the
next step.
Move each half
of the working cord backward, over
the crossed area of the holding cord, then
through the space indicated in the
previous image.
Pull them to the right and left horizontally,
so they remain above
the holding cord.
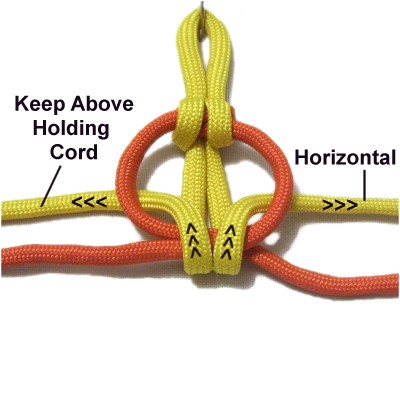
Step 2,
continued: Tighten the second knot
by pulling on both halves of the holding cord
first, followed by the working cord.
Make sure you tighten firmly, so the cords are
balanced.
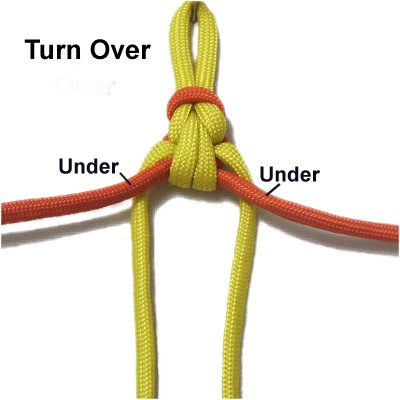
Step
3: Turn
the entire knot over.
Pass the working
cordunder
the holding cord on each side.
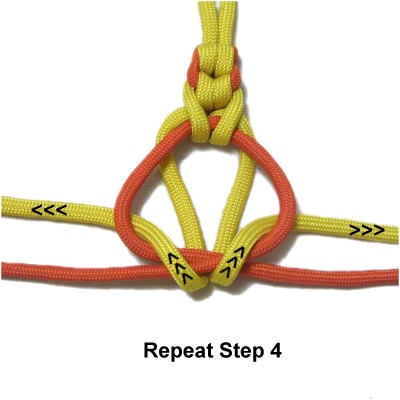
Step
4: Repeat step
2.
Remember that each half of the working
cord passes through the spaces furthest to
the left or right, NOT the one in the
center.
Arrange the working cord horizontally,
resting above the holding cord.
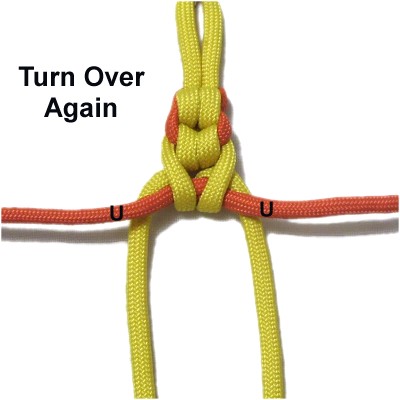
Step
5: Repeat
step 3.
Step
6: Repeat
step 4.
Step
7:Repeat
steps 3 and 4 several more times,
until the Stitched Monkey Bar is the size
you wish to make.
Make sure you turn the sennit over each
time you start a new knot.
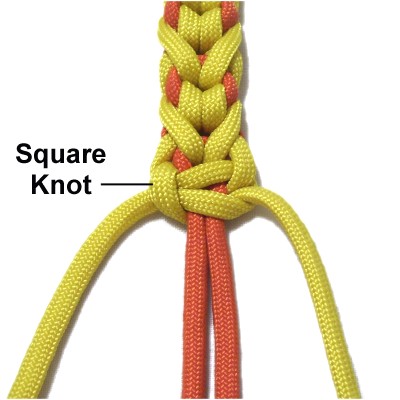
Step
8: To finish, tie a tight Square Knot
using the working
cord.
This is optional if you wish to use a
different knot.
You can now finish off the ends of the
working cord by sliding them under loops
in the BACK of the sennit.
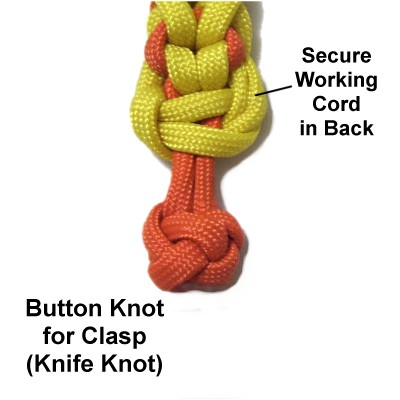
Step
9: You can now make a
button knot using both halves of the
holding cord, if you need a clasp.
The Knife Knot,
also called the Diamond Knot, is the best
option for this design. Cut
off the ends of the holding cord after the
knot is tightened firmly.
By using any
text or images on Free Macrame Patterns, you are
agreeing to ourTerms of Use