|
|
| |
|
|
|
|
|
|
|
Alternating
Pattern #1
|
|
Alternating
Pattern #2
|
|
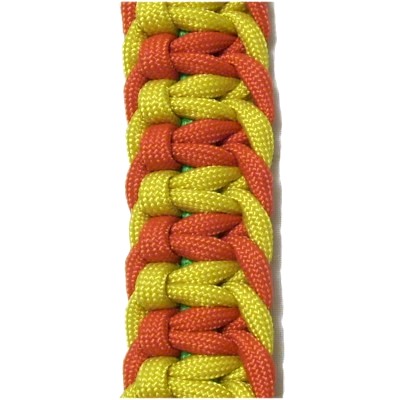
Zigzag
Pattern
|
|
Star
Pattern
|
|
|
| |
|
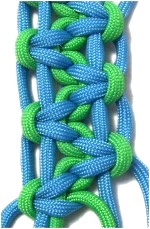
Description: These
Square Knot Sennits are chains of knots tied one
right after another. How you construct the
sennits to form a Macrame design can vary in
several ways.
You can form interesting designs for your
Macrame projects by alternating colors, or by
changing the direction of the knots.
You can also cross cords, or switch back and
forth between groups of cords.
Four vintage designs are described on this
page:
- Alternating Sennit #1 is made with two pairs
of working cords.
- Alternating Sennit #2 is made with two pairs
of working cords, and the knots face opposite
directions.
- The Zigzag Sennit is made with shared cords,
with the knots heading opposite directions.
- The Star Pattern is a very common design
with star-shaped openings between the Square
knots.
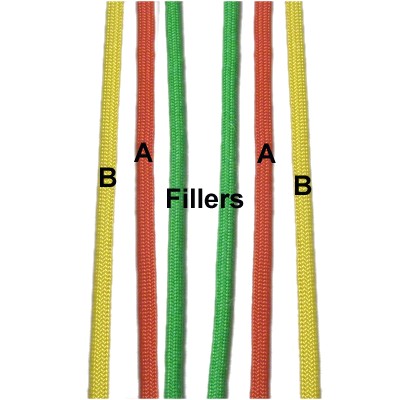
You need to know the difference between fillers
and working
cords. See the Macrame
Dictionary if these terms are not
familiar to you.
Also, make sure you know how to tie both
right and left Square Knots.
|
| |
|
|
| |
 |
| |
|
|
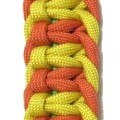
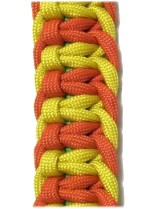
Alternating Pattern #1
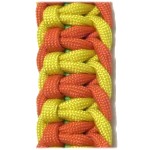
For this
vintage design, you switch back and
forth between two
pairs of working cords.
This creates
loops along the edges of the sennit,
which makes it a little wider and more
interesting than regular Square knot
sennits.
|
|
| |
|
|
|
|
The Fish
Bone Designs are similar to
this type of Alternating Sennit.
Click on the link or image to visit that
page. |
|
|
|
|
| |
|
|
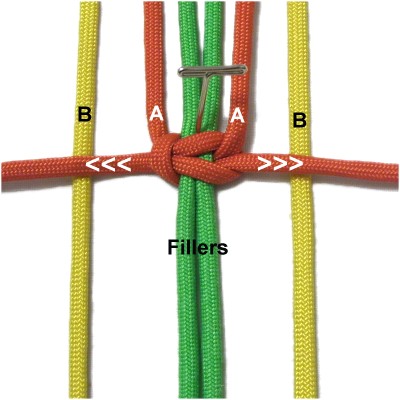
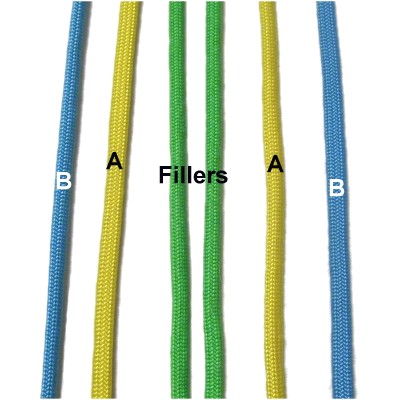
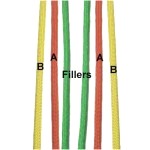
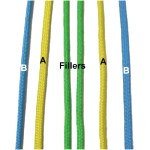
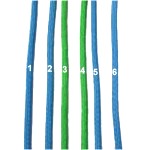
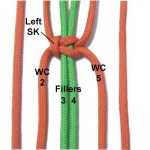
Step 1: Secure six
36-inch cords to your project board
vertically. The two cords in the center
are the fillers
for all the knots.
Mentally label the two sets of working
cords A and B as shown (Set A closest to
fillers).
|
|
| |
|
|
Designer's
Tip: When you are learning these
Square knot sennits for the first time, I
recommend you use different colors, arranging them
as shown in the images.
This way you can clearly recognize which cords are
used next.
|
|
|
| |
|
|
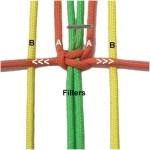
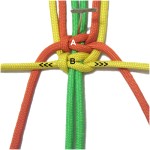
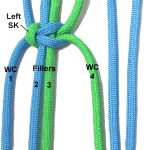
Step 2: Use Set
A to tie a Square knot around
both fillers.
Position the cords
horizontally, so they rest on
top of the other pair of working cords.
|
|
| |
|
| |
|
|
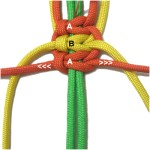
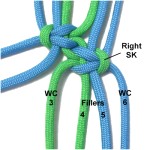
Step 3: Use Set
B to tie the next Square
knot.
Move Set
A so the cords are vertical.
Then arrange Set B on top of them horizontally.
|
|
| |
|
|
Designer's
Tip: Always position the cords in
the direction they need to be for the next
knot. Do this at every step, immediately
after tying the SK.
The cords for the previous knot should be
vertical, since they will be used next. They rest
under the cords you just used, which are
horizontal. |
|
|
| |
|
|
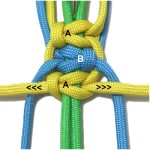
Step 4: Tie the next
Square knot with Set
A.
Move Set
B so the cords are vertical.
Arrange
Set A on top of them horizontally.
|
|
| |
|
| |
|
|
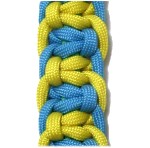
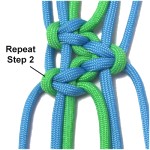
Step
5: Repeat
steps 3 and 4 several
more times, pushing the knots close
together as you progress.
Square Knot sennits look better if they
are long, with at least 5 - 10 knots.
|
|
| |
| |
|
|
|
|
|
|
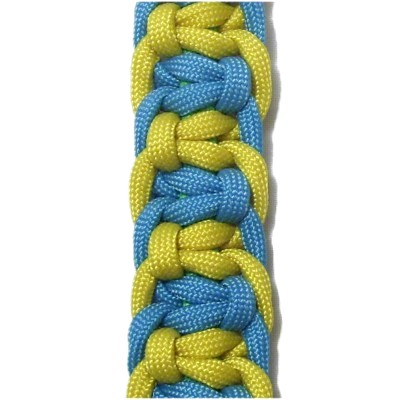
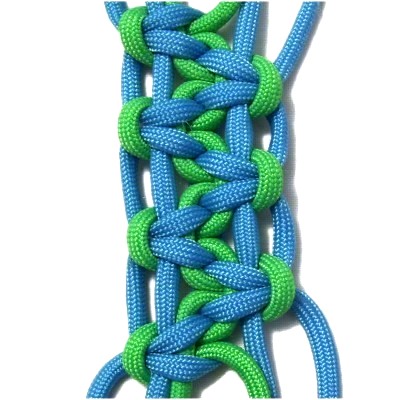
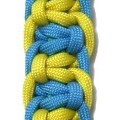
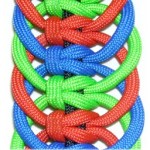
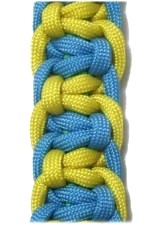
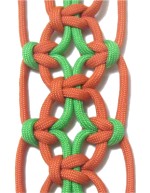
Alternating Pattern #2
Square Knot
sennits are often made with knots that
alternate direction, like this one does.
This pattern
is similar to the first design, but the
right and left edges are more
symmetrical.
The loops
form a frame around each knot, which
makes it really unique.
|
|
|
|
|
|
|
|
Step
1: Arrange six 36-inch
cords on your board vertically. The
two cords in the center are the fillers
for all the knots.
Mentally label the working cords A and B,
with Set
A closest to the fillers.
|
|
|
|

|
|
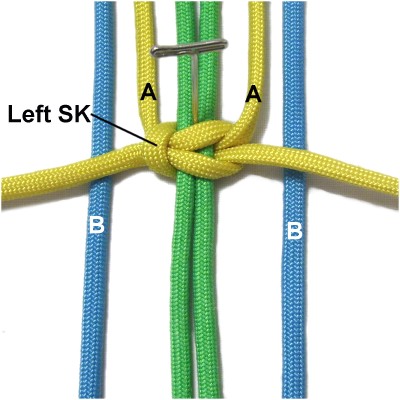
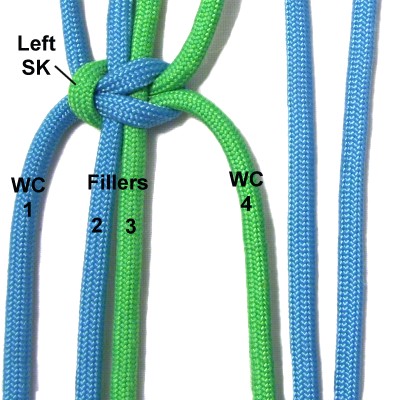
Step
2: Use Set
A to tie a LEFT Square knot
around both fillers.
Position the cords horizontally,
resting on top of the other working cords.
|
|
|
|
|
|
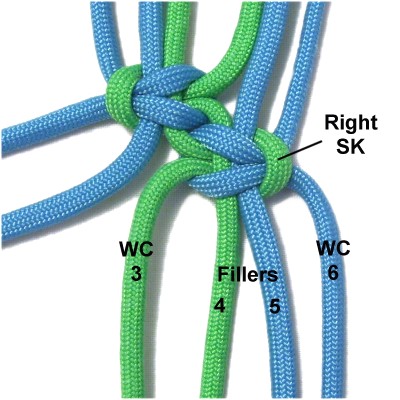
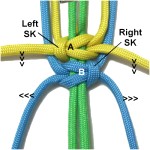
Step
3: Tie a RIGHT Square knot
with Set
B.
After you are finished, arrange Set A vertically,
and Set B horizontally
(arrows).
|
|
|
|
Designer's
Tip: As you make these Square Knot
sennits, when you tie a
left SK, you first move the working cord
on the left.
The head of the knot will face left.
For a right SK,
you move the working cord on the
right first, so the head will face right.
In the image above the black lines indicating the
left and right SK are pointing to the head of each
knot. Click on the image if you need to see
more details. |
|
|
|
|
|
Step
4: Use Set
A again, tying the next LEFT SK.
Move Set B vertically,
then arrange Set A horizontally
on top.
|
|
|
|
|
|
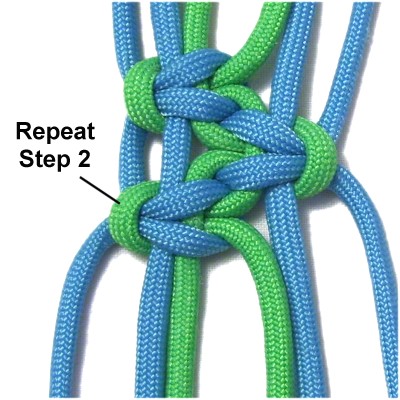
Step
5: Repeat
steps 3 and 4 several more times,
pushing the knots close together as you
progress. |
|
|
|
|
| |
|
| |
|
|
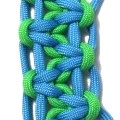
Zigzag Pattern
Square Knot
sennits are often used in plant hanger
designs. This vintage pattern was
frequently seen in Macrame planters and
tables from the 1970s.
Some of the
cords are shared,
so the knots are connected differently
than in a regular sennit. The
knots face opposite directions.
|
|
| |
|
| |
|
|
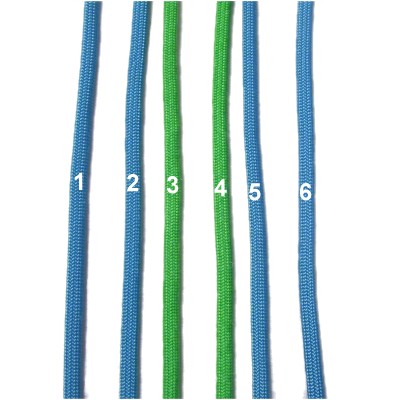
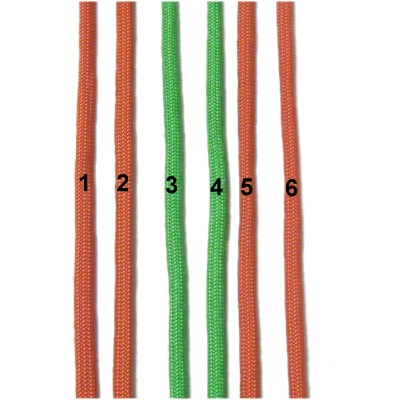
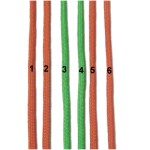
Step 1: To practice,
secure six 36-inch
cords to your project board
vertically. (See important tip
below)
Mentally number the cords 1 - 6.
The shared
cords are the green ones in
this image.
|
|
| |
|
|
Important
Tip: The cords in the center
are used in all the knots, so they will become
short really fast. For that reason, they
should be DOUBLE
the length of the other cords when you are using
this design in a Macrame
project.
When practicing, they can all be the same length. |
|
|
| |
|
|
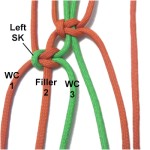
Step 2: Using working
cords
1 and 4, tie a LEFT SK.
The fillers are cords
2 and 3.
|
|
|
|
Designer's
Tip: Square Knot sennits should
have straight edges. So adjusting the
tension and position of these knots is an
important part of the process.
After tightening, make sure the knot is
horizontal, and that it is close to the previous
knot. |
|
|
| |
|
|
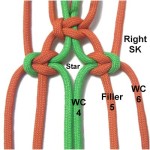
Step 3: Tie a
RIGHT SK using working
cords
3 and 6.
The fillers are cords
4 and 5.
|
|
| |
|
| |
|
|
Step
4: Repeat
step 2, tying a LEFT SK.
|
|
| |
|
| |
|
|
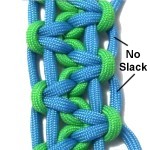
Step
5:
Repeat steps 3 and 4 several more
times.
Pay close attention to the position
of the knots. Make sure they are
horizontal after tightening.
The segments between
the knots on both sides should be straight
without slack. |
|
| |
| |
|
| |
| |
|
|
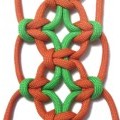
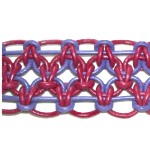
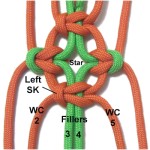
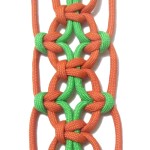
Star
Pattern
The Star
Pattern is different from the other
Square Knot sennits because there is
space between the knots.
The Square
Knots alternate position and direction.
The center of
each 4-knot design has a diamond shape,
which resembles a star.
|
|
|
|
|
|
|
The Leather
Star Bracelet features this
design.
Click on the link or image to visit that
page, if you want to give it a try. |
|
|
|
|
|
|
|
Step
1: Secure six 36-inch cords
to your project board
vertically.
Using different colors is optional, but
adds a nice touch of contrast.
Mentally number the cords 1 - 6.
|
|
|
| |
|
|
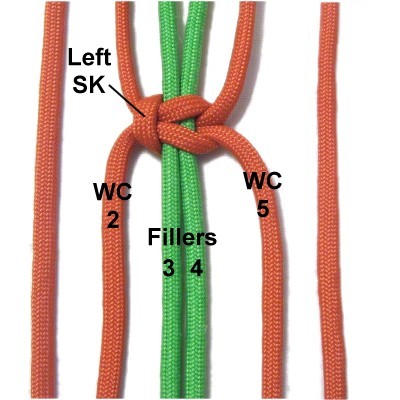
Step 2: Tie a LEFT SK
using working
cords 2 and 5.
The fillers are cords
3 and 4.
|
|
| |
|
| |
|
|
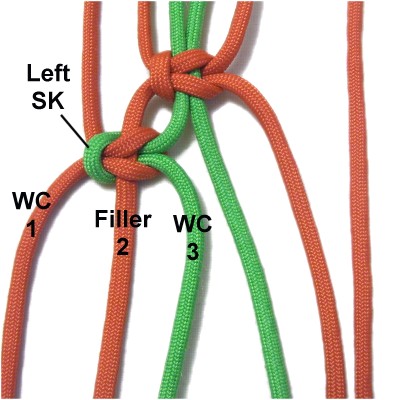
Step 3: Tie a LEFT SK
using working
cords 1 and 3.
There is
only one filler (cord
2).
Tighten the knot so it rests 1/4-inch
from the first SK.
|
|
| |
|
| |
|
|
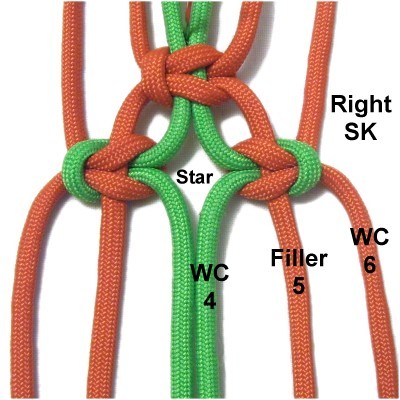
Step 4: Tie a RIGHT
SK with working
cords 4 and 6.
This
knot also has one filler (cord 5).
Tighten it so it rests directly
across from the knot tied in
step 3. Make sure both knots are
level (not tilted).
|
|
| |
|
| |
|
|
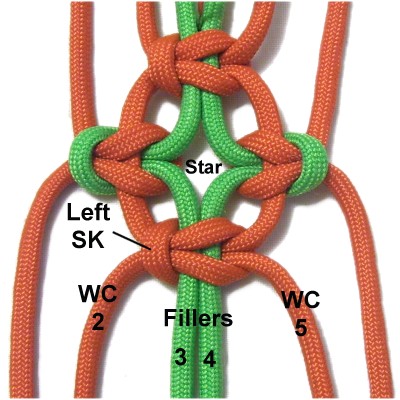
Step 5: To finish the
four knot group, tie a LEFT SK with working
cords 2 and 5.
The fillers are cords
3 and 4.
Make sure this knot rests 1/4-inch from
the previous knots.
|
|
| |
|
| |
|
|
Step 6:
Repeat
steps 3 - 5 at least one more
time.
It's very important that the knots are
horizontal and have the same spacing.
Do your best to keep the edges straight by
adjusting the tension of cords 1 and 6. |
|
|
| |
|
|
| By using any
text or images on Free Macrame Patterns, you are
agreeing to our Terms of Use |
|
|
|
|
Have
any comments about Square Knot Sennits? Contact
Me.
|
|
|
| |
|
| |
| |