Step
1: Cut
20 cords, each 45 inches long.
Prepare the tips to prevent unraveling.
To make the Snowflake larger than 6 inches, use 2
mm material and a 2-inch ring. Cut the cords
55 inches long.
Step
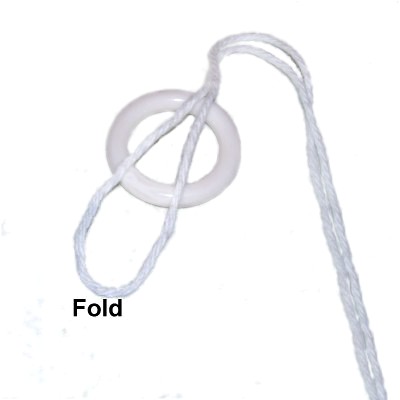
2: Mount each cord to the
ring with a REVERSE Larks Head knot, as
described below:
Start by folding the cord in half and
placing it on top of the ring as shown.
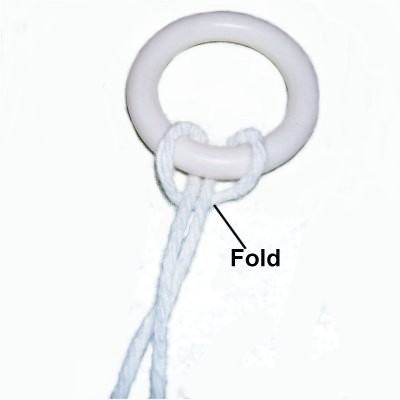
Pass both
halves through
the ring and over
the folded area of the cord.
Pull both halves firmly to tighten the
knot.
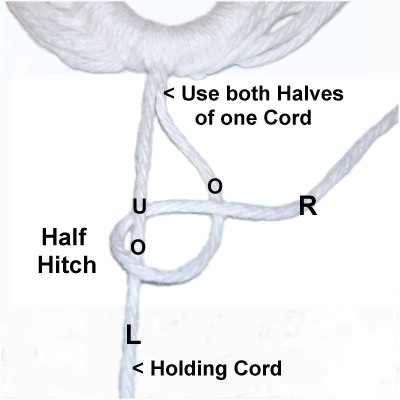
Make a clockwise
Half Hitch with the left half, passing over
- under the ring and over
the cord.
Rotate counter-clockwise
to make the Half Hitch with the right
half.
Mark the right
half of the cord with tape.
Step 3:
Repeat step 2 with all the remaining
cords.
Make sure the
ring is completely covered. You
can add more Half Hitches if needed.
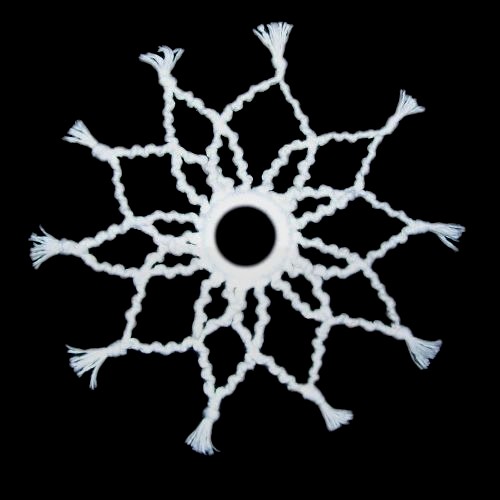
First Level Spiral Design
The Spiral Snowflake is made with the Half Hitch
Spiral technique, which requires both halves of
one cord.
Hold the left half in one hand or secure it with
tension. You use the right half (marked with
tape) to tie the knots onto the left.
Step
4: Pass the right
halfover
- under the left half to make a
clockwise loop.
Pass over the right half as you pull it to
the right.
Tighten it firmly
so it rests next to the ring.
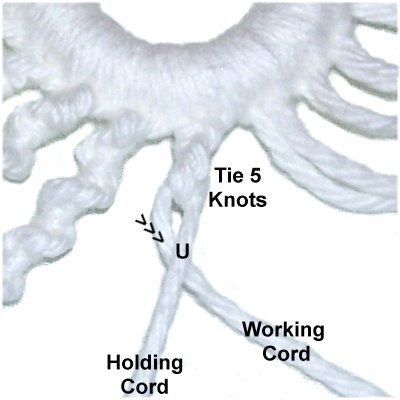
Tie 4 more knots in the same manner (total
of 5).
To make the
Spiral Snowflake more consistent, it's
important to twist the knots after you've
tied every set of 5 Half Hitches.
Hold the left holding cord steady while
you move the right working cord to the
left. Then move it under
the holding cord as you pull it back to
the right.
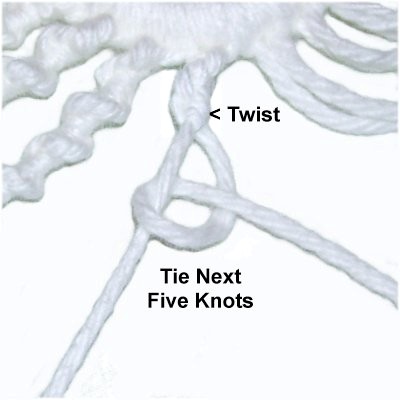
Twist the
knots slightly to the left, then
tie the next five knots.
Make sure you are still using the same
working cord (right half). It should
always remain to the right of the holding
cord while you are tying the Half Hitches.
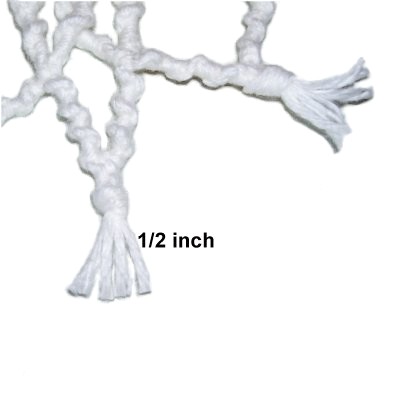
Step 5:Repeat
step 4 several times, continuing until
the sennit is 1-inch
long.
Push the knots close together as you progress, and
count the number
of knots you are tying to get
1-inch. You can use that number as a
guideline for making the remaining sennits, but
you still need to measure
accurately.
Step 6: Repeat
steps 4 and 5 with all the remaining
cords. Be sure you are using both halves of
the same cord for each spiral.
Important:
Measure each Spiral to make sure each one is
1-inch long.
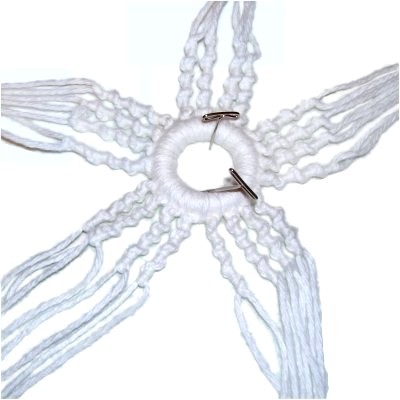
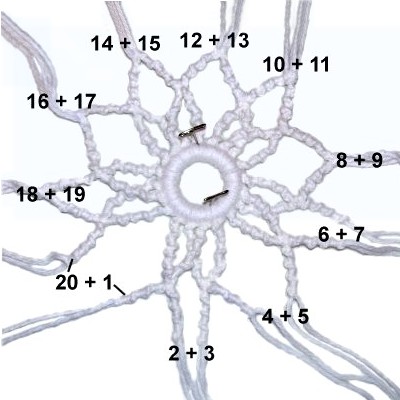
Step
7: Organize the cords for
the Spiral Snowflake so there are five
groups containing four spirals.
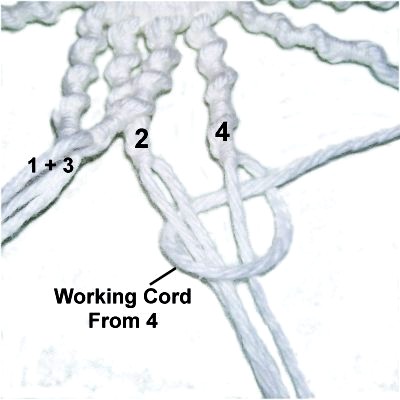
Mentally number the four spirals in one group.
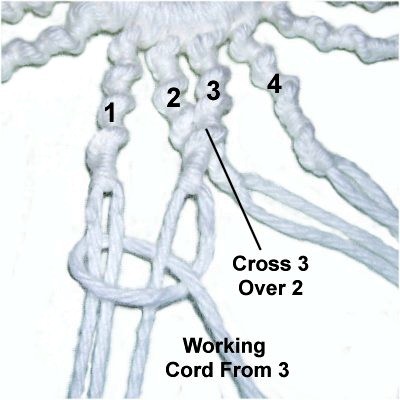
Step
8: Cross Spiral 3 over
Spiral 2.
Combine the cords from Spirals
1 and 3. Select the working
cord from Spiral 3, which is marked with
tape.
Tie 2 Half Hitches with it, passing around
the other three
cords (Two from Spiral 1 and one from
Spiral 3).
Step
9: Combine the cords from Spirals
2 and 4.
Select the working
cord from Spiral 4, which is
marked with tape.
Tie the 2 Half Hitches around the other
three cords.
Step 10:Repeat
steps 8 and 9 with the remaining four
groups of Spirals.
Important:Make sure you always cross Spiral 3 over
2, and use the marked working cords to connect
Spiral 1 to 3 and Spiral 2 to 4.
Second Level Spirals
Step 11:
Organize the Spiral Snowflake so you are working
with the same five groups containing 4
Spirals.
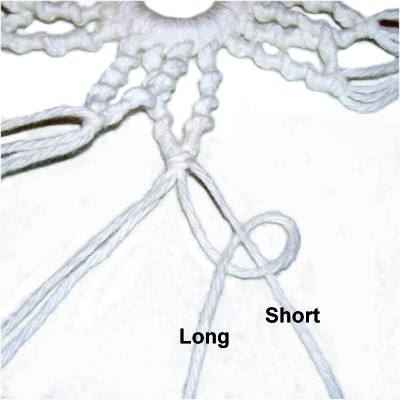
In one group, locate the 4 cords coming from two
Spirals that are connected. They will have a
V-shape.
The previous working cords will now hold
all the knots. They are shorter than the
other two and are marked.
The previous holding cords will now be used to tie
the Half Hitches, so you use the longest
cords to make the second level of
Spirals.
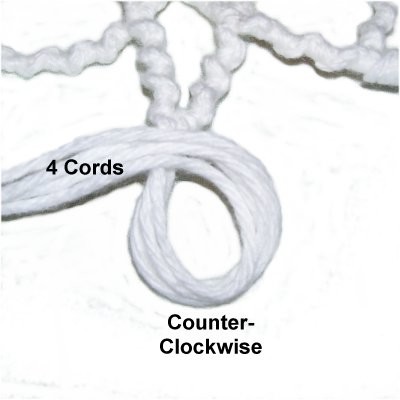
Use
two cords (one long, one short) to tie
Half Hitches in a counter-clockwise
direction. The long cord is on the
left, which is why you need to switch.
Tie the Spirals as you did in steps 4 and
5, but reverse the direction of the
twisting (to the right). The long
cord should always be on the left while
tying the Half Hitches.
Step 12:Repeat
step 11 with all the remaining cords in
sets of two (one long and one short). Make
sure the long cord remains to the left of the
short one as you tie the knots.
Important:
Push the knots close together, and measure to
verify they are all the same length (1-inch).
Step
13: Mentally number the 20 new
Spirals. Connect the spirals using the
cord furthest to the right
to tie the two Half Hitches around the
other three cords in each group.