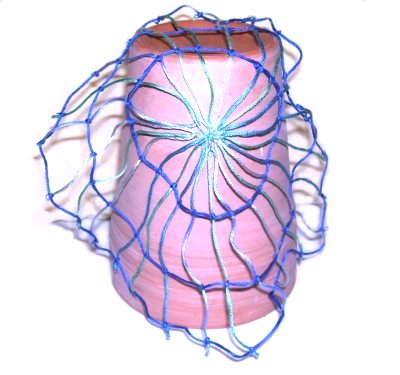
Description: This Spider
Web is a fun Halloween project for school age
kids and beginners, since there are very few
knots used in the overall design. Young
children may need help with the knots.
This decoration is very flexible, so it can be
hung on a wall or draped over furniture.
Make it with soft, delicate material such as the
cotton embroidery cord used in the example.
You should practice
the knots a few times before making this Macrame
pattern.
Step 1:Cut
12 cords, each at least 25 inches long.
The longer you cut the cords, the larger you
will be able to make the Spider Web.
For a specific size, use this formula:
Diameter of
web x 2+
12 inches. (The diameter
is the size from edge to edge)
Prepare the ends with glue or tie Overhand knots
at the tips.
Step 2:Fold the cords to locate the
center. When you position them in the next
step, the center
of each cord should be matched up (see image
below).
Secure them to your project board where they
all meet in the center.
Crown Knot
Instructions
The new Crown Knot
page has more details, if you need a review of the
steps.
One cord for
your Spider Web should be vertical, the
next horizontal, and the third and fourth
diagonal, forming an X.
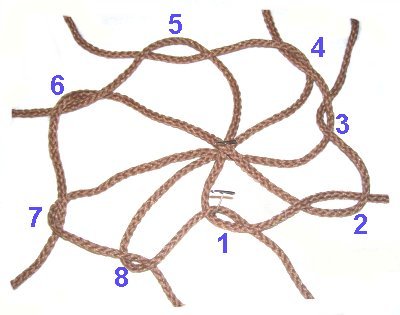
Mentally number the cords 1 - 8, starting
with the one in the center
at the bottom.
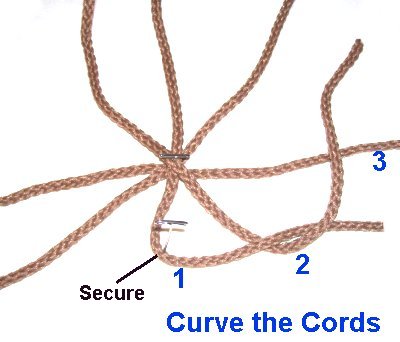
Step
3: Curve each cord over
the next, starting with cord 1.
Move counter-clockwise.
Markthe curved area of
cord 1 with a pin, so you can
find it easily.
When you curve cord
8, pass it through cord 1, near
the pin. (see next photo)
Step
4: Tighten the Crown
knotslowly
by pulling on each end. It will be
in the center of the Spider Web, so
tighten it completely.
Secure each of these primary
cords to your board separately,
and secure the Lanyard knot, too.
Adding Cords
Step 5: Secure a new cord
under one
of the primary cords, matching the ends so the new
cord is centeredand arranged horizontally.
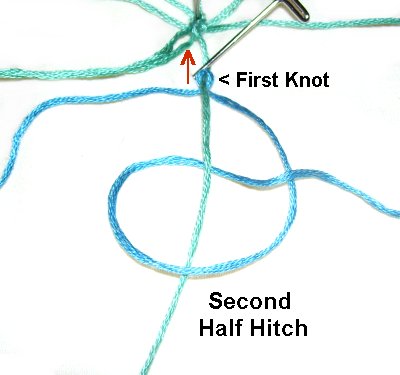
Use the right
half of the new cord to tie a Half Hitch
onto the primary cord, by making a clockwise loop.
Pass over
- under - over as shown.
Tie a second
Half Hitch, while holding the first one
steady.
Tighten the knot as much as you can, after
you push it up against the Crown knot (arrow).
Repeat this
process,adding new
cords to each of the remaining
primary cords.
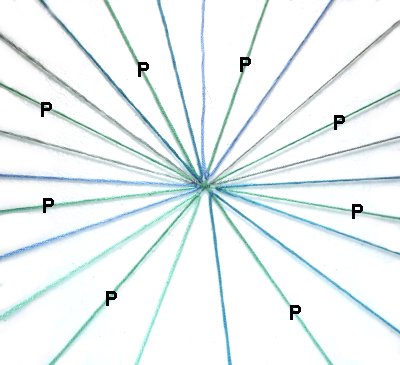
Fan out all the cords, arranged in a
circle. Secure each one with a pin, or with
tape.
They need to be straight, but should
not be pulled tight.
In this image,
the primary cords used to tie the Crown
knot are labeled (P).
The added cords are on either side of
them, with two between each primary.
Each of these cords is a holding
cord from now on.
Circular Web Design
Step 6: The
working
cord used to form the circular rows for the Spider
Web should come directly from the
roll. You will only cut
the material after the row is done.
Wrapping a generous length of material on a piece
of cardboard really helps.
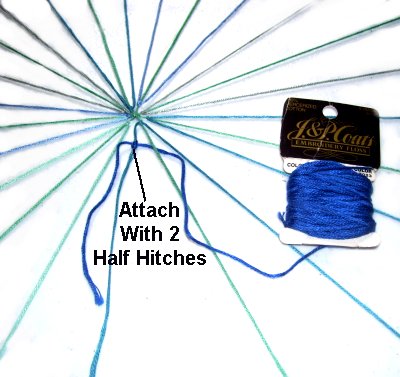
Attach the end
to one of the holding
cords, with two Half Hitches (as you did
when you added the new ones). Leave a 3-inch
tail.
Position the knot so
it's between 1/2-inch and 1-inch below the
knot you tied in step
5.
See the
next image.
Important:Don't rely on the tape or pins to hold
the cords when tightening each of the knots.
Supportthe
holding cord as you tighten each knot firmly.
The best way is to pinch it between your
fingers. Try pressing it firmly to the
surface of your board if that's too awkward.
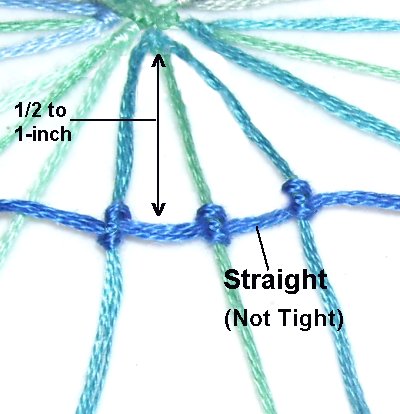
Pass the
working cord under
the next holding cord, and then tie
another knot (2 Half Hitches).
Repeat this process, tying one knot onto each
holding cord, working in a
circle.
Try to keep the area between the knots straight,
but not
tight.
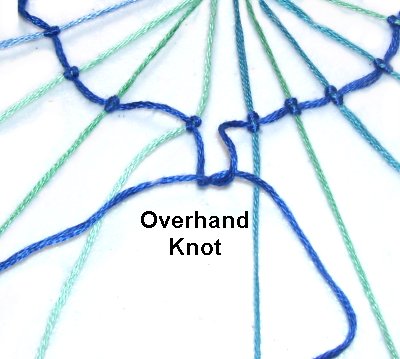
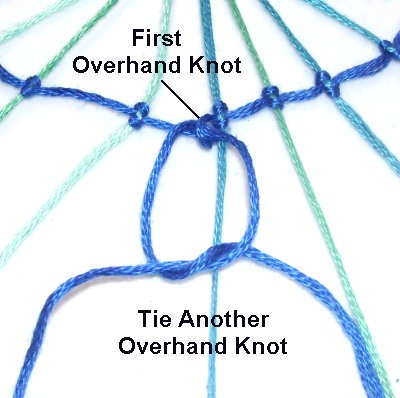
Step
7: When the circle
is complete, cut the material, so you have
another 3-inch
tail. Tie the two tails
together with an Overhand knot.
As you tighten it, push the knot close to
one of the holding cords. (see next
image)
Tie a second
Overhand knot, tightening it as
much as possible.
Cut off the extra material, after applying
glue to the knot.
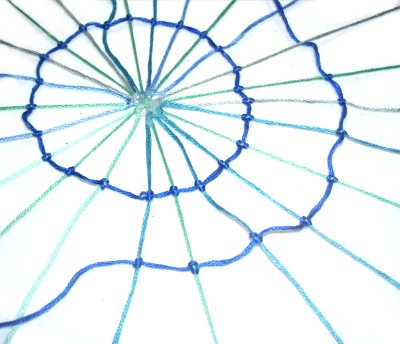
Step
8: Repeatsteps
6 and 7, tying several more
rows.
The spacing between the rows is up to you,
but 1/2 inch to 1-inch is
recommended.
Important:
You can make as many rows as you wish, but make
sure you stop when the rows get close to the end
of the holding cords.
The holding cords need to have at
least 4 inches free for the final knots.
Step 9: When
the last circular row of the Spider Web is done,
it's time for the finishing touches.
Remove the pins
or tape from one
holding cord, and tie an Overhand
knot. It should be tightened so it
rests next to the DHH in the last circular
row.
Apply glue, and cut off any extra
material.
Repeat
this process with the remaining holding
cords.
By
using any text or images on Free Macrame
Patterns, you are agreeing to ourTerms
of Use