Description:
The Secret River Bar is a combination
knot, featuring the Square Knot
and a variation of Endless Falls.
The instructions below include a loop, which can
be used as part of a clasp for Macrame bracelets
or belts. You will need two cords folded in
half for this option.
You could also use four cords and start the Square
Knots at the center, without folding the cords.
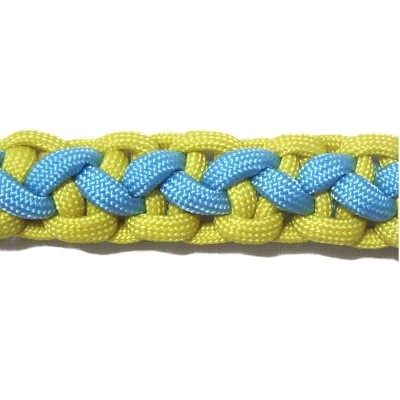
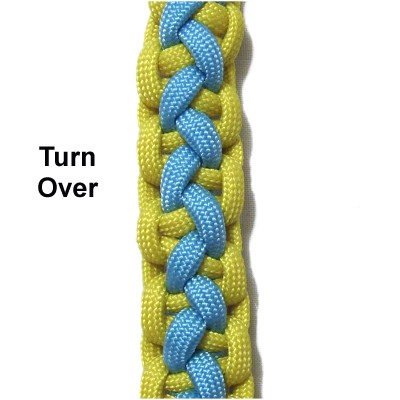
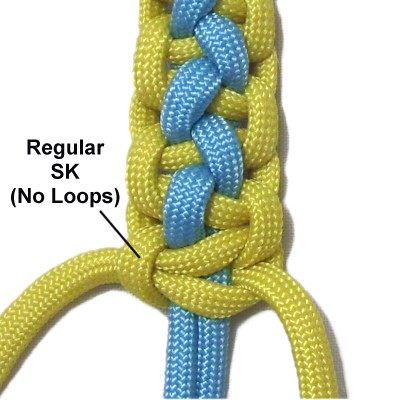
Please note that as you construct the knots, the
portion you are looking at is the back
of the sennit. When you turn it
over, the design looks like the image above.
The
video gallery containstutorials for a variety of
decorative knots and techniques.
Preparation:
To
practice, cut two cords, each at least 60 inches
long.
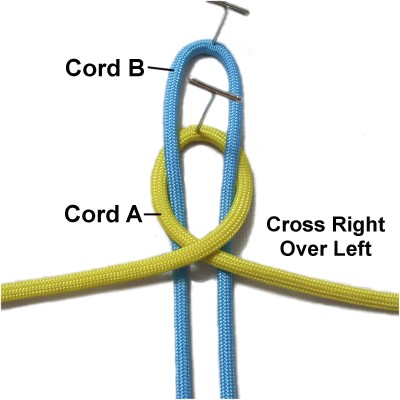
In the example shown, Cord
B is blue and Cord
A is yellow.
When making a Macrame project with the Secret
River Bar, the cords should be at least 8
x the finished length you wish to make,
if you plan to fold the cords so you have a loop.
To start the Secret River Bar in the center
(no loop), cut 4 cords, each at least 4
x the finished length.
Fold Cord Bin
half and secure it to
your board.
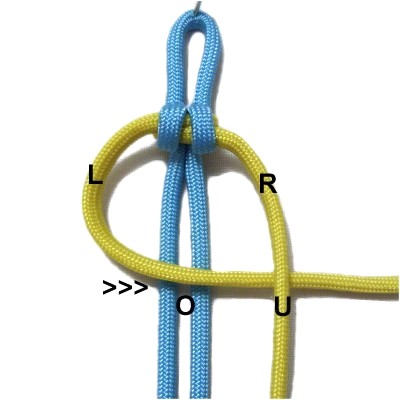
FoldCord Aand secure it under
Cord B. Bring the two halves of it
on top of Cord B, then cross them right
over left.
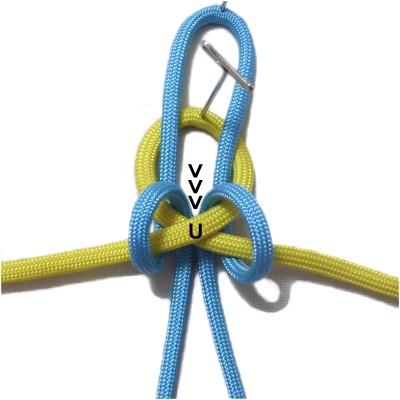
Separate the two halves of Cord B, so
there is space between them.
Move both
halves of Cord
B backward, so they pass over
the crossed area of Cord A.
Bring them through the space between the
two segments.
Pull them forward (towards you) to
complete the loops.
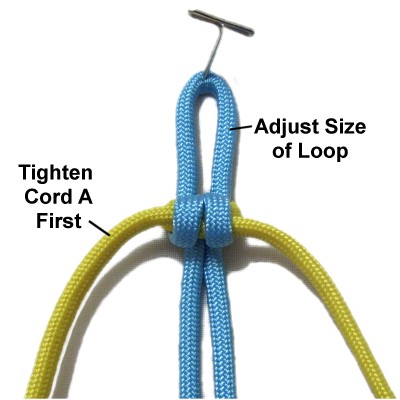
Adjust the
size of the loop (Cord B).
Tighten Cord
A first, by pulling on the two
halves of it.
Then tighten the two loops made with Cord
B.
Designer's
Tip: Since the two halves of Cord A
switch places frequently, it helps if you place
tape on one half so you can easily identify left
versus right.
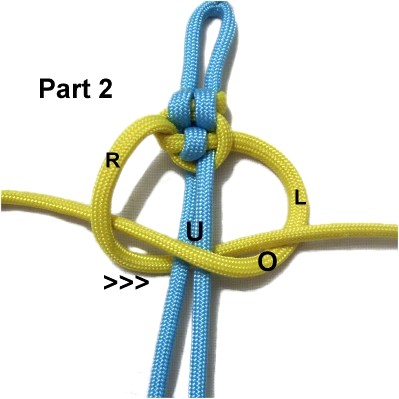
Step
2: Mentally label the two
halves of Cord
A where they rest now (left and
right).
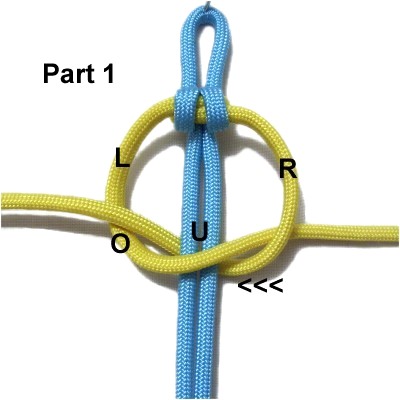
To start the first Square Knot, move the left
half of it to
the right, passing it over
Cord B and under
the right half of Cord A.
Designer's
Tip: Every Square knot is tied in
two parts (or two halves), which are sometimes
called Half Knots.
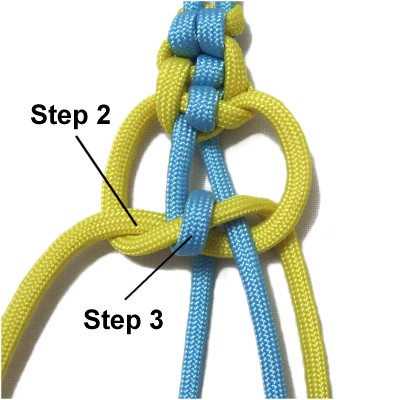
To complete
part 1 of the SK, move the right
half of Cord A under
the fillers, heading left.
As you pull it out on the left, pass it over
the left half of Cord A.
Do
not tighten this knot.
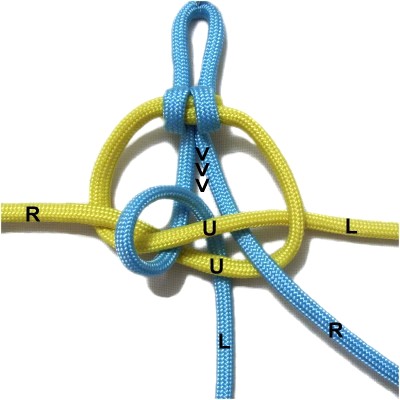
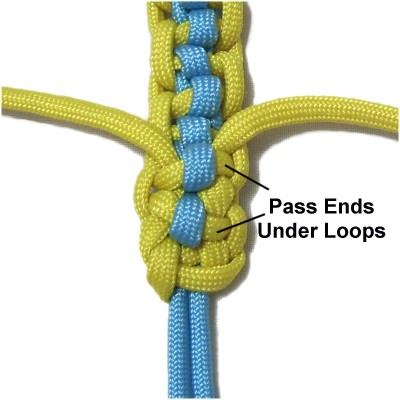
Step
3: Move the left
half of Cord
B backward, passing it over
the
crossed area of the knot you just made
with Cord A.
Bring it between
the two halves of Cord B to form a loop.
Then pull it toward you, passing under
the crossed area.
Important:
Tightening the knots correctly is an important part of the
Secret River Bar design. This applies to
both parts of the Square Knot:
Start by pulling both halves of Cord
A to tighten that portion.
Then remove the slack from the loop made with Cord
B. Usually all you need to do is
pull firmly, but some materials may require you to
adjust the size of the loop with your fingers
first.
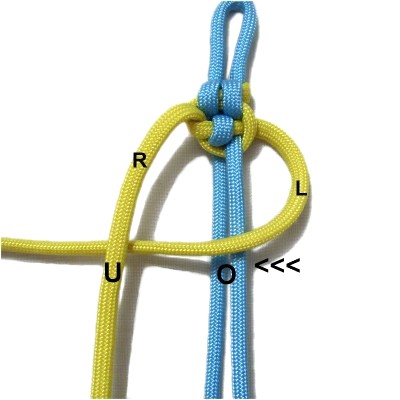
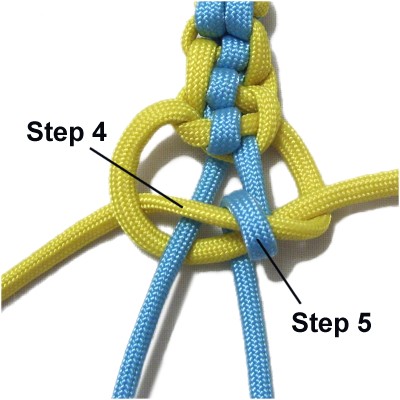
Step
4: Start part 2 of the SK
by moving the left
half of Cord
Aover
Cord B, heading left.
Pass it under
the right half of Cord A.
Complete part
2 by moving the right
half of Cord
Aunder
Cord B.
Pull it out on the right, moving it over
the left half.
Do not
tighten the knot.
Step
5: Move theright half
of Cord
B backward, passing it over
the crossed area of the SK.
Bring it between the two halves of Cord B,
forming a loop.
Pull it forward, passing it under Cord A.
Tighten Cord A first, then Cord B.
Step 6:
Repeat steps 2 and 3to
start the next SK for the Secret River
Bar.
Repeat
steps 4 and 5 to complete the SK.
Step
7:Repeat
step 6 several more times, until
the Secret River Bar is the size you wish
to make. Keep in mind still have one more
knot to tie.
Turn it over to see the zigzag pattern.
Repeat steps 2 and 4 to make one
regular Square knot (no loops) to finish
the bar.
Step 8:
Finish off the ends of Cord
A by sliding them under segments
in the BACK of the bar.
Apply glue and cut off the excess
material. When using Paracord, apply
a flame to the stubs to melt the material.
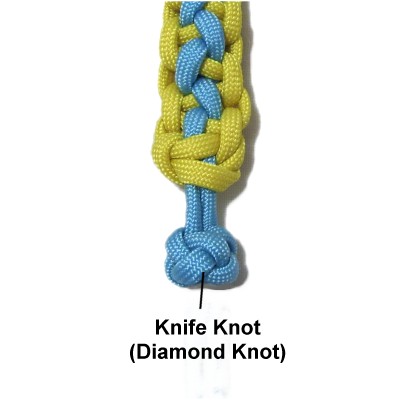
Cord
B can be finished off in the same
manner, or you can tie a Button Knot if
you need a clasp.
The best one is the Knife Knot,
also called the Diamond Knot.
By
using any text or images on Free Macrame
Patterns, you are agreeing to ourTerms
of Use