Satin Dragonfly
Description:
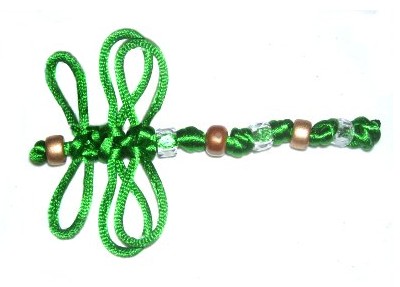
The Satin Dragonfly is a great Macrame
project for beginners and older children, since
only 2 decorative knots are used to make the
entire insect.
Supplies
Needed:
Crow roller beads x 6 (or more)
Fabric glue that dries clear (test it on the
material before use)
Knots
in Pattern:
Step 1: Cut one cord, at least
2 yards long (72 inches).
Prepare the tips with glue
and allow it to dry completely.
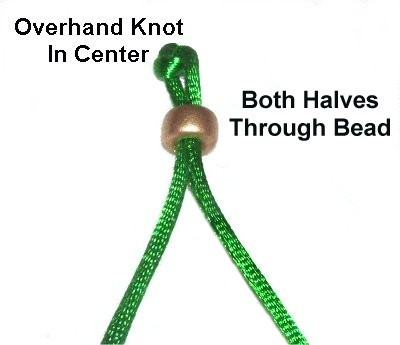
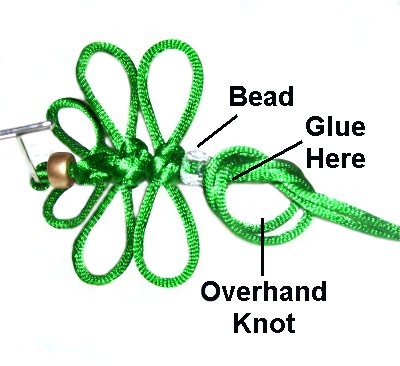
The head
of the dragonfly is made with one bead, as
follows:
Overhand
Knot:
one at a
time .
Important:
Satin material is easily damaged by pins, which is
why you should never push them through the
cord. lean
the pins over the cord, or use the Cross-Pin
Technique.
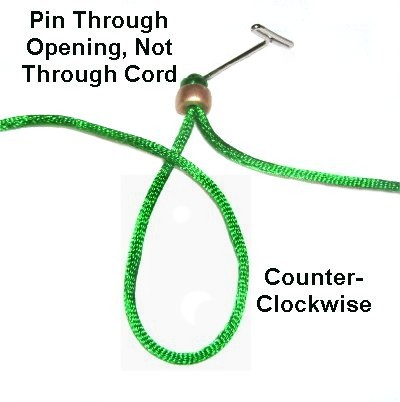
Step
2: Secure the head of the
Satin Dragonfly by passing the pin through
the space
in the Overhand knot you just tied.
left
half of the cord to make a loop,
rotating in a counter-clockwise
direction.
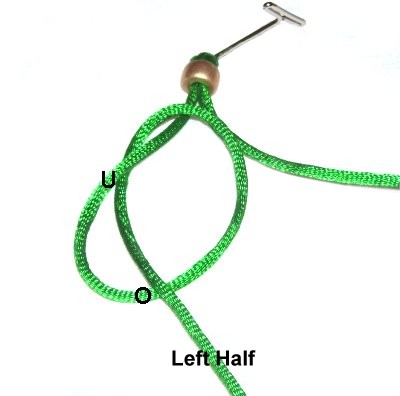
Step
3: Complete the Overhand
knot by moving the left half through
the loop under
- over (from below).Do
not tighten the knot.
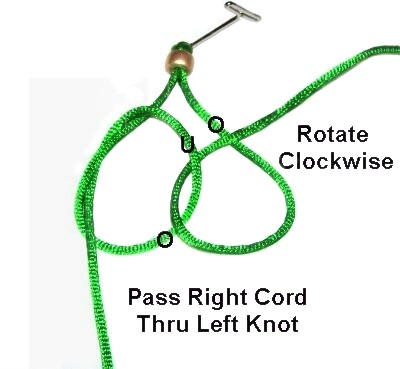
Step
4: Pass the right
half of the cord through
the knot you just tied, rotating it
clockwise . over
- under over
the right half as you pull it right.
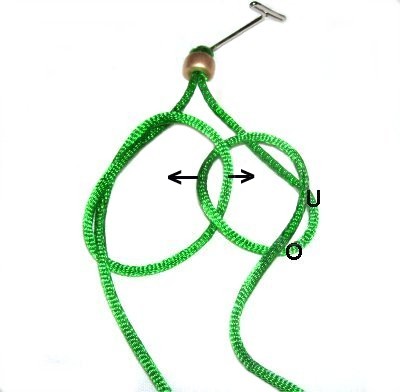
Step
5: Complete the right
Overhand knot by passing the right half
through the loop under
- over
(from below).
Important:
The inner portion of the two knots is the
rounded area, also called the
crook . The outer portion is the
crossed area.
Step
6: Hold the inner portion
of the left
knot and move it to the right. Pass
it through the outer crossed portion of
the right
knot. under
the segment that leads to the top
of the Satin Dragonfly, and over
the segment leading to the end .
(See next image)
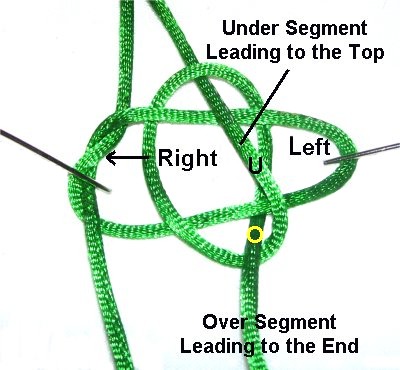
This is a
closer view of step 6.Click on
the image and a larger one will
come up so you can see the details.
Step 6,
continued: Move the inner portion
of the right
knot to the crossed area of the
left knot.Under
the top segment and over
the portion that leads to the end.
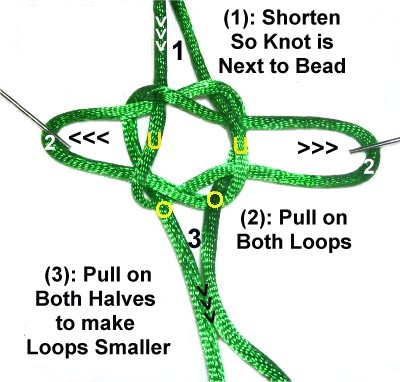
Step
7: Before you tighten the
wings for the Satin Dragonfly, shorten the
segment leading to the bead so the knot is
close to it.loops
while holding both halves steady.
Step
8: Repeat steps 2 - 7back
of the Hanger Knots and allow it to dry.
Step
9: Slide a bead onto both
halves, as you did the first one at the
top of the Satin Dragonfly. using
both halves
working
together as shown. Apply
glue inside
the knot
before tightening it.
Step
10: Repeat
step 9 several times, until the tail is
the size you want.
By
using any text or images on Free Macrame
Patterns, you are agreeing to our Terms
of Use
Have
any comments about the Satin Dragonfly? Contact
Me.