|
|
| |
|
| |
| |
|
Description: The Hanger Knot
is a Chinese Macrame technique that is used for
decoration or to form a stable loop. It's
actually 2 linked Overhand knots made in
opposite directions.
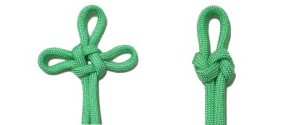
There are two variations on this page.
The first one described has a single loop at the
top, and the knot is tighter.
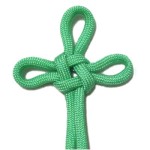
The traditional style has three loops, and the
tightened portion in the center is rectangular.
It's sometimes called the Sauvastika Knot, which
is the opposite of the Swastika emblem.
In Chinese Buddhist symbolism, the central
structure of the traditional knot represents
good fortune and virtue, power over evil, and
the heart of Buddha.
|
| |
|
|
|
|
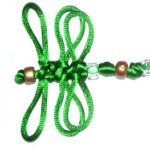
The Satin
Dragonfly is an easy
beginner's project featuring this knot
(wings).
Click on the image or link if you want to
give it a try after practicing. |
|
|
|
|
|
|
Hanger Knot - Single Loop
|
| |
| |
|
|
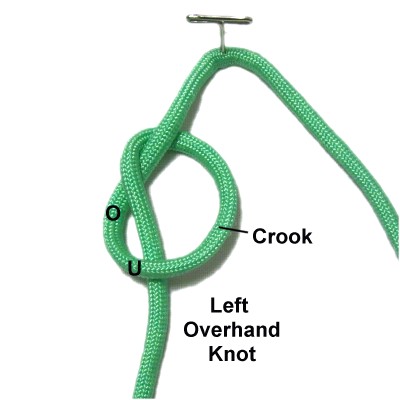
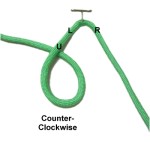
Step
1: Fold a cord in half and secure
it to your board at the center.
Make a counter-clockwise
loop with the left
half of the cord, passing under
at the crossing point.
|
|
| |
|
| |
|
|
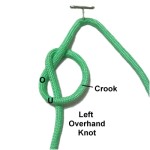
Step 2: Complete the
left Overhand knot by moving the left
half of the cord through the loop over
- under.
Do not
tighten the knot. You can
adjust it so it's closer to the center
fold, depending on the loop size you are
aiming for.
|
|
| |
|
| |

|
|
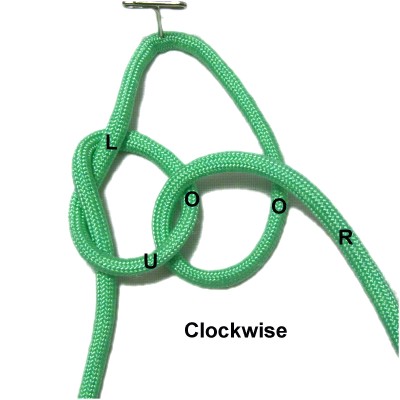
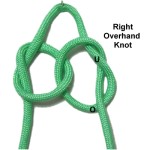
Step 3: Moving clockwise,
pass the right
half of the cord through the
left Overhand knot under
- over.
Pull it right, passing over at the
crossing point.
|
|
| |
|
| |
|
|
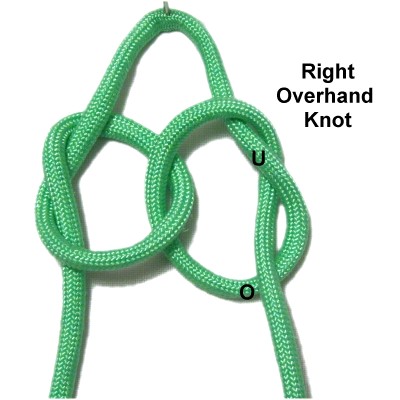
Step
4: Pass the right
half of the cord through the
loop under
- over
to complete the right Overhand
knot. |
|
| |
|
| |
|
|
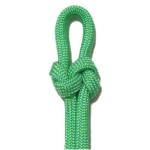
Step 5:
Reduce the size of each Overhand Knot
gradually, adjusting the folded area as
needed.
Make sure both knots remain in position
and that you don't twist them. |
|
| |
| |
|
| |
|
|
| |
Traditional Hanger Knot
|
| |
|
Repeat
steps 1 - 4 of the previous
instructions to start the traditional
variation with three loops.
The cord should be at least 25 inches long.
Do
not tighten the two Overhand
knots. Leave them large
and open so you can identify the following
areas:
|
| |
| |
|
|
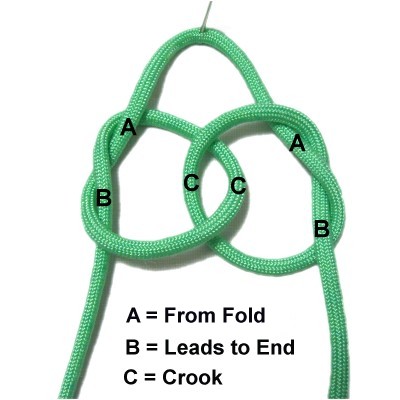
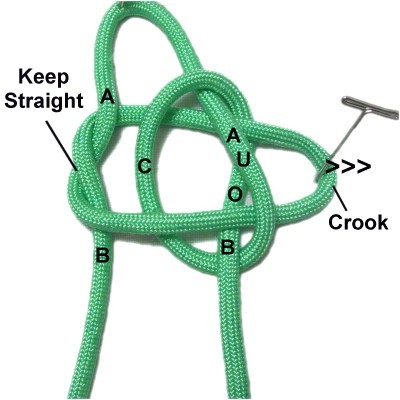
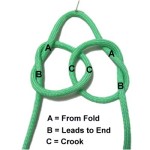
Segment
A is the portion coming from the
center fold.
Segment B
is the portion leading to the ends of the
cord.
Segment C
is the crook of the Overhand knots.
These are the segments you move in the
next 2 steps.
|
|
| |
|
| |

|
|
Pull the crook
of the left
Overhand knot to the right, passing it through
the crossed area of the right Overhand
knot.
It should pass under
segment A and over
segment B.
Try to keep the crossed area of the
left knot straight, even if you need to
enlarge the knot to get more material.
|
|
| |
|
| |

|
|
Pull the crook
of the right
Overhand knot to the left, passing it
through the crossed area of the left
Overhand knot.
It should pass under
segment B and over
segment A.
Enlarge the knot if you need more
material.
|
|
| |
|
| |
|
|
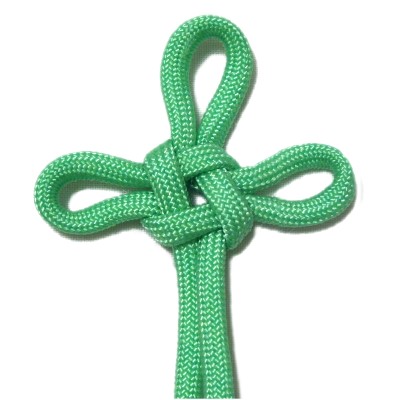
Tighten by
pulling all three loops and the
ends.
The loops will become quite large, so you
will need to reduce their size once the
center area is tight. |
|
| |
| |
|
|
By
using any text or images on Free Macrame
Patterns, you are agreeing to our Terms
of Use
|
|
|
| |
|
Have
any comments about the Hanger Knot? Contact
Me.
|
|
|
|

|
|
|
| |