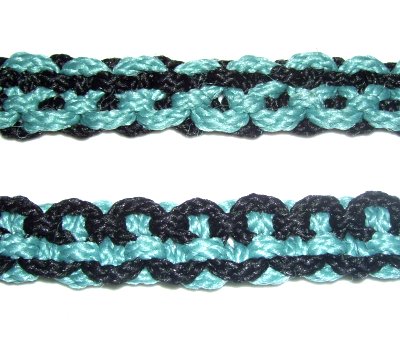
Reversible Belt
Description:
The Reversible Belt features a decorative
knot called the Link
Weave . That's its name here in Free
Macrame Patterns. turquoise
(color B) . black in the
example (color
A) .practice
the knots before getting started.Note:
The cord measurements cannot be precise in this
design, so you may have material left over.
The
primary knot used in this pattern is
found on the Fusion
Knot website,
under the name KBK
Bar .Click on the link or image to visit the
site.
View the Video Gallery if you wish to
explore the various tutorials
offered.
Supplies
Needed:
3mm to 4mm Cord Material (10 yards of each
color)
Project Board, pins and tape
Beads for Fringe (optional)
Knots
Used:
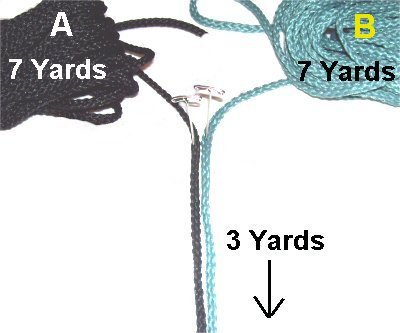
Preparation:
Cut
2 cords, each 10 yards long. For a belt
over 45 inches, cut the cords longer. tape
to the ends to prevent unraveling.
Secure each
cord 3
yards from one end. The
remaining 7 yards should be at the top,
rolled up.
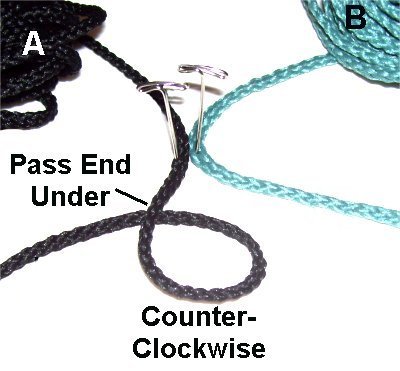
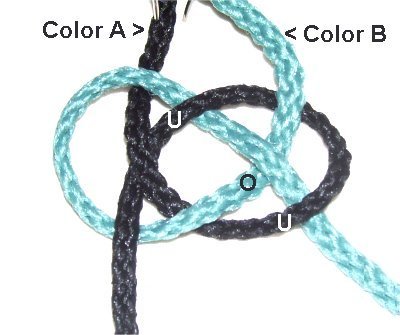
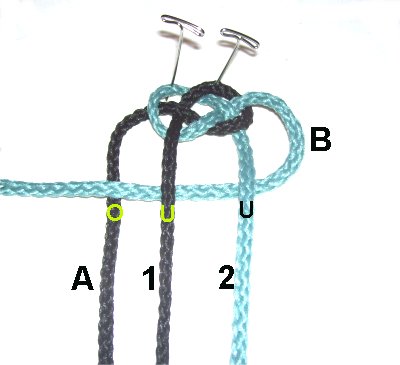
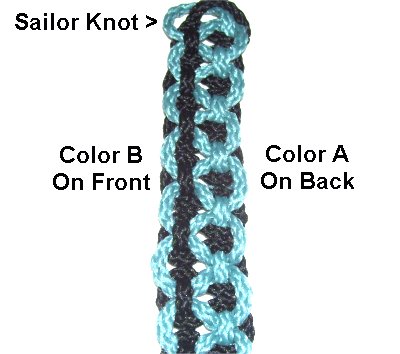
Sailor Knot Instructions
Step
1: Make a counter-clockwise
loop with the cord on the left
(A) . 3-yard
portion of the cord.under
the secured portion to make the crossing
point.
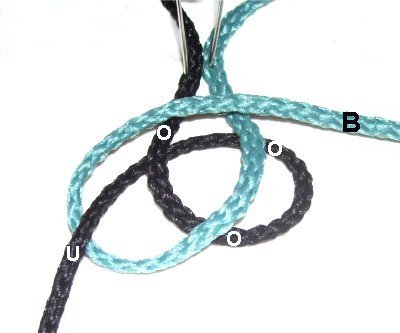
Step
2: Move the 3-yard portion
of the second cord
(color
B) in a clockwise
direction, over
the first loop. Bring it under
the end, and over
the segment near the pins, at the top.
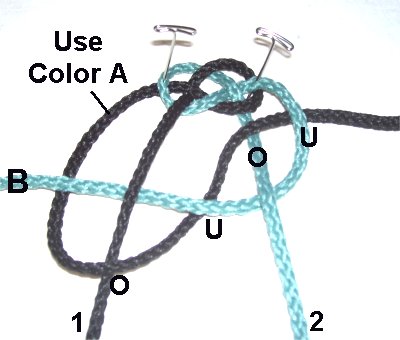
Step
3: To complete the second
loop, use cord
B again. Weave it
under - over - under the three
segments of the first loop.
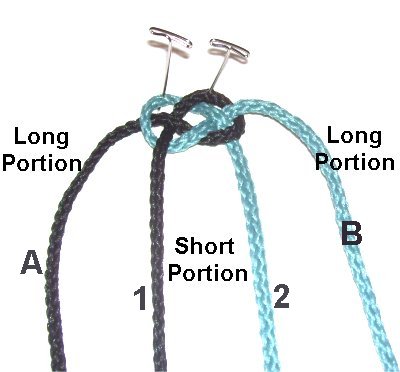
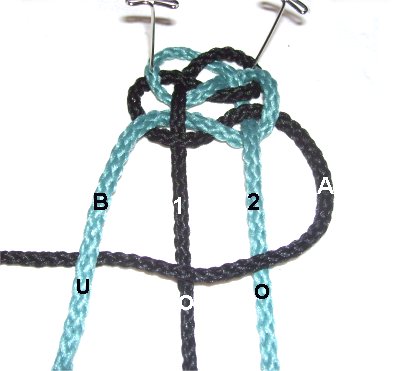
Link Weave Design
Step 1:
To start the Link Weave design for your Reversible
Belt, bring the long portion
outside
of the short portions.
short
portions of the cords 1 and 2.long
portions are the working cords,
and will be used to make the weave (A and
B).
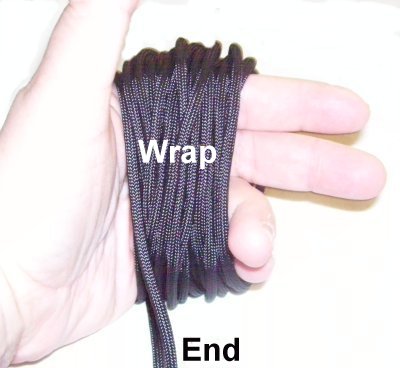
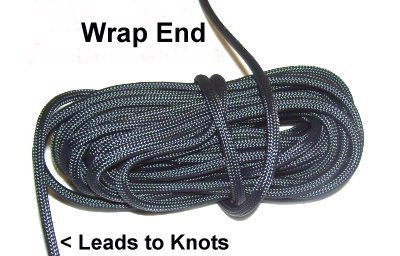
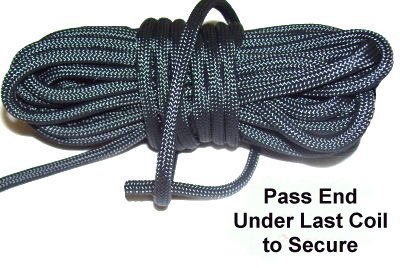
Wrapping Long Cords
Roll up the working cords to make them easier
to work with:
Wrap Cord
Around Hand Several Times
Remove
Roll. Wrap End Around Middle.
Tuck End
Under Last Coil to Secure
Step
2: Move working
cord B left , under the short
portions (1 - 2)
over
the left working cord (A) .horizontal
and straight.
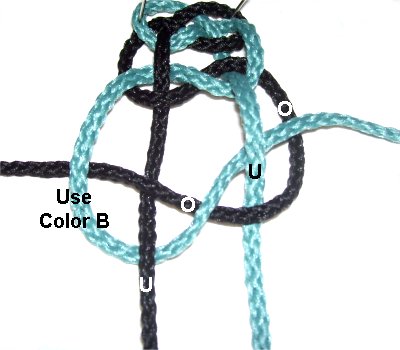
Step
3: Bring working
cord A over
cord 1, and under
the horizontal portion of working
cord
B . over
cord
2 , further up, and under
cord
B again, on the far right.
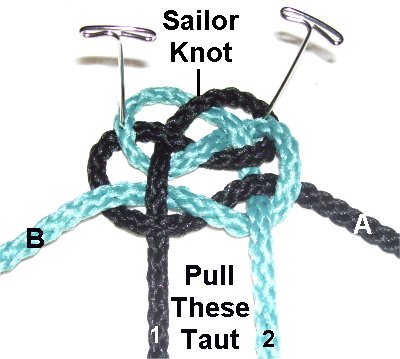
Important:
Step
4: Tighten the knot slowly,
pulling the short
segments down (1 and 2), so
they have
tension.
Design
Tip: You can tighten the weave for
the Reversible Belt all the way, or leave it a
little loose.
consistent all the way through.
Step
5: The over-under pattern
for the second knot is the opposite
of the first. working
cord A , which is now on the
right. Pass it over
cords 1 and 2. under
working cord
B on the far left.
Step
6: Bring working cord B under
cord 1 ,
and over the
horizontal portion of cord
A . under
cord 2 further up, and over
cord A
on the far right..
Step
7: Repeat
Steps 2 - 7 until the Reversible
Belt is the size you need.
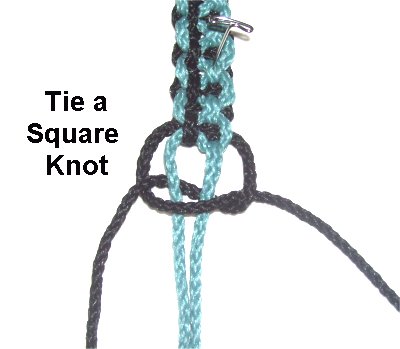
Finishing Touches
Arrange the
two color
B cords, so they are next to each
other (fillers), with color
A on either side.color
A cords. Apply glue if you
wish, and trim the ends so they are the
same length.
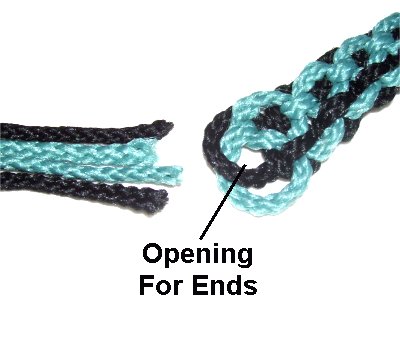
The ends for
the Reversible Belt will pass through
the Sailor knot at the opposite end,
as described below.
Pass one cord of
each color through the opening in
the Sailor knot (from the top).
By
using any text or images on Free Macrame
Patterns, you are agreeing to our Terms
of Use
Have
any comments about the Reversible Belt? Contact
Me.