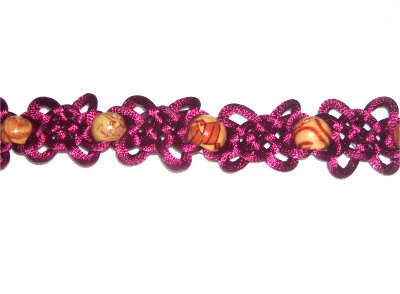
Step 1: Cut
1 cord, at least 72 inches long (2 yards).
Prepare the ends with glue
and allow it to dry before tying the first knot in
the Loop Weave bracelet.
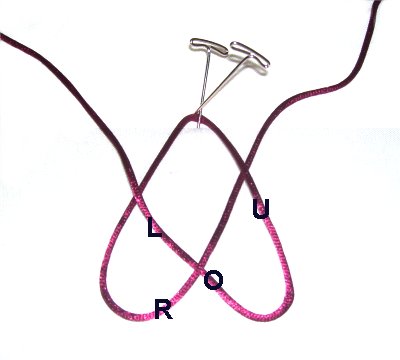
Secure the center
of the cord to your project board.
Make a long
bight with theright half,
so the fold is 3 to 4 inches below the
center.
Make sure it passes over
the left half of the cord as you bring it
up to the top left area.
Step
2: Make a bight with the
left half, passing over
and under
the two segments of the right cord.
Mentally label the left and right portions
of each bight (see next photo).
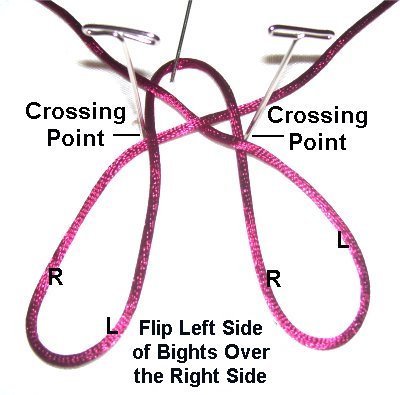
Step
3: Flip the left side of
each bight over the right side, creating
two long loops.
The crossing point should be arranged
close to thetop
of the knot.
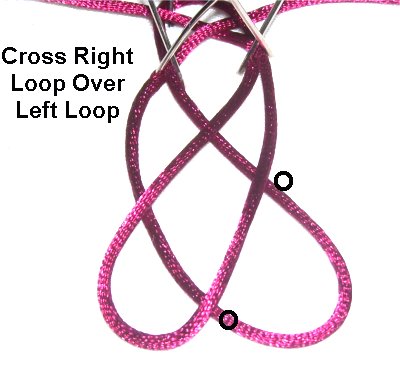
Step
4: Cross the right loop
over the left loop. Curve
them both slightly so they are tilted as
shown.
Make sure
they are wide
and open, so you can see the
details clearly.
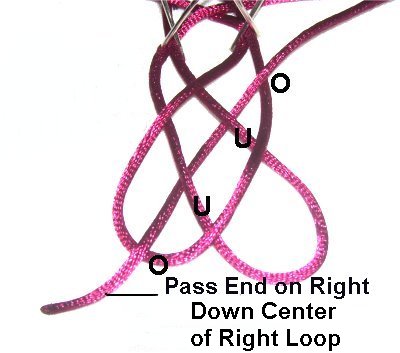
Step
5: Weave the end that's
now on the right,
down through the center of the right loop(tilted towards the
left).
The cord should pass over
- under - under - over the four
segments.
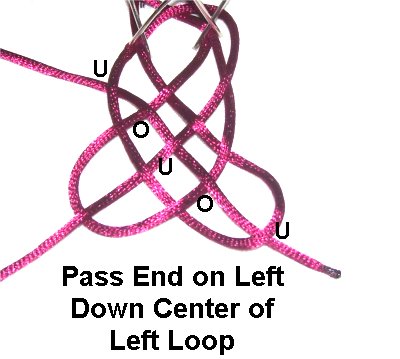
Step
6: Weave the left
end down the center of the other loop
(tilted towards the right).
Pass it under
- over - under - over - under the
five segments.
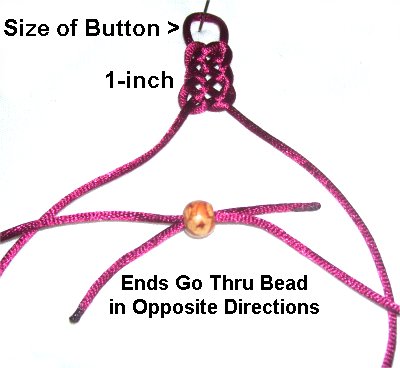
Step 7:
Tighten the knot in
the order the loops were made, starting
at the center. It should be about 1
inch in size when you are done.
Important:Make all the knots in
the Loop Weave bracelet as small as possible,
so the design has a delicate appearance.
Make sure the first loop (top center) is
the appropriate size for the button used
for the clasp.
Pass both ends through a bead in opposite
directions. This will
help prevent the knot from being pulled
out of shape.
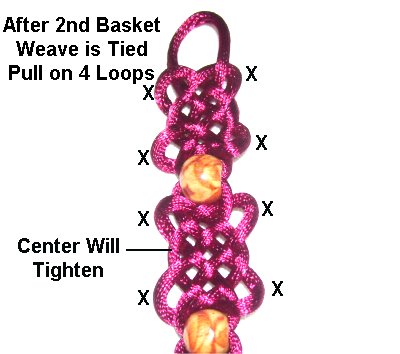
Step
8: Repeat
steps 1 - 7 to make the
next knot. After the second one is
tightened, pull on the four loops at the
corners of the first knot as shown.
The central portion will tighten as you do
this. The loops can be any size.
Important: Pull on
the four loops as you progress, rather than wait
until the Loop Weave bracelet is finished.
Make sure you tie one knot, then pull the loops
on the knot you previously made.
Step
9: Repeat
Steps 1 - 8 until the
bracelet is the size you need.
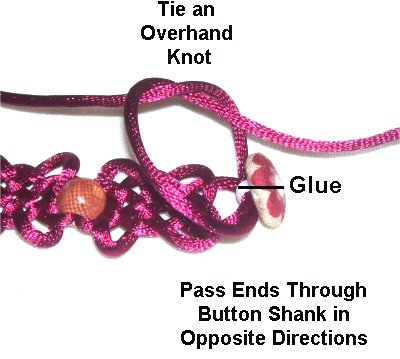
Pass both ends through the shank in the
button, in opposite directions, as you did
the beads. Make sure it fits the
loop at the other end.
Apply glue on
the shank. Tie an Overhand
knot with the two ends, tightening it
firmly, so it rests on the glue.
Step
10: Turn over the Loop Weave
Bracelet so you work in the back.
Tie a second Overhand knot, applying the glue
close to the shank. When the glue is dry,
cut off the extra material.
(OPTIONAL) You can give all the loops
another tug, tightening the center of each knot
even more. When they are as you want, apply
a thin coat of glue to the back
center portion of the knots. The
glue will help prevent the knots from
loosening as the bracelet is worn. Glue will darken
Satin material,
so keep that in mind if you decide to use
it in this manner.
By using any text
or images on Free Macrame Patterns, you are
agreeing to ourTerms of Use