This Jump Rope features the Spiral Stitch, which
is one of the easiest basic knots used in
Macrame.
I recommend you make the rope with 550 size
Parachute cord, which is what is shown in the
example. It's stronger than other materials,
and the added weight really helps, too.
This is a suitable project for children ages 6 or
older, but some kids may need help from an
adult.
This project is time
consuming, since you need to make the
rope at least 7 feet long. That's the
standard size for children under 5 feet tall (60
inches).
Since you will need to search online for the
handles, be sure to get the type that are hollow
or used for beaded ropes.
Supplies
Needed:
4 mm cord material (size 550 Parachute cord
works the best)
Use the chart below to determine the finished
length most appropriate for your height.
Then cut 2 working cords and one filler cord to
the lengths shown.
Height
Finished
Length
Working Cords
x 2
Filler Cord x 1
Under
60 inches
7 feet
15 yards
3.5 yards
60
to 65 inches
8 feet
17.5 yards
3.75 yards
66 to 72
inches
9 feet
19.5 yards
4 yards
When using Parachute
cord to make the Jump Rope, an ADULT
should prepare the tips as follows:
Pull the COREthreads at
least 1-inch past the edge of the outer sleeve.
Cut them as far back as possible. Then slide
the outer sleeve past the core and use a BBQ
lighter to melt it closed.
Step
1: Pass one end of all
three cords through the handle from bottom
to top.
Make sure there is 18 inches of material
sticking out beyond the handle. Secure
that portion to the handle with masking
tape.
Step 1,
continued: Bundle the working cords
separately,
keeping at least 1-yard free (between bundle and
handle).
Secure the handle and cords vertically on your
board. Make sure the filler cord rests
between the two working cords.
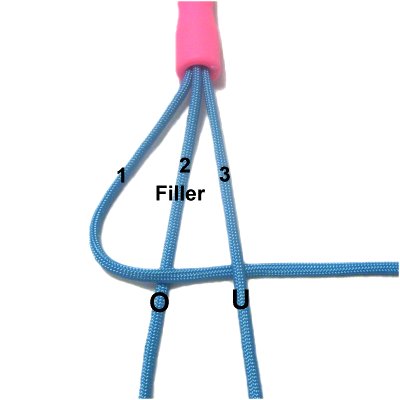
Spiral Stitch
Step
2: Mentally number the cords 1 -
3.
Curve working
cord 1 to the right, over
filler cord 2 and under
working cord 3.
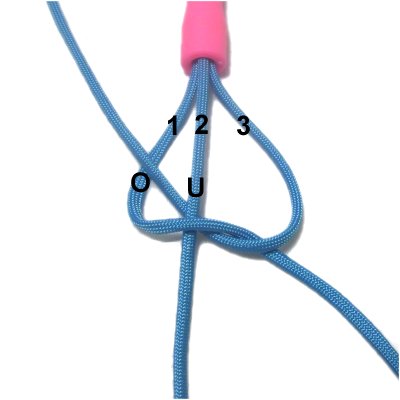
Step
3: Move working
cord 3under
filler cord 2, heading left.
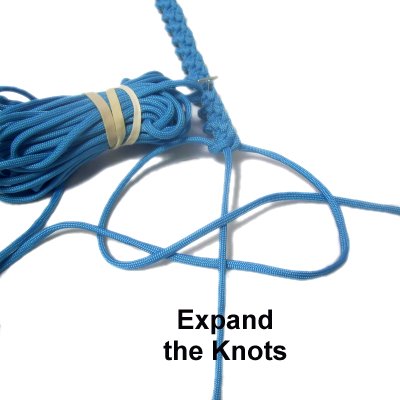
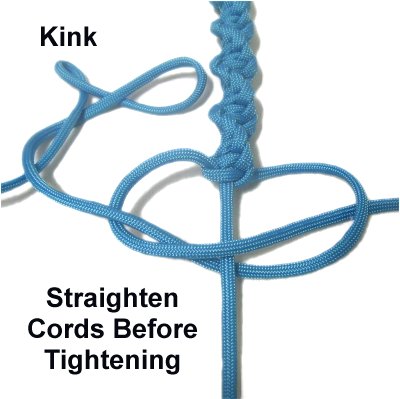
Separate the cords to expand the knot, so
the bundle can fit through (see next
image).
As you pull cord 3 out, it should pass over
cord 1 near the curved area. To
tighten, pull both working cords while
holding the filler cord steady.
Step 4:Read the three tips
below.
Repeat steps 2 and 3 to continue making
the Spiral Stitch. Mentally re-number the
working cords each time you repeat, so the knots
are always tied the same way.
Stop when the Jump Rope is the size you determined
in Preparation. Include
both handles when you measure.
Tip
#1: Always expand and
enlarge the knot you are working on during
step 3, so you can keep the material
rolled up.
When you tighten, pull the filler cord so
it has tension. The knots should be as
tight as possible.
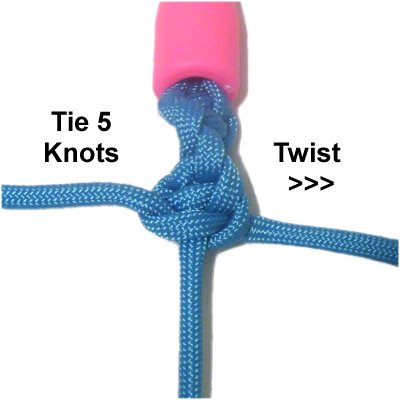
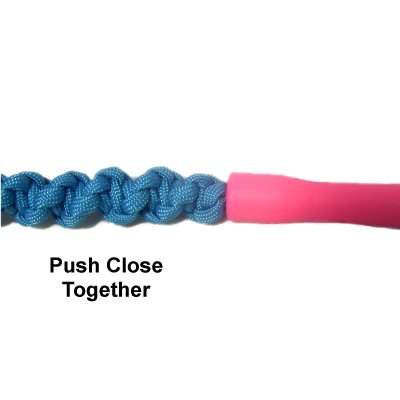
Tip
#2: Each section of the
Spiral Stitch should be the same size, so
tie a total of five
Half Knots.
Twist the section to the right, so the
working cords switch
places.
Push the knots close together before
making the next five knots.
Tip
#3: Straighten the working
cords to eliminate any kinks just before
tightening.
Once in a while you should hold the cords
vertically, so the bundles can dangle and
untwist.
Step
5: Push several sections
close together, then slide the cords
through the second handle.
You will slide them apart again, once the
finishing knots are tied in the following
steps.
Secure the ends of the cords to the handle
with tape.
Finishing Knot
Step 6:
Wrap the three 18-inch segments above the first
handle (step 1) with masking tape, so the cords
work together to make the finishing knot.
Make sure the cords are organized(see next image).
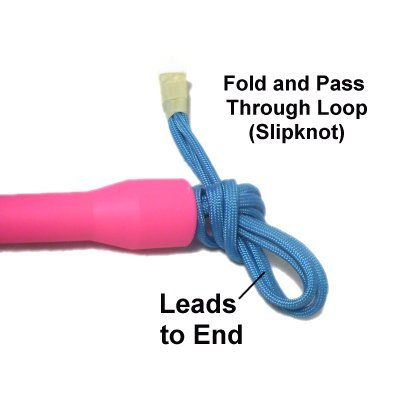
The finishing knot for the Jump Rope starts by
making a Slipknot:
Make a clockwise
loop resting close to the top of the
handle.
Fold the cords
and pass them through the loop from below
(Slipknot).
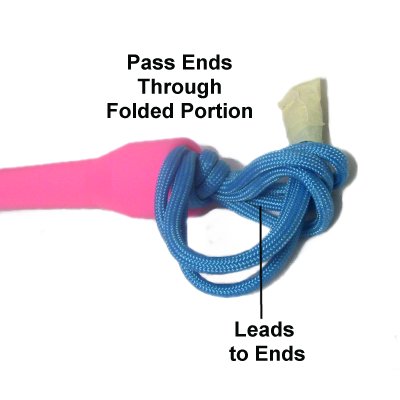
The portion that leads to the end
of the cords should be on the bottom, as
shown in this image.
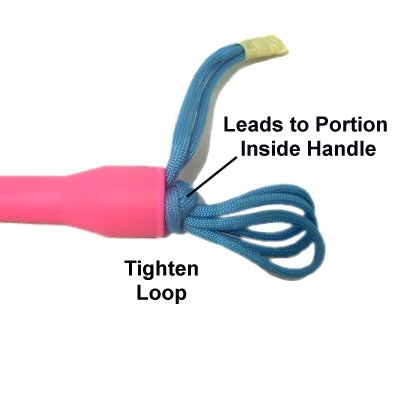
Tighten the
LOOP by pulling on the segment at the top,
which leads to the portion inside the
handle.
Then pull on the folded portion.
The goal is to make sure this part of the
knot is inside
the handle.
Step
7: Bring the ends toward
you, then pass them through the folded
portion front to back.
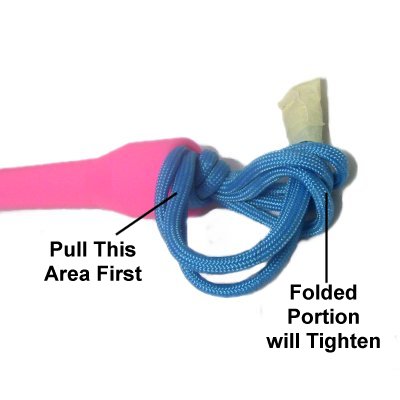
Tighten the
folded portion by pulling on the area
close to the handle.
Next, pull on the ends to tighten the
remainder of the knot. You can apply
glue if you wish.
Step 8:Repeat
steps 6 - 7 to tie the finishing knot
above the second handle.
Step 9:
Adjust the Half Knots you pushed together in step
5, eliminating any gaps between the knots and the
handle.
Step 10:
Cut off the remaining material at both ends of the
Jump Rope.
Use the BBQ Lighter to melt the tips if using
Parachute cord, Olefin, or similar material.
By
using any text or images on Free Macrame
Patterns, you are agreeing to ourTerms
of Use