|
|
| |

|
|
| |
|
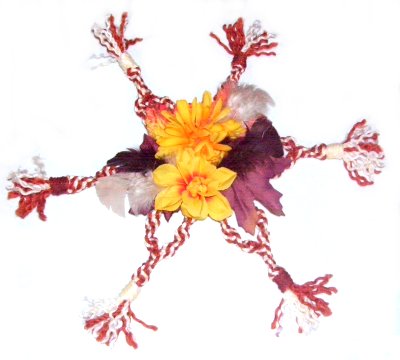
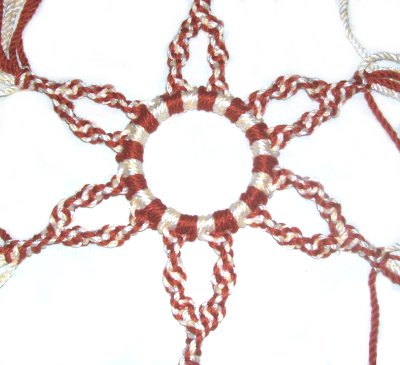
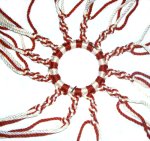
Description: The Harvest Sun
Wreath, made with autumn colors, will be a
welcome addition to your holiday decorations.
Many people put floral wreaths on their walls
during fall and winter. So the best colors for
this Macrame project are earth tones, such a
brown, rust and gold.
The circle in the center represents the sun,
and two colors resemble the sun's rays.
Dried or silk flowers are symbolic of the
autumn harvest. You can add dried corn, real
flowers, pine cones, feathers and dried grass,
if you want to make a completely natural wreath.
In the example shown, I used nylon material,
but Hemp and Jute look great, too.
|
| |
| |
|
| |
Supplies
Needed:
- 4mm 6mm material in 2 colors (50 - 60
yards, depending on size)
- Metal or Plastic Ring (any size)
- Fabric Glue that dries clear
|
| |
| |
|
Knots Used:
|
| |
| |
|
| |
Preparation
|
|
|
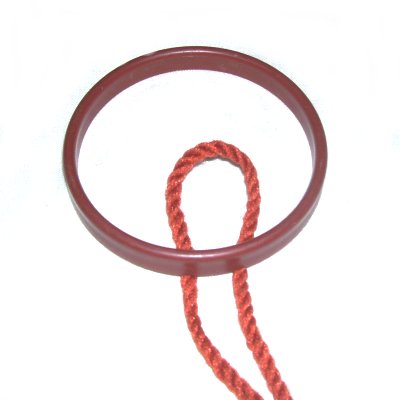
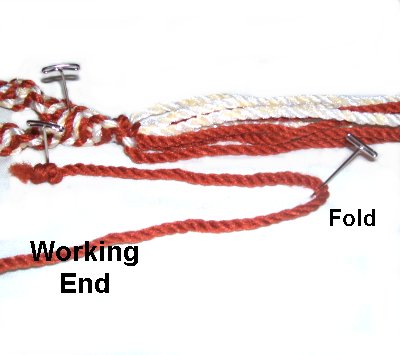
| Step 1: Cut one cord, 72 inches
long. Apply tape to the tips to prevent
unraveling while you work. |
|
|
|
<<
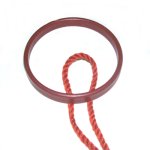
Fold the cord in half, and place it under
the bottom of the ring.
Bring the folded area down, over
the front of the ring. Pass the ends
through the loop. >>
Pull firmly on both
ends to tighten. |

|
|
|
|
|

|
|
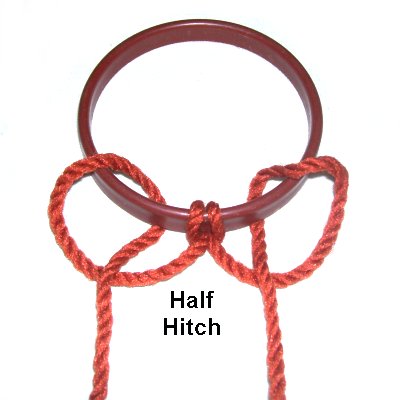
Use
each end
to tie a Half Hitch, which will rest on
either side of the Larks Head knots. |
|
|
|
|

|
|
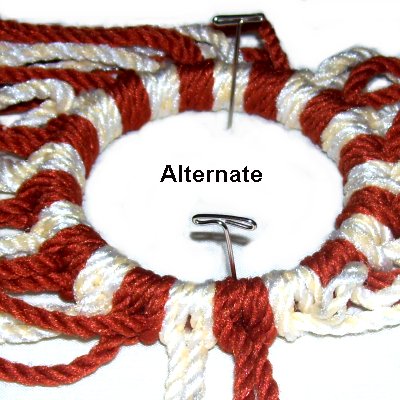
Step
2: Repeat
step 1, mounting more cords,
until the entire ring is covered.
Alternate
the colors.
Important:
Make sure the number of cords on the ring
can be divided by four
(16, 24, 32, etc.) |
|
|
|
|
|

|
|
Spiral Design
|
|
|
The main area of the Harvest Sun Wreath is made
with the Spiral Stitch. It's here that you
can make changes, if you want to try other
knots.
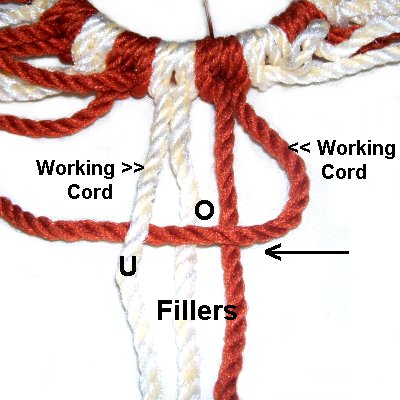
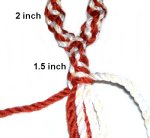
Step 3:
Each chain of knots is made with 2 working cords
and 2 fillers.
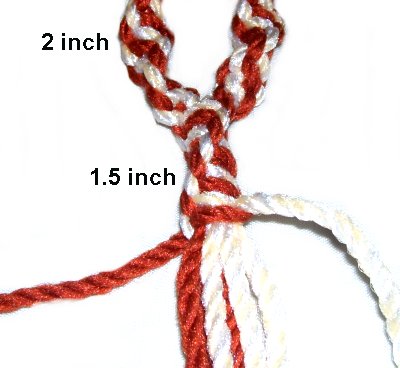
Tie several knots, until the sennit measures 2 inches.
The
steps below show you how to make the Spiral
Stitch: |
|
|
|

|
<<
Move the right
working cord to the left, passing over
the fillers and under
the left working cord.
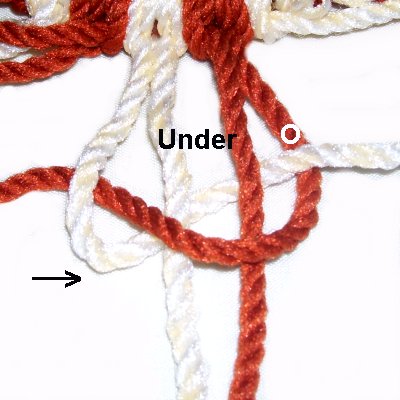
Bring the left
working cord under
the fillers and over
the right cord, as you pull it to the
right. >>
Tighten the knot firmly.
|

|
|
|
|
Design
Tip: As you tie the knots in the
Harvest Sun Wreath, twisting will occur by the
time you tie 4 or 5 knots. At that point,
rotate the sennit half
a turn.
In other words, the left working cord moves to the
right when you rotate. |
|
|
|
|
|
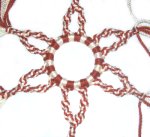
Step
3: Repeat
step 2, all the way
around the ring, using groups of 4 cords.
Design
Tip: You could stop here,
and skip to the finishing steps if you
want just a small sun decoration. For a
wreath, continue on to the next steps. |
|
|
|
|

|
|
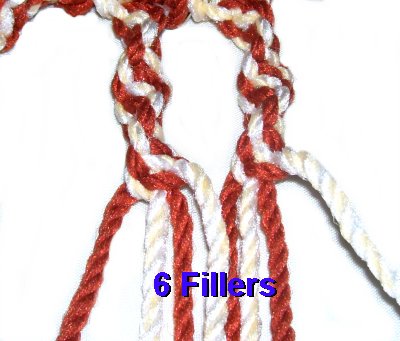
Step
4: Bring two sennits close
to each other.
Organize the cords so there are two
working cords and 6 fillers.
|
|
|
| |
|
|
Tie a Spiral
Stitch sennit measuring 1.5
inches.
The design will not twist on it's own, so
you will need to rotate it.
|
|
|
|
|
|
|
Step
5: Repeat
step 4 with the other
groups. |
|
|
| |
|
|
|
|
Finishing Touches
|
|
For the finishing touches to the Harvest Sun
Wreath, you will tie Wrapped knots around each
group of cords. The instructions are below.
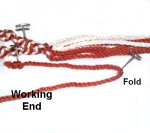
Step 6:
Arrange the wreath on your left, so the ends
coming from one spiral design are horizontal,
heading right.
Cut one cord 12
inches long. Tie an Overhand knot
at one end. |
|
|
|
|
|
Step
A: Secure the knot just
below the spiral sennit, on the
left. Fold the 12-inch cord 3
inches to the right
of the knot, and secure it.
The long portion is the working end and
will be used to tie the Wrapped Knot.
|
|
|
|
|
|
|
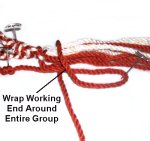
Step
B: Wrap the working end
around the entire group of cords,
including the portion with the knot.
Wrap 5 times, moving towards
the folded portion of the working
cord.
Make sure the coils are firmly wrapped,
which makes tightening the knot much
easier. |
|
|
|
|
|
|
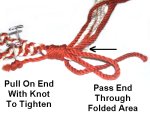
Step
C: Pass the working end
through the folded area (loop).
Pull on the end with the knot, until the
loop and other end goes inside the wrapped
portion. That will tighten the
entire knot. |
|
|
|
|
Step 7: Repeat step 6
with each set of cords, all the way around the
Harvest Sun Wreath. Alternate the colors if
you used more than one.
Apply a light coat of glue to the outside of all
the Wrapped Knots. When it's dry, cut off
the portion with the Overhand knot, flush with the
top of the wrapped area.
Make sure you only cut the 12-inch
cords, not
the ones from the spirals. |
|
|
|

|
|
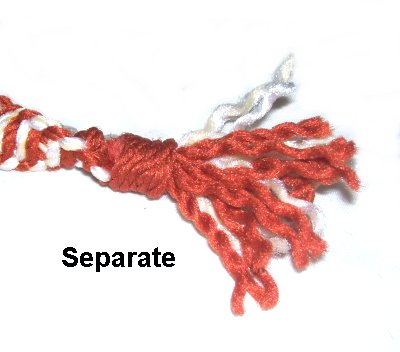
Step
8: Trim the remaining
cords to 3 inches. Separate the
fibers from each cord, to form the fringe.
Y can brush them if you wish, but they
look good just the way they are. |
|
|
|
|
Step
9: Add the decorations to the ring
using the fabric glue.
Fold a small piece of craft wire to make a loop,
and attach it to the back of the Harvest Sun
Wreath, to hang it on the wall. |
| |
| |
|
|
|
By
using any text or images on Free Macrame
Patterns, you are agreeing to our Terms
of Use
|
|
|
|
|
Have
any comments about the Harvest Sun Wreath? Contact
Me.
|
|
|
|
|
|
|
| |