Description:
This Flower Bracelet pattern requires a Buttonhole Clasp,
which may be a challenging decorative knot for
young children. So this project may be more
suitable for kids with experience in this craft,
or adult beginners.
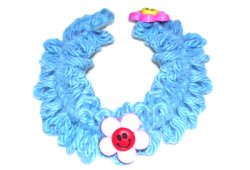
This Macrame project features the use of picots
to form loops that look like flower petals.
There's a button in the center for decoration and
one for the clasp as well.
I recommend you use flexible material such as the
crochet cotton used in the example.
Cut two cords, each 2 yards long (for a child's
size - up to 6 inches).
For a larger size, cut the cords 12
times the length you wish to make.
Coat the tips with glue and allow it to dry
completely before starting the Flower Bracelet.
Find the center
of both cords and secure them to your board with a
pin. The best way is to wrap the cords
around the pin a couple times. Secure
the left half of the cords with tape while
you work on the right.
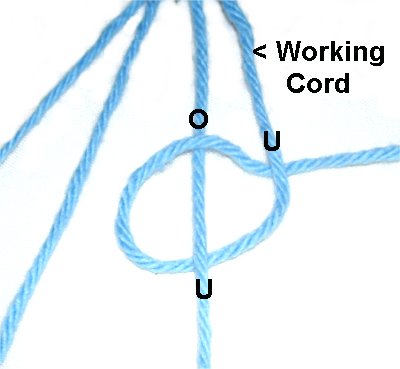
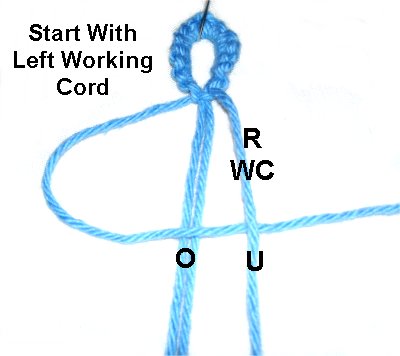
The working cords for the Buttonhole Clasp are on
the outside, with the holding cords on the inside.
Step
1: Tie the first
half of a Larks Head knot by
passing the working
cord over
- under the holding
cord.
Make sure it passes over
the working
cord as you bring it back to the right,to
complete the clockwise
loop.
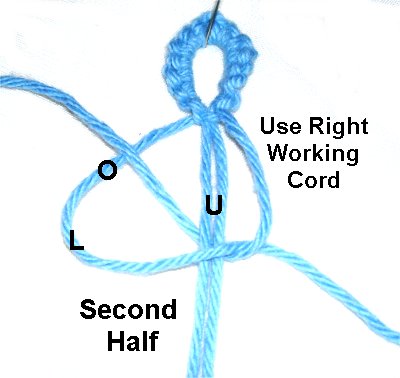
Step
2: The second half of the
Larks Head knot is tied by bringing the
working cord under
- over the holding cord.
Pass it under
the working cord as you bring it back to
the right.
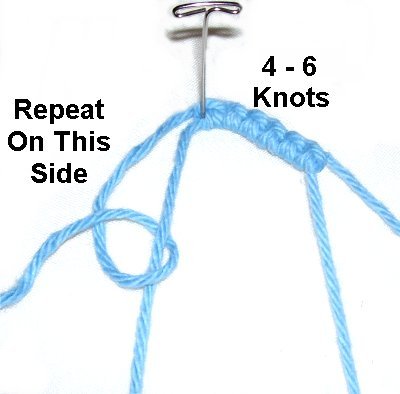
Step
3:Repeat
steps 1 and 2, tying a total of 4
- 6 Larks Head knots for the right side of
the clasp.
Repeat
steps 1 - 2 with the
left half of the cords, rotating
counter-clockwise
when tying the knots.
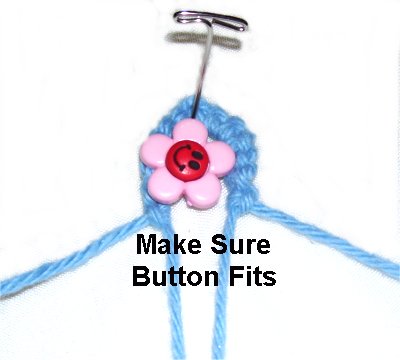
Step
4: Make sure the button
fits through the clasp, by bringing the
ends together. Add more knots if you
think it needs to be larger.
Design
Tip: The loop should pass
around the button loosely, but not allow
the button to slip out.
To complete the Buttonhole Clasp for your Flower
Bracelet, you need to tie a Square
Knot. Steps 5 - 8 show you how it's
done.
This knot will be used to form the rest of the
bracelet, too.
Step
5: Mentally label the
working cords right and left. The
two cords between them run through the
center of the Square Knots, so are called
fillers.
Bend the right
working cord to the left, passing
overthe fillers, and under
the left working cord.
Step
6: To complete the first
half of the Square knot, bring the left
working cord under
the fillers, and over
the right working cord.
Pull the two ends
firmly, so the Buttonhole Clasp
is tightly secured.
Step
7: Mentally re-label the
working cords where
they are now,
since they have switched places.
Move the left
working cord to the right, overthe
fillers and under
the right working cord.
Step
8: Move the right
working cord under
the fillers and over
the left working cord.
Pull the ends firmly to tighten the Square
Knot.
Flower Bracelet Design
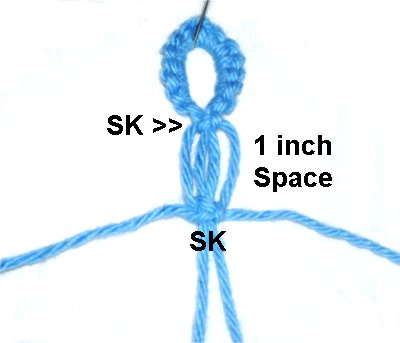
Step
9: Move down 1
inch, leaving a space, and tie
another Square Knot following steps 5 - 8
above.
Tighten the knot firmly, while
holding the fillers steady. You
can pull them taut, so it's easier to
tighten the knot.
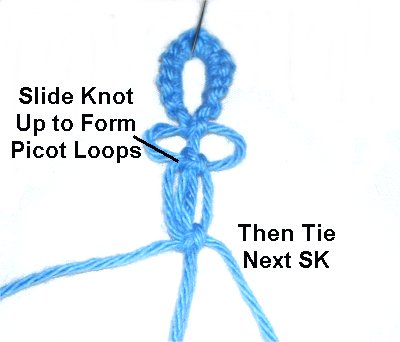
Step
10 : Slide the Square Knot
up, close to the one tied for the
clasp. This will form small picot
loops on each side.
Then tie the next Square Knot, leaving a 1-inch
space.
Step
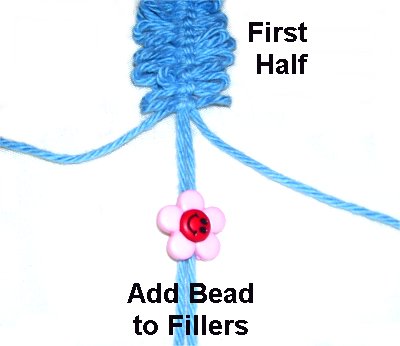
11: Repeat
steps 9 and 10 until the Flower
Bracelet measure half
the size you planned to make.
Make sure you include
the clasp when you measure.
Slide the fillers
through the shank of one button, and
position it against the last SK picot tied
(optional).
Step
12:Switch
the cords, so the working cords
now become the new fillers.
The
purpose for the button is to disguise
the area where the cords are
switched.
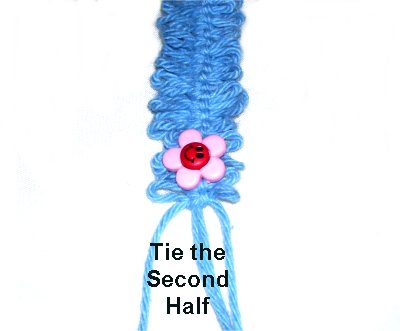
Step
13: Tie the second half of the
Flower Bracelet the same length as the
first.
There should still be 1-inch between each
knot, so the picots are the same size.
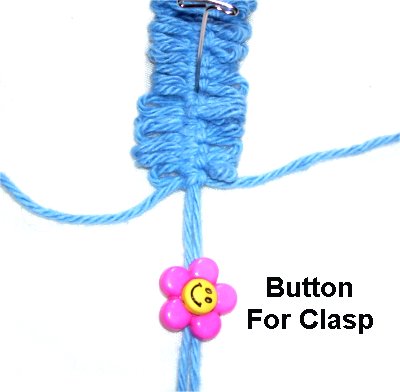
Step
14: Add another button onto
the filler
cords, making sure the bracelet
has not twisted, and the front
is face up.
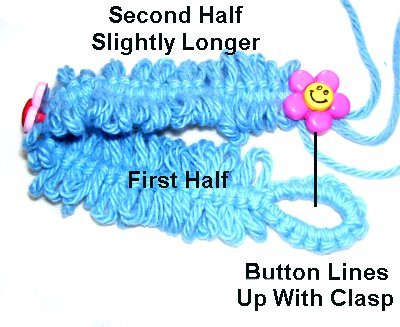
Check the size before
the finishing touches, by completing the
next step.
Step
15: Fold the Flower
Bracelet at the center, where
the first button is resting.
The button for the clasp should line up
with the Buttonhole at the other
end. Add more knots if necessary.
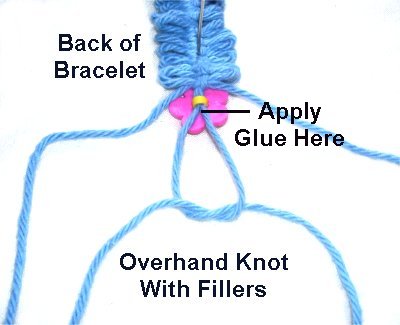
Finishing Touches
Turn over the
Flower Bracelet, so you are working in the
back.
Locate the two filler
cords running through the button.
Apply glue next to the button's
shank. Tie the two cords together
with a very
tight Overhand knot.
Apply more
glue next to the Overhand knot, and then
use the working
cords to tie a Square knot around
the fillers.
Pull it as tight as you can, and apply
more glue to the knot. Allow it to
dry completely before cutting off the
excess material.
By
using any text or images on Free Macrame
Patterns, you are agreeing to ourTerms
of Use