Description:
The Chinese Butterfly is a combination knot made
with both the Mystic Knot
(Pan Chang) and the Josephine knot
(Double Coin).
You must
know how to tie both knots easily,
or this Macrame pattern will be difficult for you
to complete.
This Chinese knot can be used as a pendant, since
the loop at the top could be an attachment point
for a necklace cord.
You can also use it as a decoration for handbags,
belts, plant hangers and more.
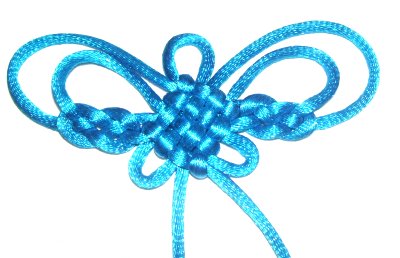
This Butterfly shaped knot looks great when made
with Satin cord material, as in the image
above. When tightened firmly, it will result
in a wingspan of approximately 3 inches.
I used Paracord in the images below to make these
instructions easier to see. This design
looks best when made with 2mm cord material, but
you can use other sizes, too.
Important:
Please be sure to lean
the pins or use the cross-pin technique
to secure the loops and bights, if using Satin,
Leather or Silk.
Supplies
Needed:
2mm cord material (2.5 yards or more)
Project board and pins or tape
Fabric glue (optional)
Preparation:
Cut one cord, at least 2.5 yards long.
When making the Chinese Butterfly, you will create
a series of bights in vertical and horizontal
directions. Try to make these bights around
3 inches long, so you have room to work.
That's why you need so much material; this way you
can make the design large the first time you try
it.
For the first 3 steps of the design, you will be
using the right
half of the cord. Secure the left
half for now.
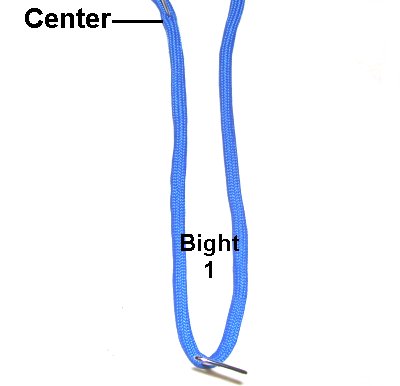
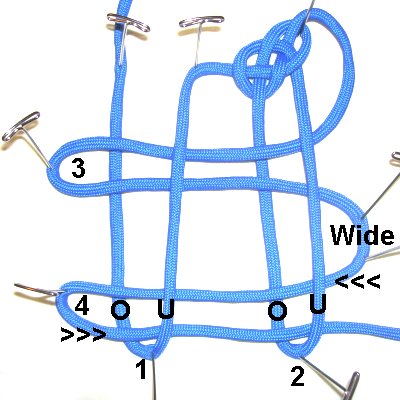
Step
1: Secure the center of
the cord on your left, at the back of your
board.
Form bight
1 with the right
half of the cord. It should be long
and narrow.
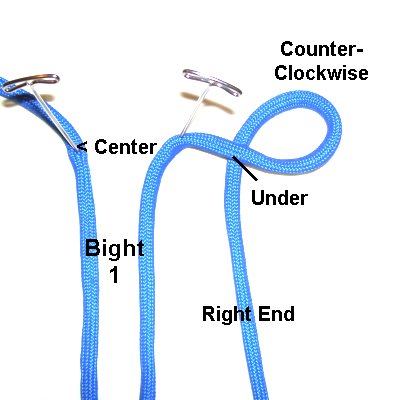
Place a pin on the right half, directly
across from the center (see next
image). This is to mark
the area for step 2.
To make the
first Josephine Knot for the right
wing of the Chinese Butterfly,
make a counter-clockwise
loop with the right half.
As you bring it forward and to the right
of bight 1, pass under
to make the crossing point for the
loop.
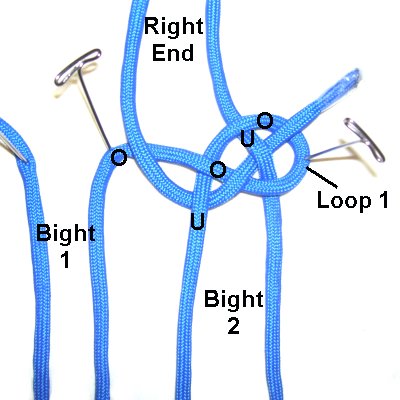
Bring the
right half forward more, then fold it to
form bight
2. The folds of both bights
should line up.
Move it backward again, then pass it under
loop 1.
Step 2: Begin
the second loop for the Josephine Knot by moving
the right half over
the segment you marked
with the pin, which is to the left
of loop 1.
Pass it under
the left side of bight
2, then through the loop over
- under - over.
Tighten the Josephine Knot slightly and
balance the three loops.
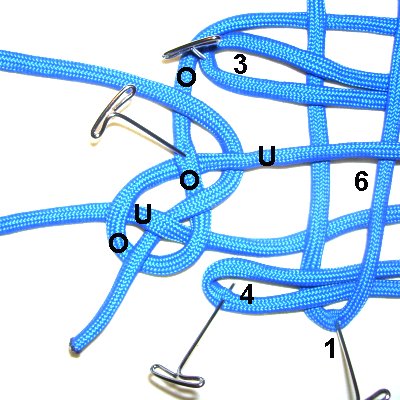
Step
3: Create bight
3 by weaving the right half
through bights 1 and 2, under
- over - under - over.
Weave right to left, fold the cord, then
bring it back to the right. The
path is the same both directions.
Create bight
4 by repeating the previous
step. Place the bight close to the
fold of bights 1 and 2, then secure the
right half of the cord.
The area between
bights 3 and 4 should be wide
as shown in the image.
You will use the left
half to complete the remaining bights
and weaving for the Chinese Butterfly.
Step 4 takes place between
bight 3 and the Josephine knot on the
right.
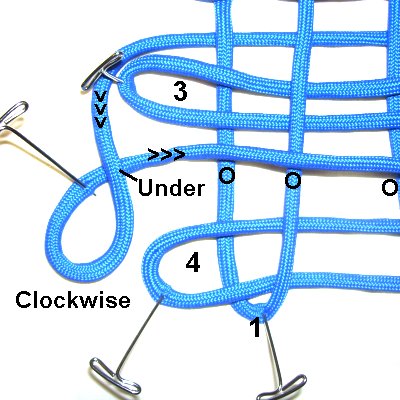
Step
4: Make a counter-clockwise
loop with the left half of the cord.
Move it towards the right
horizontally, passing over
all of the vertical segments (bights 1 and
2).
Fold the left
half around the right
side of bight 2
to make bight
5.
Bring it back to the left, passing it under
the vertical segments of bights 1 and 2.
Important:
Make sure you do not fold it around the segment
furthest to the right, which comes from the right
Josephine knot.
Pass the cord around bights
1 and 2 only or the Chinese Butterfly
won't work out.
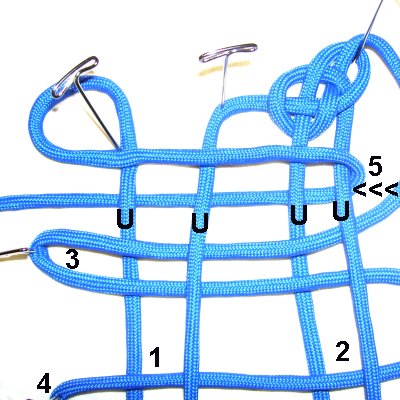
Step
5: Bring the left half
forward to the wide area between
bights 3 and 4.
Make a clockwise
loop, passing under
to form the crossing point. This
loop is for the left Josephine knot.
Continue moving it to the right,
passing over
the four vertical segments of bights 1 and
2.
Fold the cord
around the right
side of bight 2 to form bight
6.
This
is the same as step 4 (bight 5).
Bring it under
all the vertical segments, moving right to
left. Pass it under
the new loop.
Rotate
the left half in a counter-clockwise
direction. Pass it over
the segment close
to bight 3.
Pass it under
the segment of bight 6, near the crossing
point of the first loop.
Weave it over
- under - over the loop. Tighten
and balance the Josephine knot.
Important:
Before moving on to step 6, make the sixbights as
narrow
as possible.
Spread things out so you can see all areas of the
Chinese Butterfly.
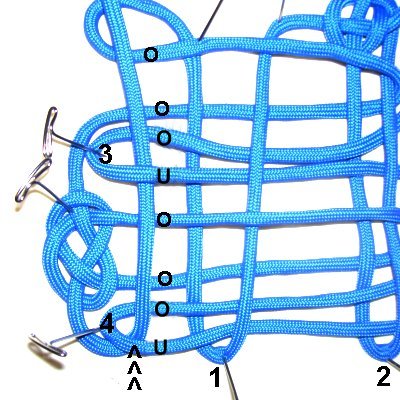
The vertical weaving for step
6 takes place to
theleft
of bight 1, close to the folded
areas of bights 3 and 4.
In step
7, the second area of weaving
takes place between
bights 1 and 2.
The focus of the weaving for the Chinese
Butterfly will be bights
3 and 4. You will pass the left
half of the cord through
them.
These cords have black symbols in the images
below.
Follow
these instructions carefully:
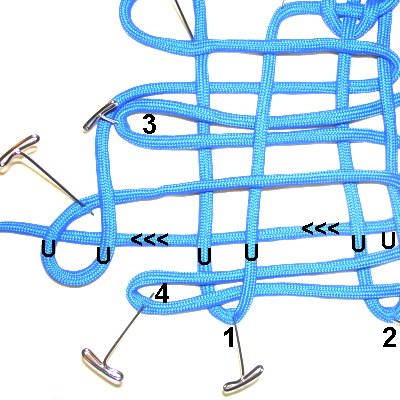
Step
6: Bring the left half
through bight
4 heading backward, which is under
- over.
Pass it over
the next two segments.
Move it through bight
3under
- over. Pass it over
the next two segments, ending at the lower
part of the loop on the left.
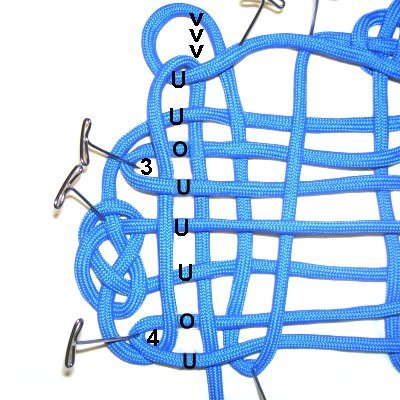
Bring the left
half forward, passing it under
two segments, and then over
- underbight 3.
Pass under
the next two segments, and over
- underbight 4.
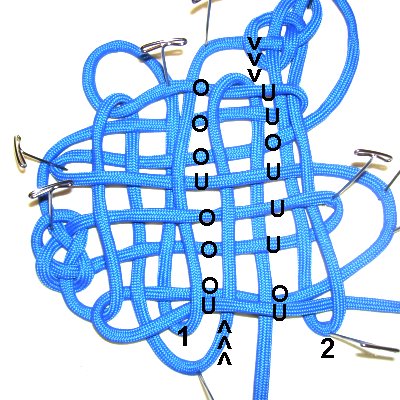
Step
7: Move the left half
around
bight 1, then to the space
between it and bight 2.
Repeat
step 6, weaving the cord
vertically backward
then forward again.
The over -
under pattern is exactly the same.
Tightening Process
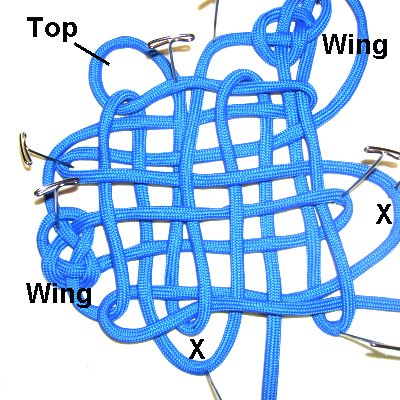
Step 8:
There are five areas that will be arranged along
the outside
of the Mystic Knot:
The loop on the
upper left is the "head" of the Chinese
Butterfly. The wings are the areas
with the Josephine knot.
The areas marked with an X are the loops
at the bottom. Keep
these 5 areas secureduntil the design is
completely tightened.
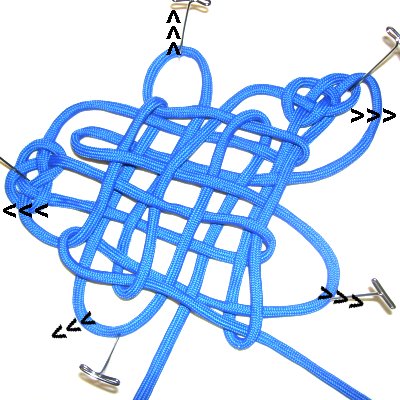
Pull on the
five areas, after turning the design so
the loop for the head is heading toward
the back of your board. The center
of the Mystic knot will begin to tighten.
Reduce the size of each area, moving the
pins as needed.
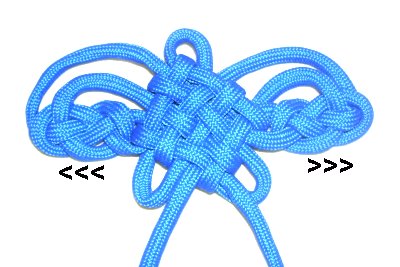
The Josephine knots for the wings need to be horizontal
as you tighten the Chinese Butterfly.
Make the areas between the head and the Josephine
knots wider, forming the curved details at the top
of the wings. The head and lower wings can
be any size.
To finish the design, you can move the tips to the
back and slide them under a portion of the Mystic
knot.
You could also let them dangle, adding beads
and/or finishing knots.
By
using any text or images on Free Macrame
Patterns, you are agreeing to ourTerms
of Use