Description:
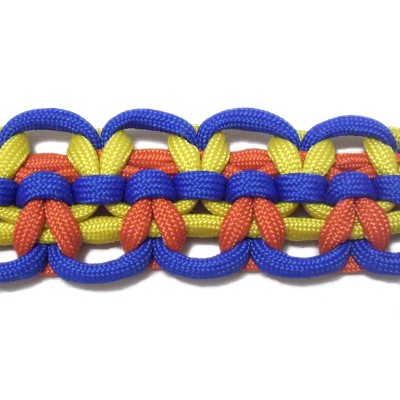
The Ara Batur Bar is a unique Square Knot
pattern featuring three colors. The
heads of the knots face inward, forming a line
down the center and loops along the edges.
You can use this type of knotted band to create a
bracelet, belt, or other flat item. In
the example shown, there is a loop at one end,
which can be part of a clasp. You can start
this design in the center of the cords, too.
I recommend practicing with Parachute cord, which
is the material you see in the example. Make
sure you know how to tie both LEFT and RIGHT Square
knots.
Ara Batur can be translated to mean Row
Boat. Try to visualize the red and yellow
loops as the oars, and the center area as the
surface of the boat. The loops on the edges
are the waves.
Be sure to view the video
gallery, which contains
tutorials for many unique decorative
knots.
Preparation
To practice, cut three
pieces of material, with one dark and two
light colors. Using blue as the dark
color is recommended.
The cords should beat least 60 inches
long.
Prepare the tips to prevent unraveling. For
Parachute cord, apply flame to the tips to seal in
the core material. See Cord Preparation
for more details.
When using the Ara Batur Bar in a Macrame project,
the cords should be at least 10
x the finished length you are aiming for.
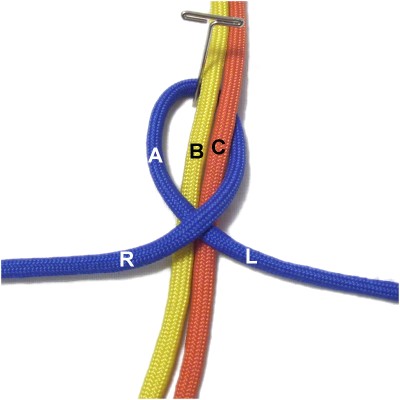
Step
1: Make a loop in the center of
the dark
cord (Cord A), crossing right
over left.
Arrange the other two cords through the
loop vertically. The center of these
cords should rest directly under the
crossing point of the loop.
Mentally label them cords B and C.
Fold the top
half of cords B and C toward you
(forward), so they rest on top of the
crossed area of the loop.
The fold should be at the center.
Make adjustments if needed.
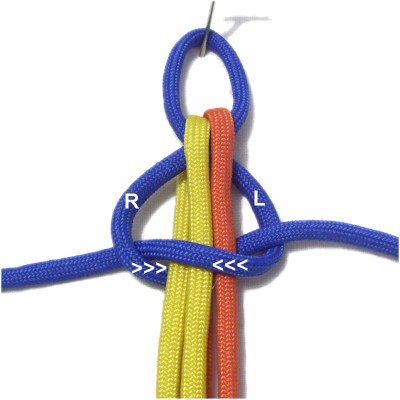
Make the first
half of a RIGHT SK by moving the left
half of cord
Aover
cords B and C, and under
the right half of cord A (right to left).
Move the right
half of cord A under
cords B and C, and over
the left half of cord A (left to right).
Step 1,
continued: Before tightening,
adjust the size of the loop. It should be at
least 1/2-inches in size, depending on how you
plan to use it.
When using the Ara Batur Bar to make a bracelet or
belt, the loop should be the size of the button
knot, bead, or button you will add at the opposite
end.
Square Knots (SK)
You will start the bar by tying the first two
Square Knots in opposite directions.
The steps below apply to all the knots, not just
the first two:
Steps 2 and 3
below show you how to tie all the LEFT SK in the
Ara Batur Bar, which are on the right. Steps 4 and 5
show you how to tie all the RIGHT SK, which are on
the left.
The heads
of the knots will be facing inwards
(towards each other), which is what makes the line
down the center of the bar.
Please note that for the first two knots, there
will be only one filler for each SK. Later
on, there will be two.
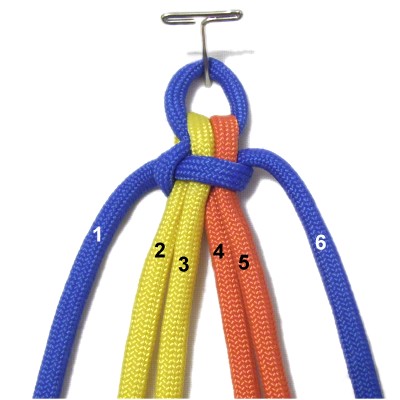
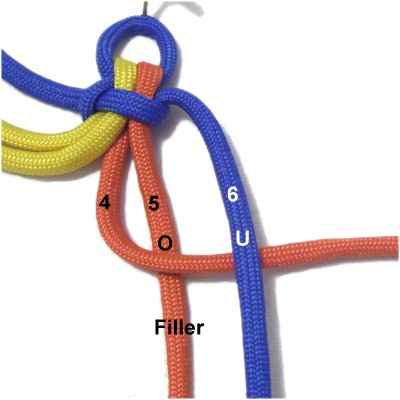
Mentally
number the six cords as follows:
Cord A(blue) should be numbered 1 and 6.
Cord
B (yellow) is numbered 2 and
3.
Cord C
(orange) is numbered 4 and 5.
Left Square
Knot
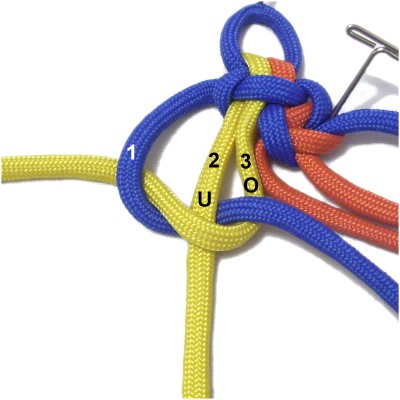
Step
2: Move cord
4 to the right,
passing over
cord 5 and under
cord 6.
Cord 5 is the single filler for this LEFT
SK.
Move
cord
6 to the
left, passing it under
cord 5 and over
cord 4.
This completes the first
half of the Square Knot. Tighten
it firmly.
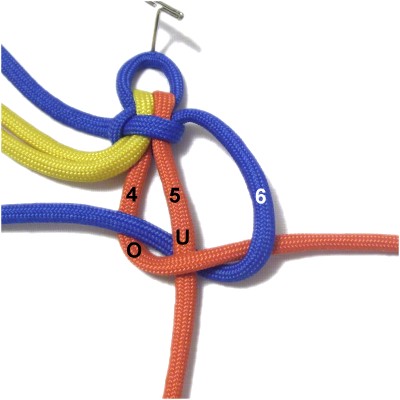
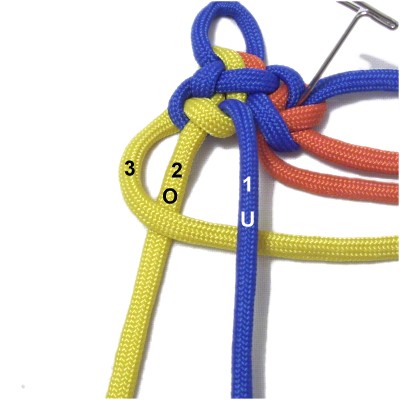
Step
3: Move cord
4 to the left,
passing over
cord 5 and under
cord 6.
Move cord
6 to the right, passing under
cord 5 and over
cord 4.
Tighten the second half firmly.
The segment indicated (cord 6) is what
forms the head of the SK, which faces
left.
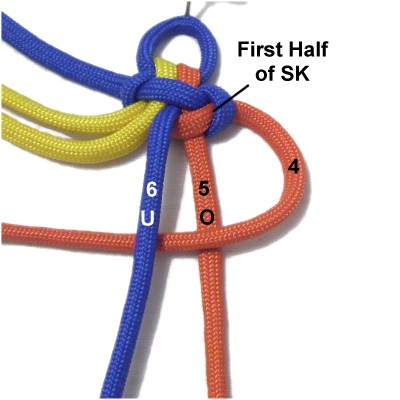
Right Square Knot
Step
4: Now it's time to tie
the first RIGHT Square Knot for the Ara
Batur Bar.
Move cord
3 to the left,
passing it over
cord 2 and under
cord 1.
The single filler is cord 2.
Move cord
1 to the right,
passing it under cord
2 and over
cord 3.
Tighten the first half of the SK firmly.
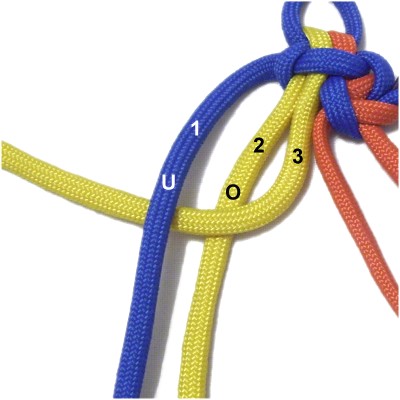
Step
5: Move cord 3
to the right, passing overcord
2 and under
cord 1.
Move cord
1 to the left, passing it under
cord 2 and over
cord 3.
Tighten the second half of the SK
firmly.
The segment of cord 1 on the right forms
the head of the SK, which touches the head
of the other knot. You can see that in the
next image.
Primary Design
The primary design for the Ara Batur Bar is a
series of Square Knotsthat share
cords. Each knot has two working
cords and TWO fillers.
Use the information in steps 2 - 5 to make the
right and left SK. You will be using
different cords, but the process is the same.
Remember that the head will face the direction of
the first working cord you move, which is what is
shown in the next two images.
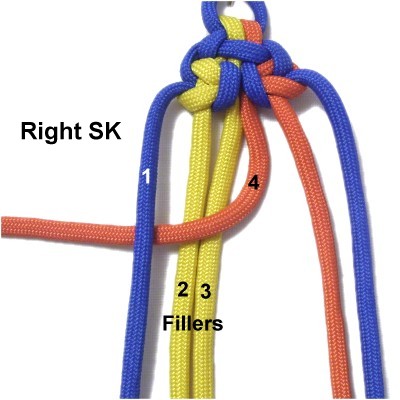
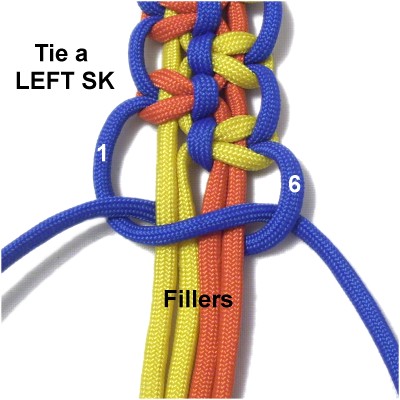
Step
6: Use working
cords 1 and 4 to tie a RIGHT
Square knot. Cords 2 and 3 are the
fillers. The first step is to move
cord 4 to the left as shown.
Pull the fillers so they are straight
after tightening the knot.
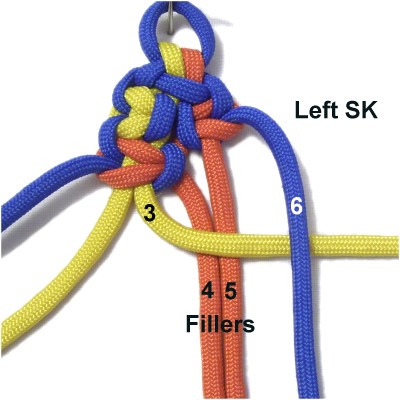
Step
7: Use working
cords 3 and 6 to tie a LEFT SK.
The fillers are cords 4 and 5. The
first step is to move cord 3 to the right
as shown.
Notice how cords 3 and 4 are part of both
knots (shared).
Pull the fillers straight after
tightening.
Step
8: Repeat
steps 6 and 7 several times,
until the Ara Batur Bar is the size you
want.
Stop on
step 7 (Left SK).
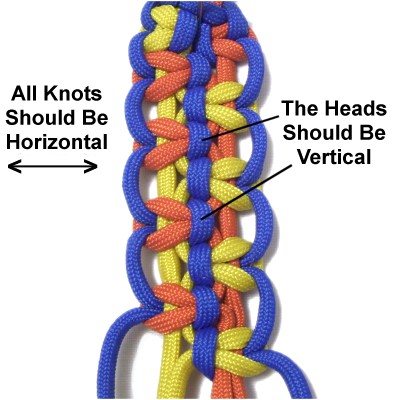
The knots should be horizontal and the
heads vertical, so they form a line down
the center of the design.
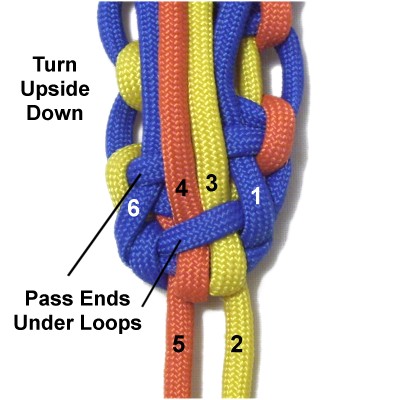
Step
9: The best way to
complete the bar is to tie a LEFT Square
Knot using cords
1 and 6.
The other four are the fillers.
This step is
optional if you are just practicing.
Turn the bar upside down so you work in
the back.
Fold cords
1, 6, 4, and 3 to the back, and
pass each one under a loop in the
design. Apply glue to secure them,
and cut off the excess material when it's
dry.
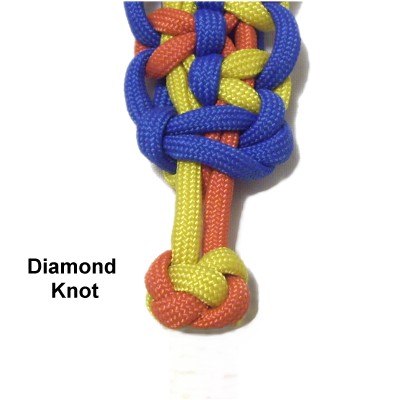
Attach a
button or bead, or tie a button knot with
cords 2 and 5.
The Diamond Knot, which is called the Knife Knot
on this site, is the best option because
it can be made with two cords. Cut
off the excess material after tightening.
This is the
completed Ara Batur Bar, showing the
details.
The loops along the edges are the waves,
and the oars are the orange and yellow
portions of the knots. The straight
heads of the SK represent the boat.
By
using any text or images on Free Macrame
Patterns, you are agreeing to ourTerms
of Use