Description:
TheAlternating
Endless Falls technique is a combination of
regular Endless Falls
with two extra loops made by a second color.
The instructions below show how to make the sennit
with a loop that can be used as a clasp.
This decorative knot can be used to make Macrame
belts, Paracord bracelets, dog collars and
leashes, and many other projects.
Because it's so thick, you can also use it for the
long posts in plant hanger patterns, or for purse
straps.
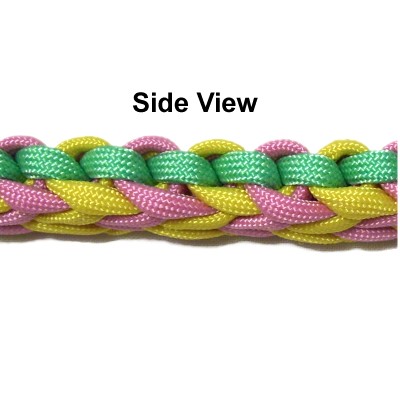
The
alternating pattern shown at the top of
the page is what the sennit looks like
after you turn it over.
This is the side view showing the
stitching made by the holding cord.
Beginners
should practice the basic Endless
Falls design before
learning this variation.
Click on
the link or image to view that page.
This
decorative knot is an adaptation of the
other Endless Falls variations on Fusion
Knots.
Be sure to see the video
gallery, where you will find
tutorials for other interesting knots.
Click
on the image or link
Preparation:
To practice Alternating Endless Falls, you need 3
cords at least 45 inches long.
When using this technique in a Macrame Project,
the cords need to be at
least 9 times the finished length you are
planning to make.
Please read Cord Preparation
if you plan to use Paracord, which is the material
shown in the example. The instructions
for preparing it are near the bottom of the page.
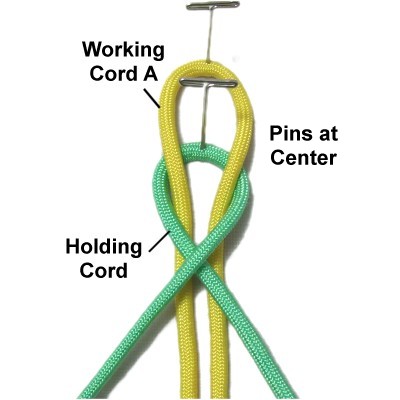
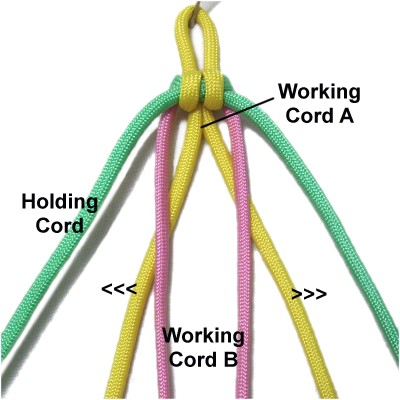
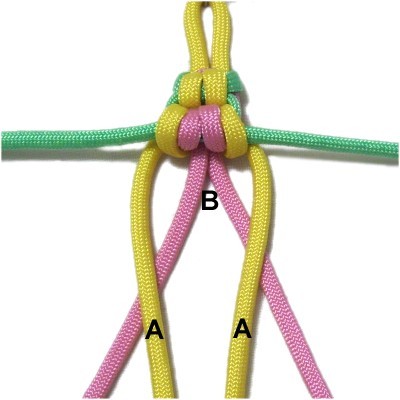
In the example shown below, working cord A is yellow,
working cord B is pink,
and the holding cord is green.
Step
1: Fold working
cord A in half and secure it to
your board vertically.
Arrange the holding
cordunder
it, making sure the centers line up and
the cords are balanced.
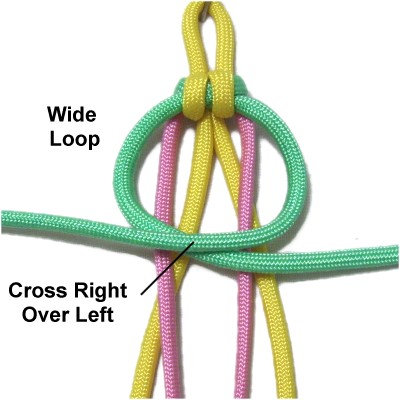
Bring the two halves of the holding cord on
top of the working cord, then
cross them right over left.
Move both
halves of the working cord backward,
then pass them around
the crossing point of the holding cord
(over - under). This results in two
loops.
Pull them towards you, making sure they
rest between
the loops. Tighten the knot slightly.
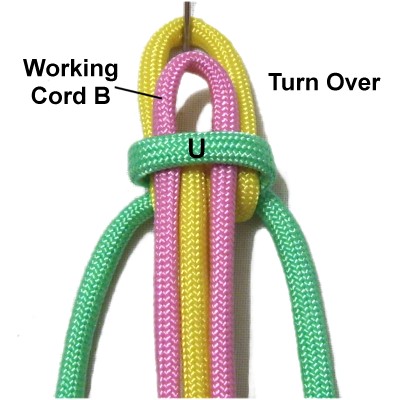
Step
2: Turn the knot over so
the front
is face up.
Fold working
cord B in half and slide it under
the horizontal segment made by the holding
cord.
It should rest on
top of working cord A.
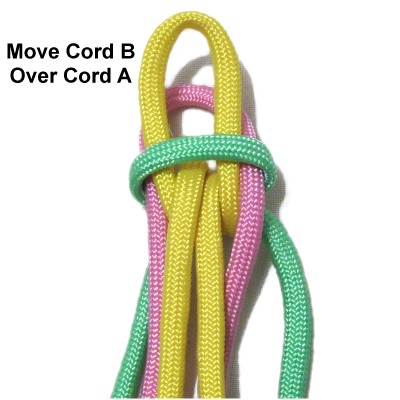
Pass cord
Bover
the folded area of cord A, so it rests under it
when you are finished.
Turn
the knot back to it's original
position. Tighten all three cords,
starting with the holding
cord.
Adjust the size of the folded area of
cord
A to 1-inch, if you need it
for a clasp.
Step
3 : Move both halves of cord
A to the right and left.
Both halves of cord
B should rest between them.
Designer's
Tip: Every time you begin a new set
of loops for Alternating Endless Falls, you
arrange both halves of the working cord that's
currently on the OUTSIDE so they move to the
inside, resting between the two halves of the
other cord.
By doing this, the colors alternate
(see step 5).
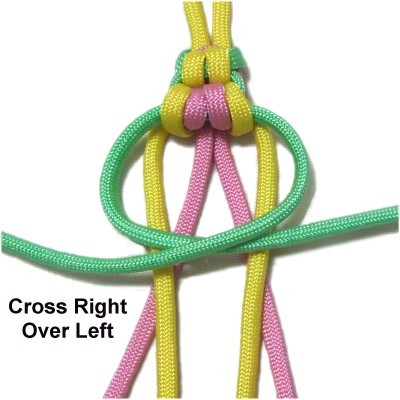
Make a wide
loop with the two halves of the holding
cord, crossing right over left.
Arrange it so it rests on top of the other
cords.
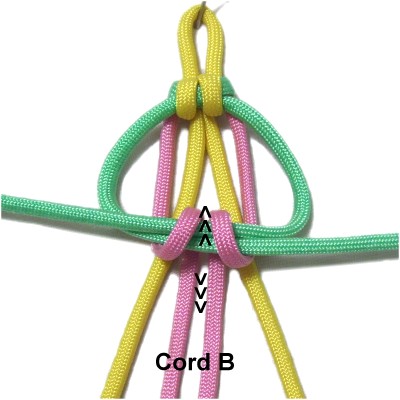
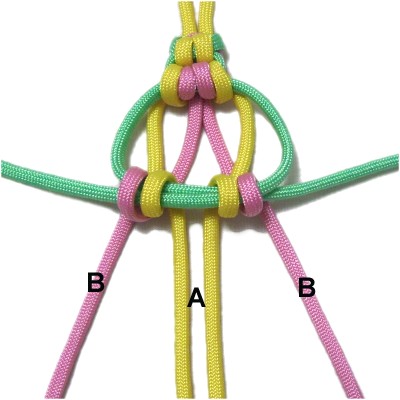
Step
4: Move both halves of cord Bbackward, passing over
the central area of the holding cord.
Pull the cords forward, passing under
the holding cord.
Make sure they rest between the two halves of cord A when you
are finished.
Do
the same thing with each half of cord A,
making sure they remain to the left and
right of cord B, both inside and outside
the loop.
Click on this image to enlarge it so you
can see the details more clearly.
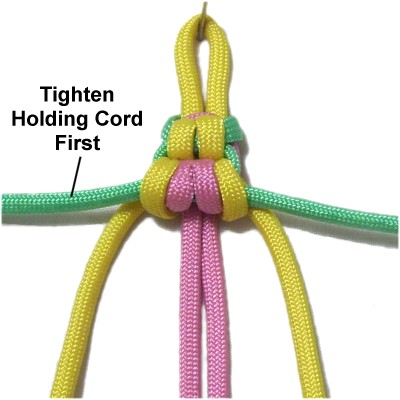
Tighten
the holding
cord first, by pulling on both
halves until all the slack is removed.
Then tighten cord B, followed by each half
of cord A.
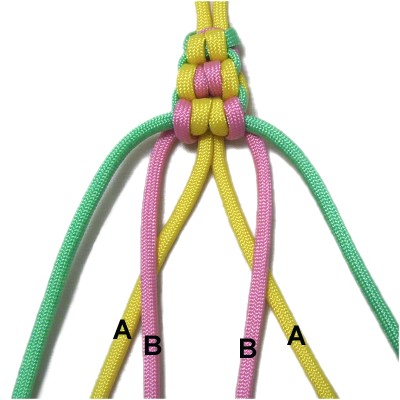
Step
5: Start the next set of
loops by moving both halves of cord
A towards each other, so they
rest between the two halves of cord B.
This will cause the colors to shift, which
is an important part of Alternating
Endless Falls.
Make the wide
loop with the two halves of the holding
cord, crossing right over left.
Step
6:Repeat
step 4 starting with cord
A. Keep the loops between cord B
at all times.
Then make the loops with cord
B, placing them to the right and
left of cord A.
Tighten the holding cord first, followed
by cord A and then cord B.
Step 7:Repeat
steps 3 - 6 several times, to
continue making the Alternating Endless
Falls sennit.
Remember to always begin by switching the
working cords so the colors alternate
(steps 3 and 5).
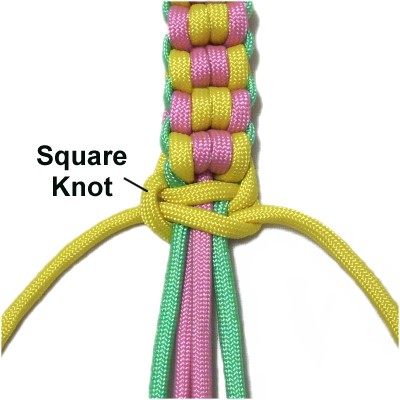
The best way
to finish the sennit is to tie a Square
Knot with the working cords
resting furthest to the left and
right. The other cords are the
fillers.
To see the
front of the sennit, turn it over.
By
using any text or images on Free Macrame
Patterns, you are agreeing to ourTerms
of Use