|
|
| |
|
|
| |
Description:
These Unique Mounting Designs can be used during
the mounting process, at the beginning of a
Macrame project.
They are created by making the primary knot
at the center of a working cord. The knot is
then attached to a holding cord, ring, or
dowel.
The three designs listed below show what you
can do with the Slipknot, the Figure Eight
knot, and Celtic Square Knot.
Other types of knots can be used in this
manner, so try experimenting after you have
practiced these designs.
Be sure to practice the Double Half
Hitch before you get started.
|
|
|
| |
|
|
Only the
mounts that feature KNOTS are on this
page.
Designs featuring simple loops can be
found on the page called Picot
Mounts.
Click on the image or link to visit that
page. |
|
|
|
|
| |
 |
|
Slipknot Mount
|
|
|
|
|
|
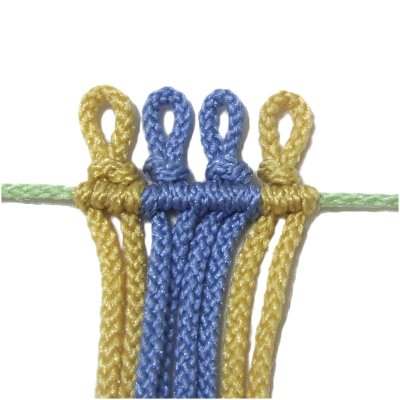
Unique mounting designs are often selected
because they have loops. In this design,
the Slipknot
is attached to a holding cord.
You will need one working cord for each
Slipknot you plan to make. You also need
one holding cord. When practicing, you
only need 12 - 15 inches of material.
|
| |
| |
| |
|
|
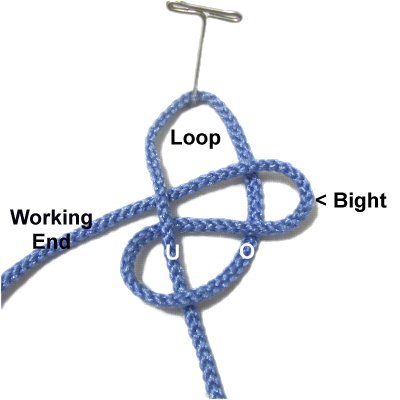
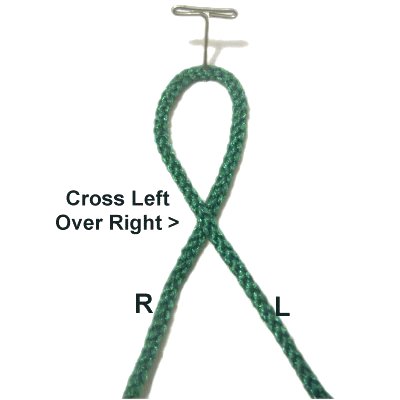
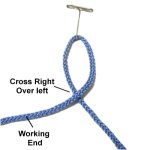
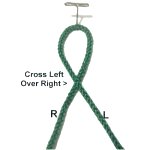
Step 1: Fold the working
cord in half. Make a loop,
crossing right
over left.
The working end is the segment on the
left.
|
|
| |
|
| |

|
|
Step 2: Fold the
working end to form a bight,
then push it through the loop from below
(under - over).
Tighten the loop by pulling on the
ends and the bight.
|
|
| |
|
| |
|
|
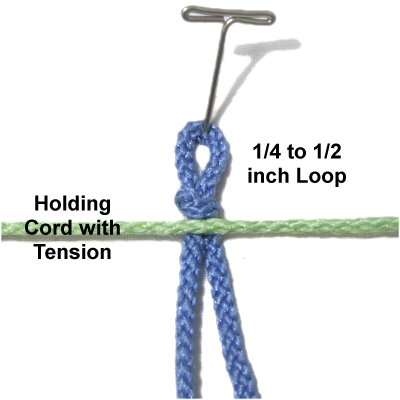
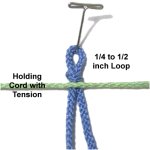
Step 3:
Arrange the holding cord
horizontally. Make sure it
is stretched so it has tension.
Place the Slipknot next to it, and adjust
the size of the loop. It should be
1/4 to 1/2-inch tall, depending on the
size material you are working with. Secure the
loop. |
|
| |
| |
|
|
|
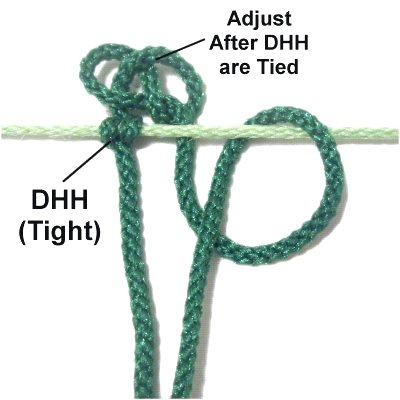
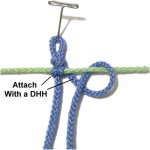
Step
4: Attach both halves of
the working cord to the holding cord with
a Double Half Hitch (DHH).
Tighten the knots firmly, so there are no
gaps between the Slipknot and the holding
cord. |
|
|
|
|
|
|
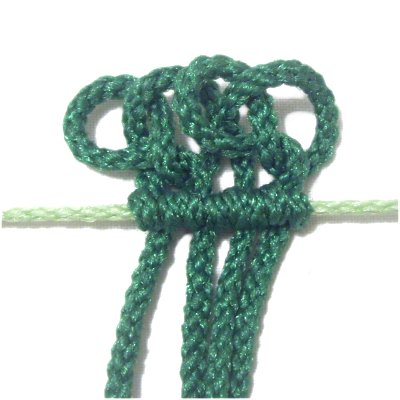
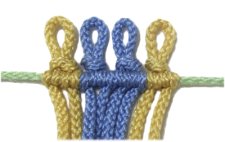
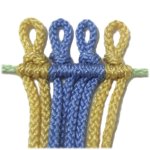
Step
5: Repeat
steps 1 - 4 with additional
cords.
When using any of these unique Mounting
Designs in a Macrame project, you will
probably be mounting more than one
cord. When you are just practicing,
this step is optional.
|
|
|
|
|
| |
|
| |
Figure
Eight Mount
|
|
|
|
|
Many unique mounting
designs can be made with loose knots rather than
ones that are firmly tightened, like the Slipknot
you just practiced
This design is based on the Figure 8 knot.
Because it's wide rather than tall, the knots will
overlap slightly if you mount more than one cord.
You need one holding cord and one or more working
cords. They should be at least 15 - 18
inches long if you are practicing.
|
| |
| |
|
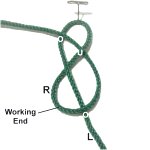
|
Step
1: Make a loop in the center
of the working cord, crossing left over
right.
The right half is the working end for the
next step. |
|
| |
|
| |
|
|
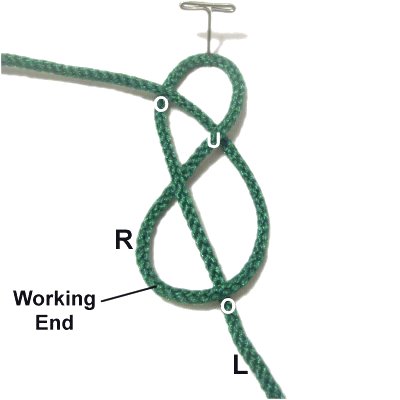
Step 2: Move the
working end (right half) to the right,
passing over the left half of the cord.
Bring it to the first loop, and pass it
through from below (under - over).
Tighten the knot until it's the size you
want.
|
|
| |
|
| |

|
|
Step 3: Arrange a holding
cord on your work surface horizontally.
Make sure it has tension.
Place the Figure Eight knot close to
it, arranged sideways.
Attach both ends to the holding cord
with Double Half Hitches. Continued
Below
|
|
| |
| |
|
|
|
Balance and
adjust the two loops of the Figure 8 knot,
leaving a little space between it and the
holding cord.
Repeat
steps 1 - 3 if you wish to mount
more cords. They will partially
overlap each other due to the width of the
knot. |
|
|
|
|
|
|
|
Celtic Square Mount
|
|
|
|
|
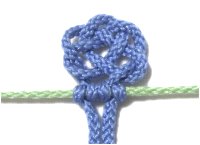
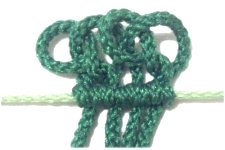
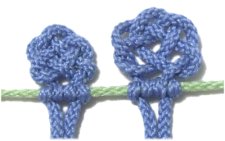
Description:
Unique mounting designs can be made with Celtic or
Chinese knots. This one features the Celtic
Square knot, which can be made small, or larger
with more open spaces (shown above).
You will need one working cord, at least 18 inches
long, and one holding cord. |
|
|
|

|
|
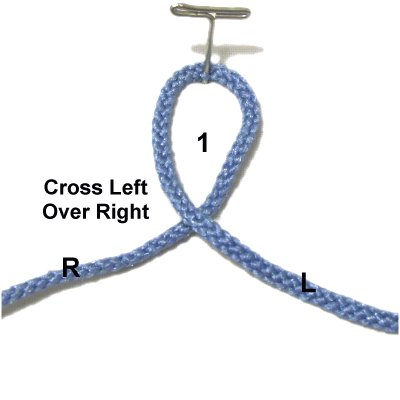
Step
1: Make a loop in the
center of the working cord, crossing left
over right. |
|
|
|
 |
|
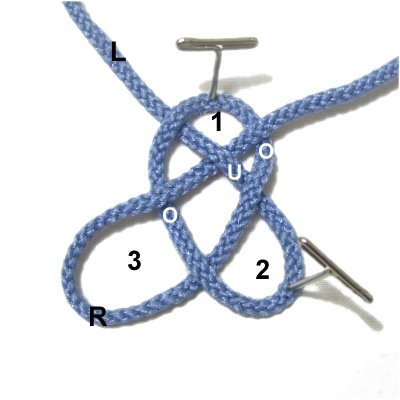
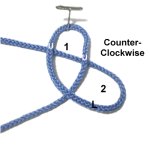
Step
2: Move the left
half of the cord around in a counter-clockwise
direction, making loop 2.
Pass it under
both sides of loop 1 as you bring it to
the left.
|
|
|
|

|
|
Step
3: Move the right
half of the cord around in a clockwise
direction, making loop 3.
Pass it over
- under - over loop 1 as you
bring it to the right diagonally.
|
|
|
|

|
|
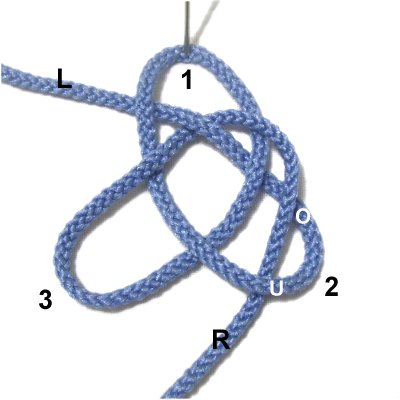
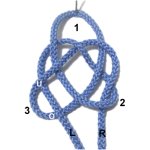
Step
4: Make sure you can
clearly identify the two lower loops (2
and 3).
Bring the right
half of the cord down to loop 2,
and pass it through from the top (over
- under).
|
|
|
|
 |
|
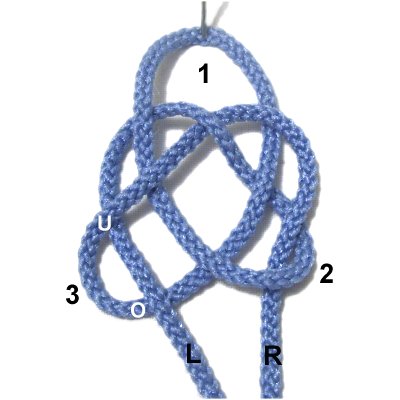
Step
5: Bring the left
half of the cord down to loop 3,
and pass it through from below (under
- over).
Tighten and balance the knot until it's
the size most appropriate for what you are
making. When practicing, it can be
any size.
|
|
|
|

|
|
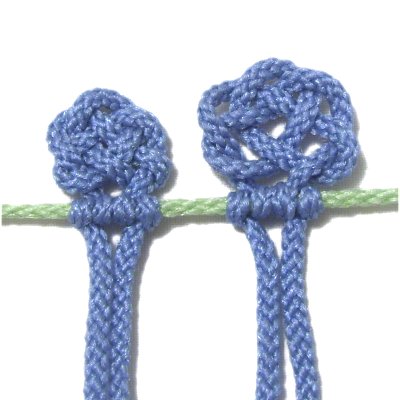
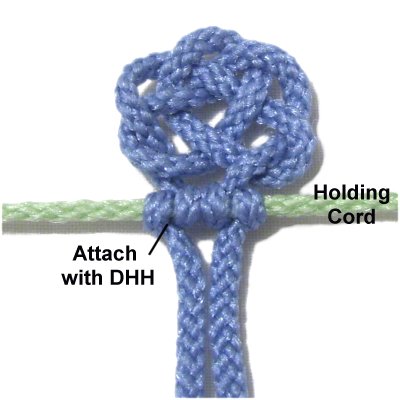
Step
6: Attach the Celtic Square
Knot to the holding cord with DHH.
|
|
|
|
|
|
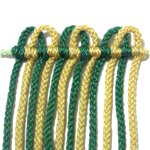
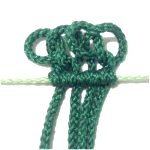
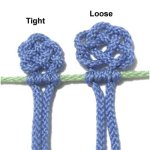
Step
7: Repeat
steps 1 - 6 with additional cords
(optional).
These are different sizes so you can see a
loose knot versus a tight one.
|
|
|
|
|
|
|
| By using any
text or images on Free Macrame Patterns, you are
agreeing to our Terms of Use |
|
|
|
|
Have
any comments about Unique Mounting Designs? Contact
Me.
|
|
|
|
|
| |
| |