Description:
The Triangle Knot Bracelet is a
Micro-Macrame design featuring the vintage Triangle knot.
In the center is a Triangle knot made with doubled
cords. You can tie other types of knots in
that area, or add a bead. The closure is a
simple bead clasp.
I recommend you practice tying this decorative
knot (both directions), before creating this
Macrame bracelet.
Two shades of Satin cord material was used in the
example shown. When using this type of
material, be sure not to pass pins through
it.
LEAN
the pins over the cords or use tape.
Cut two cords of each
color, at least 9
times the finished size of the Triangle
Knot Bracelet. So for a 7-inch bracelet, the
cords need to be at least 63 inches.
Prepare the ends to prevent unraveling.
Secure the cords vertically on your board.
Apply a piece of tape so the center
of the cords is at the top
edge.
Arrange them 1 Color B
-- 2 Color
A -- 1
Color B.
One cord of
each color will be used to tie the first
two knots.
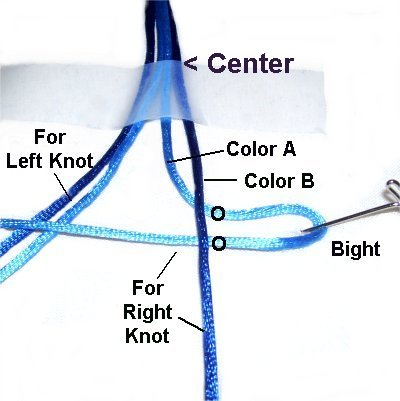
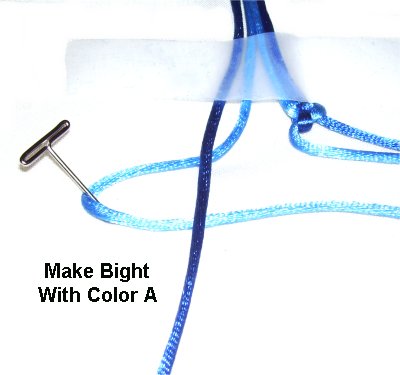
Push aside the two cords on the left,
so you use only the two on the right for this
knot.
Step 1:
Make a bight with the color
A cord, pushing it to the right.
Secure it by leaning the pin over the
folded area.
Position the color
B cord so it passes
over the bight.
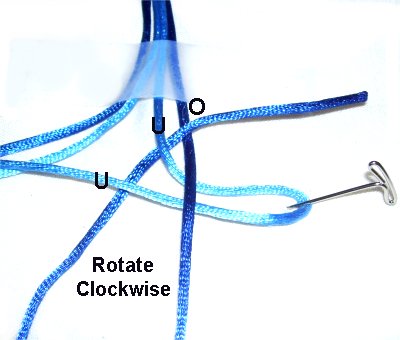
Step
2: Rotate the color
B cord clockwise,
and pass it under
the horizontal portion of the color
A cord.
Bring it to the area above
the bight, just below the tape.
Pass it under
- over the two cords, heading
right.
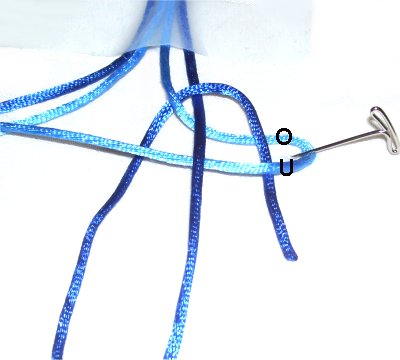
Step
3: Pass the end of the color
B cord through the bight, over
- under the two segments.
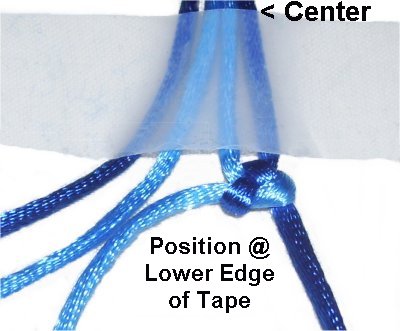
Step
4: As you tighten the
first Triangle knot, slide it up so it's
positioned at the lower edge of the tape.
Tighten it firmly, especially if you are
using Satin.
Step
5: The Triangle Knot
Bracelet requires you to tie the knots in
both directions. So now it's time to
make the knot on the left, using the two
cords you pushed aside earlier.
Use the color
A cord to make a bight, pulling
it to the left. The color
B cord should pass over
it vertically.
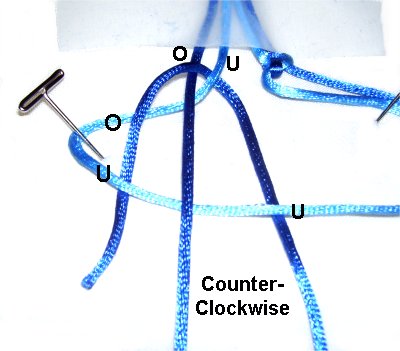
Step
6: Rotate color
Bcounter-clockwise,
as you bring it under
the horizontal portion of color
A, then to the area above the
bight.
Pass through the two cordsunder
- over. Bring the end down
to the bight, passing through over
- under.
Tighten the knot so it rests across
from the first one.
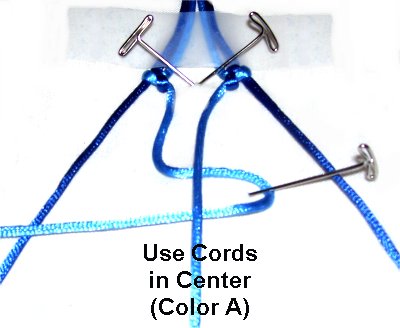
Step
7: Alternate the cords, by
using only the two color
A cords in the center of the
group.
Repeat
steps 1 - 3 to tie the next
Triangle Knot. When you tighten it, there
should be a small amount of space between
it and the knots above.
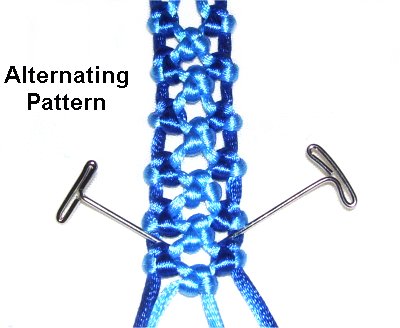
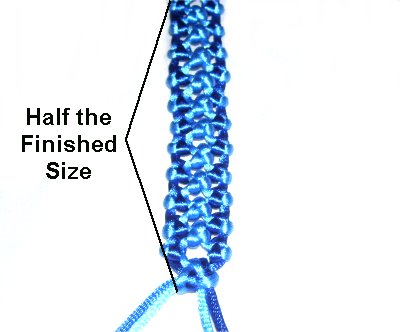
Step
8: Repeat
steps 1 - 3and
5 - 7 several times, until the
Triangle Knot Bracelet is HALF
the finished sizeyou need, minus
1-inch.
You still
have one knot to tie.
Important:
Make sure you end on step
6, so there are two knots in the
last row.
Step
9: Use two
cords together on the left and
the right to make the final Triangle knot
in the first half of the bracelet.
Repeat
steps 1 - 3, tying the knot just
like all the others, but use all four
cords.
Measure the
bracelet design from the first to the last
knot. It should be 1/2
the size you want the bracelet to
be when it's finished.
So if you are making a 7-inch bracelet,
the first half should be 3.5 inches.
You can temporarily untie the doubled knot
to add or subtract knots.
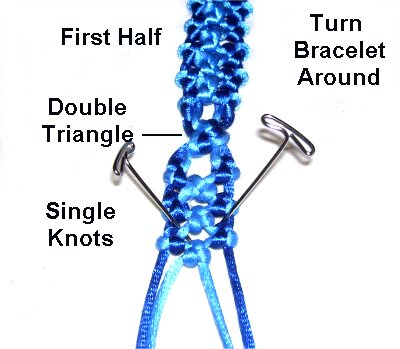
Step
10: Turn the Triangle Knot
Bracelet around, so you are working from
the center to the opposite end.
Repeat
step 9 to make another double
Triangle knot. Place it at the center,
where the top
of the tape was resting. There
should be 1/4-inch
of space above and below it.
Step
11: Repeat
steps 1 - 3 and 5 - 9 to make
the second half of the bracelet. It should be the same
size as the first half.
Make
sure you end with the doubled knot.
Step 12: Move
the color
B cords to the back
of the bracelet (inside surface).
Apply glue to adhere them to the back of the
knots, for about 1/2 inch. Trim as needed.
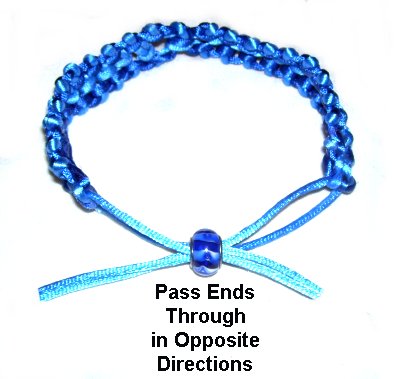
Pass the ends of the color
A cords through the bead in opposite
directions.
So two go in left to right, and the others
right to left.
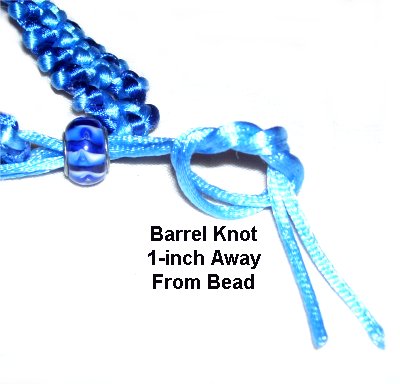
Step
13: Close the Triangle Knot
Bracelet by pulling on the ends.
Tie a loose
Barrel Knot approximately 1-inch away from
the bead, using 2 ends working together
(each side).
Try the bracelet on to verify you can get your
hand through when it's spread open
completely. Move the knots as needed.
When the knots are in the proper position, apply
glue on the inside
and then tighten them firmly. Cut off the excess
material.
By using any
text or images on Free Macrame Patterns, you are
agreeing to ourTerms of Use