|
|
| |
 |
| |
| |
|
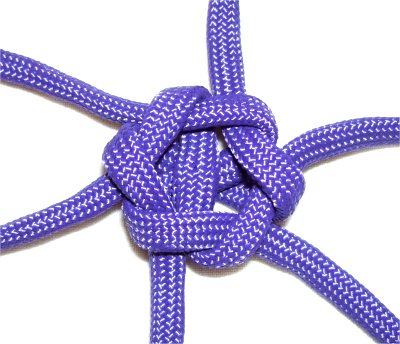
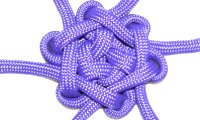
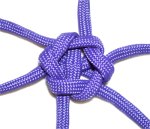
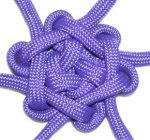
Description: The Star Knot is
sometimes called the Daisy
Knot or Flower
Knot.
It's a very interesting Celtic knot, and is not
frequently seen in Macrame projects.
There are two Crown Knots
present. They are tied in opposite
directions, and include several linked loops.
It has elements similar to a Triskelion
Knot, which is another type of
Crown Knot design.
This knot is a good project for beginners and
children, since it can be used as a pendant,
ornament or hair decoration.
You will need a project board and pins to
successfully create this decorative knot.
|
| |
|
|
| |
|
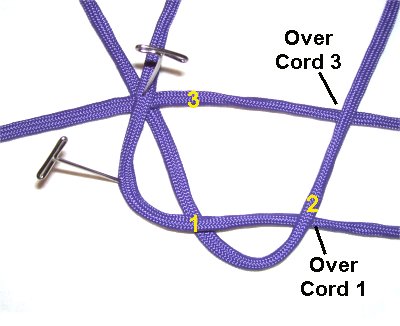
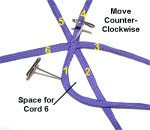
Step 1: To practice the Star
Knot, you need 3 cords, each at
least 36 inches long.
Place 2 of them in an X
shape, and one horizontally, matching
the centers. Secure them to your board at the
center.
Mentally number the
segments 1 - 6, moving counter-clockwise,
as in the image below.
|
| |
|
| |
 |
|
Curve cord
1 to the right,
passing over
cord 2.
Secure it with a pin at the curve,to
mark the space where cord 6 will pass
through.
|
|
| |
|
| |
 |
|
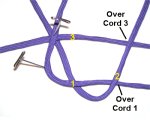
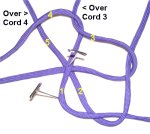
Step 2: Curve cord
2 backward,
passing over
cord 3.
Make sure cord 1 remains in place, so
cord 2 passes over it as well.
|
|
| |
|
| |
 |
|
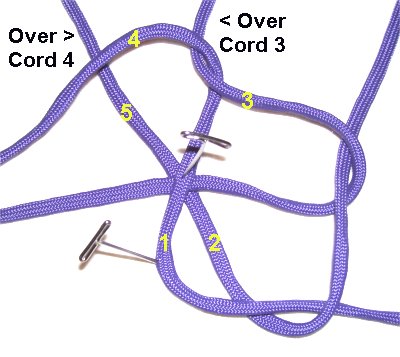
Step 3: Curve cord
3 towards the left,
passing over
cord 4.
Make sure cord 2 remains in place so
cord 3 goes over it.
|
|
| |
|
| |
 |
|
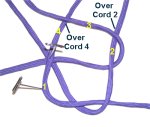
Step
4: Curve cord
4 so it passes over
cord 5 on the left. It will go over cord
3, too.
|
|
| |
|
| |
 |
|
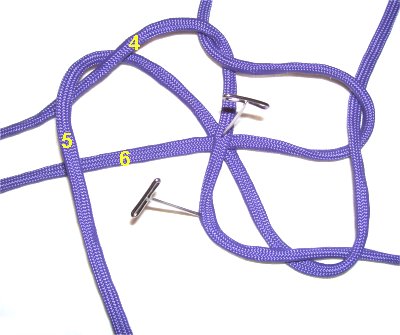
Step 5:
Curve cord
5 forward,
passing it
over
cord 6 and cord 4. |
|
| |
|
| |
 |
|
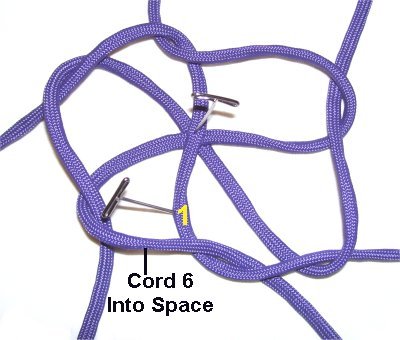
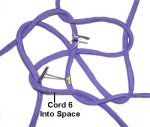
Step 6: Bring cord
6 over
- under cord 1 so it passes
through the space.
|
|
| |
|
| |
 |
|
Tighten the knot by pulling on the
ends.
This area will sit in the center
of the Star Knot, so you can make it any
size. The remainder is formed around it.
|
|
| |
|
| |
 |
|
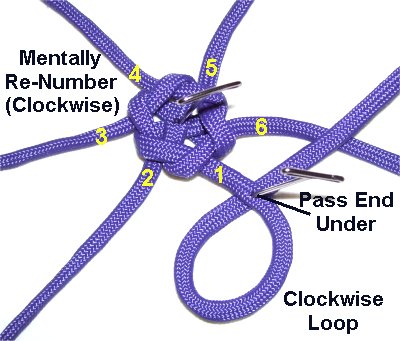
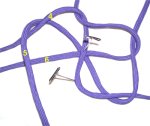
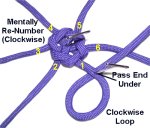
Step 7: Mentally
re-number the cords, moving in a clockwise
direction.
Make a clockwise
loop with cord
1. Pass the end under
to make the crossing point.
|
|
| |
|
| |
 |
|
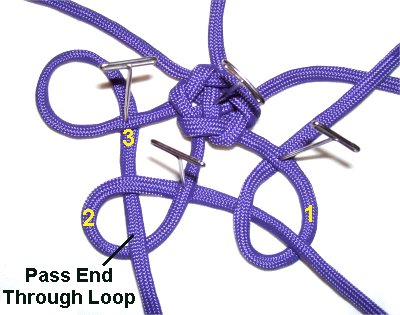
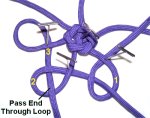
Step 8: Make a clockwise
loop with cord
2. Pass the end under
to make the crossing point.
Pass the end of cord 2 through loop
1 under
- over (from below)
|
|
| |
|
| |
 |
|
Step 9: Make the next
loop with cord
3. Bring the end through
loop 2,
from below.
Continue on in this manner, until there
are loops made with all 6 ends. The
final step is to pass cord
1 through the loop made by cord
6.
|
|
| |
|
| |
 |
|
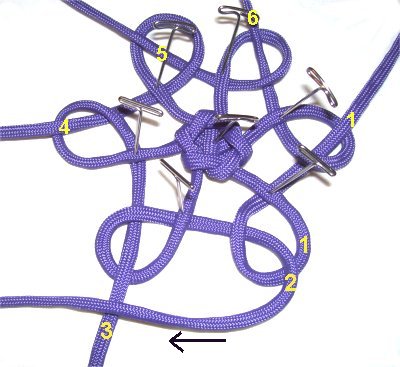
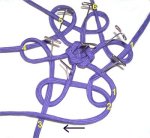
Step 10: Now you will
make the final area of the Star Knot,
which is another Crown knot. Only this
time, you rotate clockwise
as you form it.
Start with cord
2, which is the end coming out
of loop 1. Move it left,
passing over
cord 3.
|
|
| |
|
|
| Design
Tip: As you construct this section
of the knot, the cords can either rest beside the
loops or on top of them, whichever is easier for
you. |
|
|
| |
 |
|
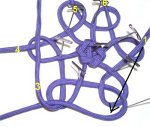
Step 11: Locate cord
3, which comes out of loop 2,
and pass it over
cord 4.
Continue on, passing cord 4 over 5,
then 5 over 6, and cord 6 over 1.
The final step is to pass cord 1
through the curved area made by cord 2
(arrow).
|
|
| |
|
| |
|
|
To tighten the Star Knot, begin by
pulling on all the ends
so the second
Crown knot is slightly smaller.
Next, reduce the size of each loop.
Once they surround the first
Crown knot, you can then tighten the
second one more.
|
|
| |
| |
|
|
|
| By using any
text or images on Free Macrame Patterns, you are
agreeing to our Terms of Use |
|
|
| |
|
Have
any comments about the Star Knot? Contact
Me.
|
|
|
|

|
|
| |