Description:
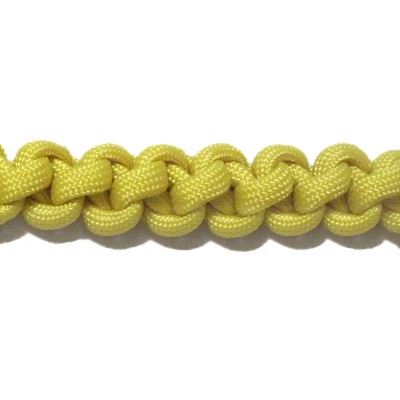
The Spring Sinnet is based on the Slipknot.
You tie a series of them in a chain,
which is called a sinnet (or sennit).
The best thing about this design is that you can
stretch it temporarily, then release it and watch
as it springs back into it's original shape.
This knotted design makes a great bangle bracelet,
since it stretches 1-inch or more beyond the
finished size. Below the main instructions
are steps that show one method to connect the two
ends to make a bracelet.
This sennit has a round profile (not flat), so can
be made with heavy rope to make a Macrame
wreath. Use fine material and you can create
earrings with this unique design.
Children will find this knot easy to tie, so
encourage them to practice this knot as they learn
Macrame.
The video gallery contains tutorials for a
variety of combination knots and
techniques.
To practice,
you need one cord at least 72 inches long.
When making a project with the Spring Sinnet
technique, the cord needs to be at least 15
x the finished length you plan to make.
Paracord was used in the example shown.
Visit Cord Preparationand view the bottom section to learn how to
prepare this material if you plan to use it.
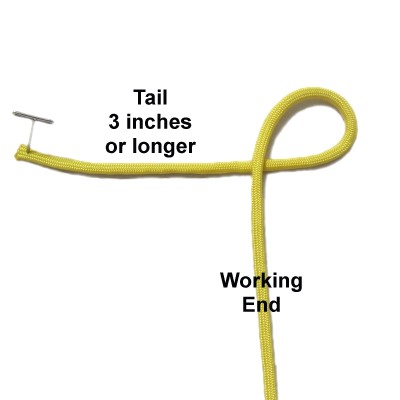
Step
1: Make a counter-clockwise
loop at
least 3 inches from one end,
which is considered the tail.
You can make the tail longer if you plan
to tie the ends together to form a
closure, such as for a belt or bracelet.
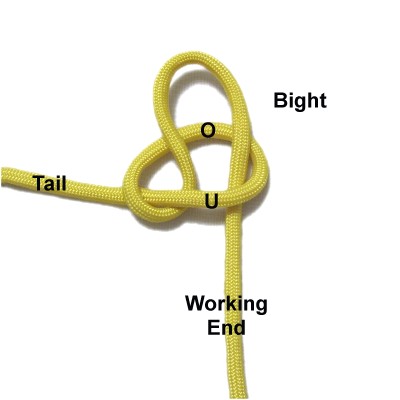
Fold the
working end to make a
bight.
Pass it through the loop under
- over (from below).
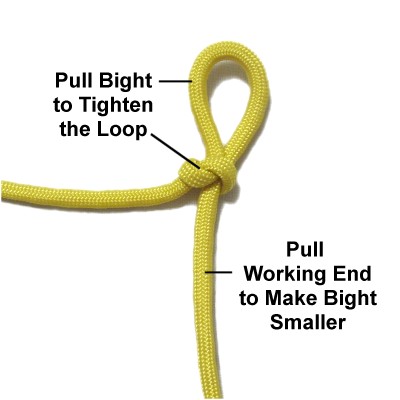
Tighten the
first loop by pulling on the bight.
As you do this, adjust the length of the
tail if needed.
Pull the working end to make the bight
smaller, at least 1/2-inch in size.
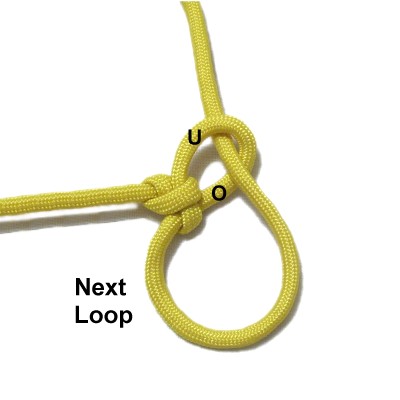
Step
2: Pass the working end
through the bight from the top (over -
under).
Pull it through most of the way, but leave
a small portion to form the next loop.
Pull the area
indicated in this image to tighten the
bight.
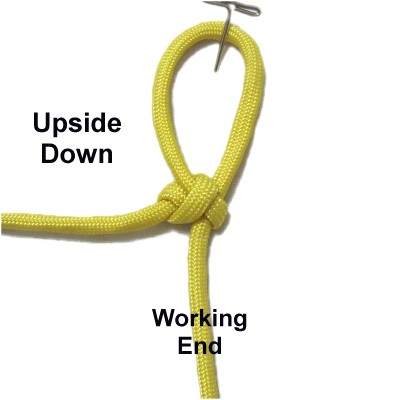
This
is the most important step for the Spring
Sinnet:
Flipthe
knot upside
down, so the loop is closer to
the back of your board and the working end
is on the right.
Pull the working end to reduce the size of
the loop. Work with the material to
make sure it's not twisted.
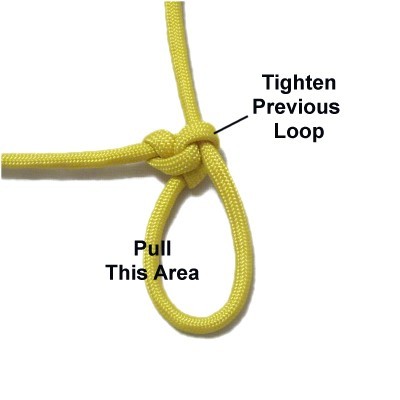
Step 3:
Pass the working end through the
loop.
Pull it through most of the way, but leave
a small amount for the next loop.
Pull the area
indicated to tighten the previous loop.
Turnthe knot upside
down, so the working end is on
the right again.
Pull the working end to reduce the size of
the loop. Make sure it's not
twisted.
Step
4:Repeat
step 3 several times, or until
you are almost out of material.
Make sure the working end is long enough
to use for a closure if you need one (see
finishing options).
Finishing Options
The following information shows you three
methods for finishing the Spring Sinnet and
forming a closure if you need one.
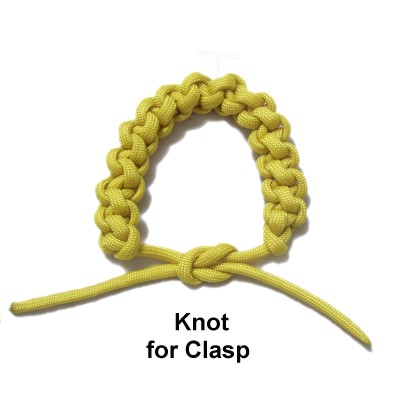
Option 1:
Best for bracelets and belts where you tie the
ends together to close.
Option 2: Works
well for items like wreaths and ornaments, but can
also be used for jewelry.
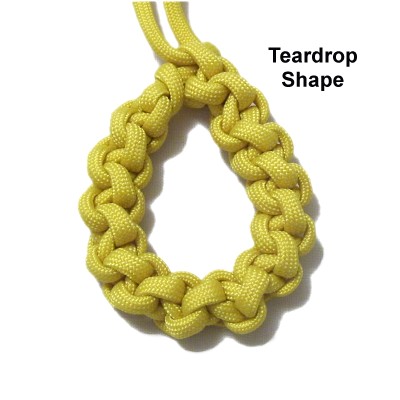
Option 3:
Results in a teardrop shape, so it's suitable for
pendants, ornaments and earrings.
Option
1: Pass the working end through
the last loop you made in the sennit. Pull
the area indicated to tighten that loop.
Then pull the working end all the way
through.
Tie the two
ends together with a knot to form the
closure.
Make sure you treat the tips of the cord
in some way to prevent unraveling.
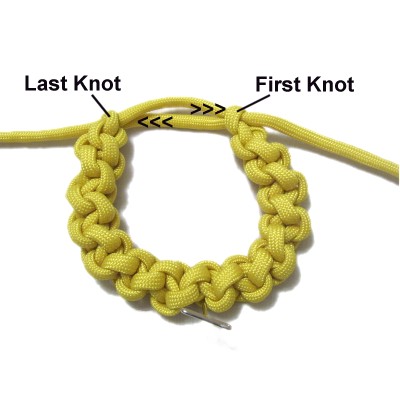
Option
2: Pass the working end
through the last loop, then tighten
it. Pull the working end all the way
through.
Pass the working end through a space close
to the first knot. Pass the tail
through a space close to the last knot,
heading the opposite direction.
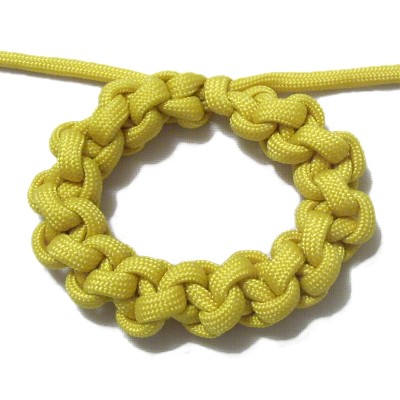
Pull both ends
to close the circular shape.
Finish off the ends in the best manner for
the type of material you are using.
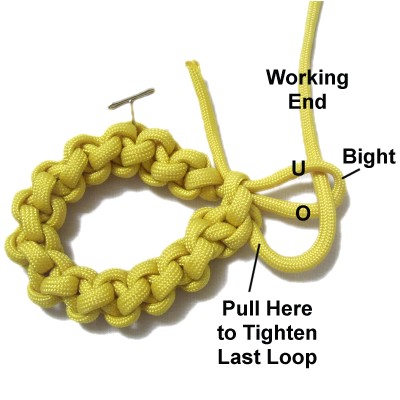
Option
3: Fold the
tail to make a bight, and pass it
through the last loop under
- over (from below).
Pass the working end
through the bight. Pull the area
indicated to tighten the last loop FIRMLY.
Pull the tail
to tighten the bight, then pull the
working end to tighten the remainder.
Arrange the
Spring Sinnet into an oval or teardrop
shape.
Finish off the ends in the best manner for
the material you are using.
By using any
text or images on Free Macrame Patterns, you are
agreeing to ourTerms of Use