Description:
The Spiral Knot has the folded elements you see in
other Chinese knots. It's similar to
the Good Luck Knot
and the Tea Cup Knot.
There is a triangular design in the center with
three loops surrounding it.
It makes a very unique pendant if you leave a loop
at the top as shown above. You can also decorate
the ends of the cord and use the design as a
holiday ornament.
When you construct this knot, curve the cord
rather than fold it, so it lies flat when you are
finished.
This knot can be found on the Fusion
Knots website.
Click on the link or image to visit the
website. The video gallery contain
tutorials for many unusual knots.
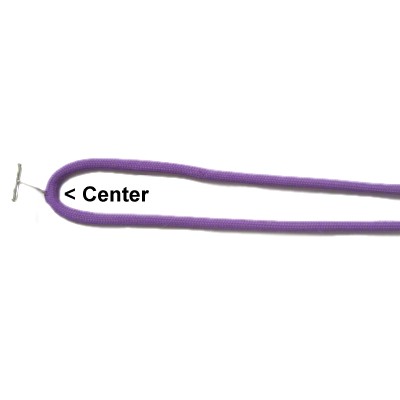
Step
1: Fold a 60-inch cord at
the center and secure it to your board horizontally
with the fold on the left.
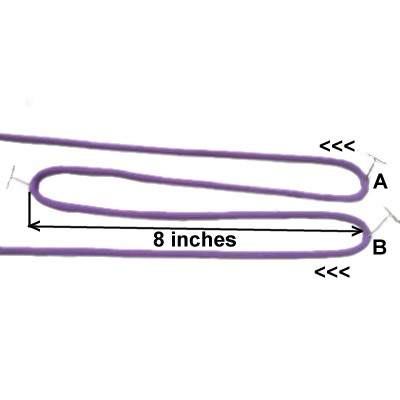
Fold both halves again to make two
bights, moving the ends to the left.
Enlarge the bights to 8
inches long, then secure them
close to the center fold.
Mentally label the two bights A and B
as shown.
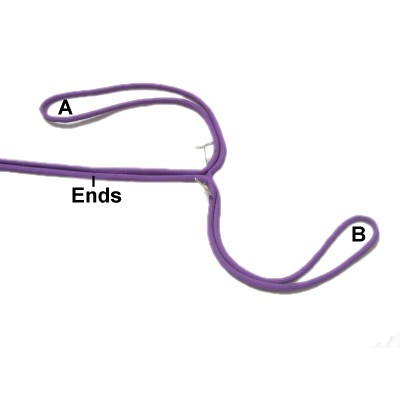
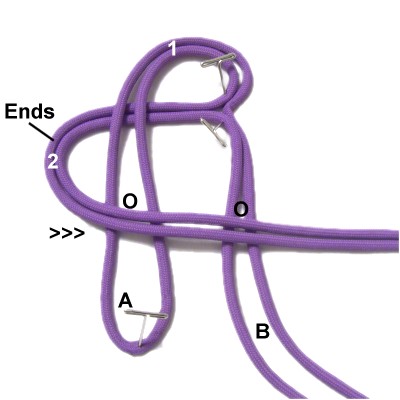
Position the three segments as shown,
with the ends
remaining on the left.
Bight
A should be curved to the left,
and bight
Bcurved to the right.
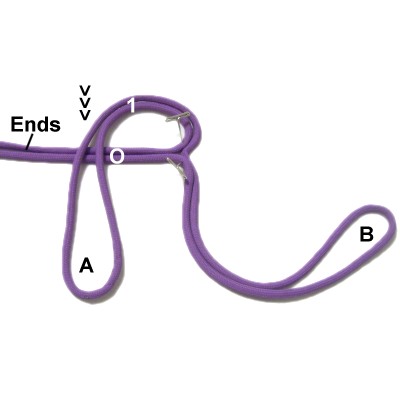
Step 2: CURVE bight
A forward vertically, passing
it over
both ends.
The curved portion should be labeled area
1.
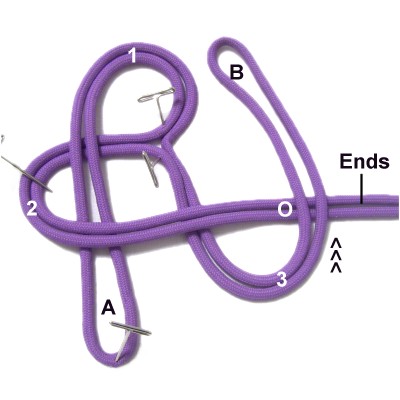
Curve the ends
towards the right, passingoverbights A and B.
Mentally label the curve as area
2.
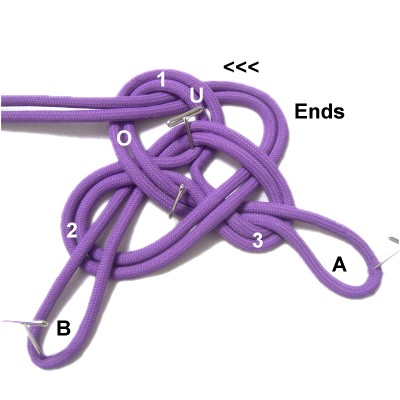
Step
3: Curve bight
B backward, passing over
the ends.
Mentally label the curve as area 3.
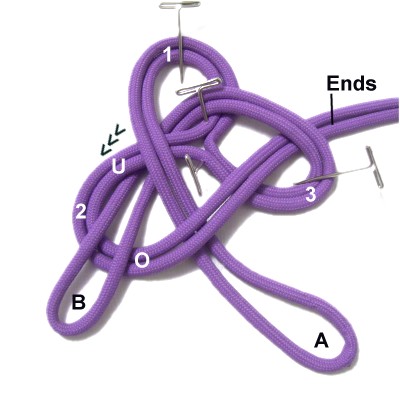
Pass bight
Bover
- underarea
1, heading right
to left diagonally.
Pull the ends and bights to tighten the
knot slightly.
Step 4: Move bight
B forward
diagonally, passing it under
- overarea 2.
Do
not cross over bight A. Bight
B should rest to the left of it.
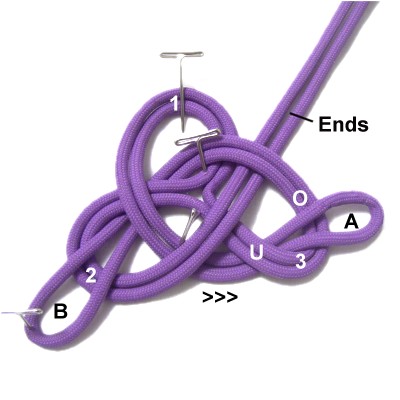
Step 5: Move bight
Aunder
- overarea
3 heading left to right.
Bight A should should notcross over the
ends.
Step
6: Move the endsunder
- overarea
1 heading right to left.
Turn the knot
over
so you can see the front.
One of the bights can be left large if you
want a loop for hanging (optional). Reduce
the size of the loop to suit your project.
Tighten the rest of the Spiral Knot
gradually.
By
using any text or images on Free Macrame
Patterns, you are agreeing to ourTerms
of Use