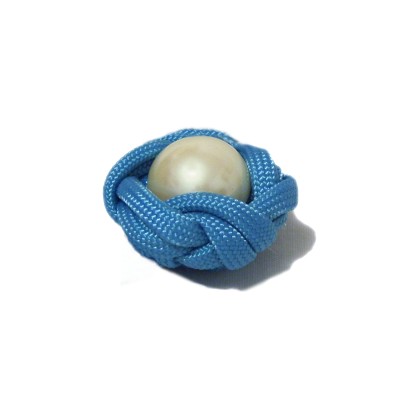
Description: The Tea Cup Knot
is a 3-D design that can actually hold something
small, since it stands up above a surface.
This cup-shaped decorative knot is a fun
project on it's own, but it can also be used as
part of other Macrame designs, such as flowers.
You can use it as a necklace pendant, placing a
stone or cabochon inside and securing it with
glue. The white object in the image above
is a cabochon with a flat back.
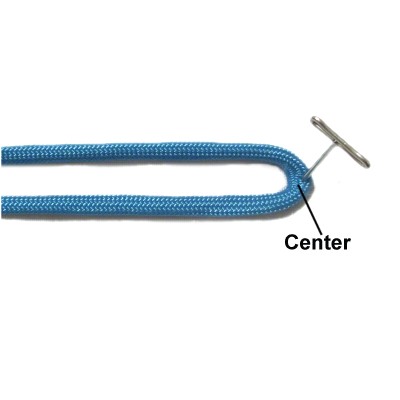
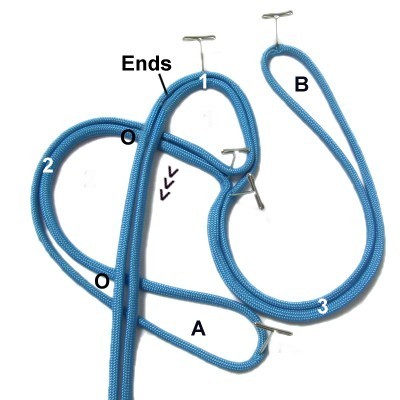
Step
1: Fold a 60-inch cord in
half and secure it to your board
horizontally, with the fold on the right.
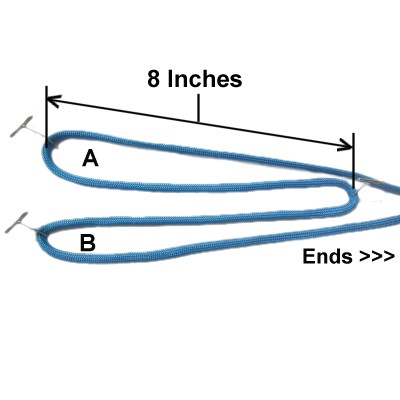
Fold each half
and move the ends
right, forming two bights. Adjust
the size so they are 8
inches long.
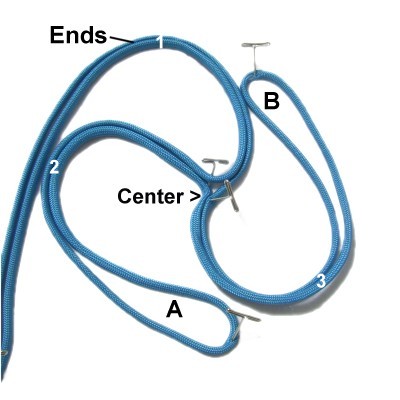
Mentally label both bights and the ends
as shown.
Secure the center area.
Curve the ends
so they are heading left and forward.
Mentally label the curve as area
1.
Move
bight
A to the left toward the ends,
then curve it to the right.
Mentally label the curve as area
2.
Curve
bight B backward and
toward the ends. Mentally label
the curve as area
3.
Designer's
Tip: Here's a reminder of the terms
used in the directions for the Tea Cup Knot, in
case you are not familiar with them:
Backward =
Toward the back of the board
Forward
= Toward the front of the board
Ends
= Segments that lead to the ends of the cord
Bights
= Folded segments
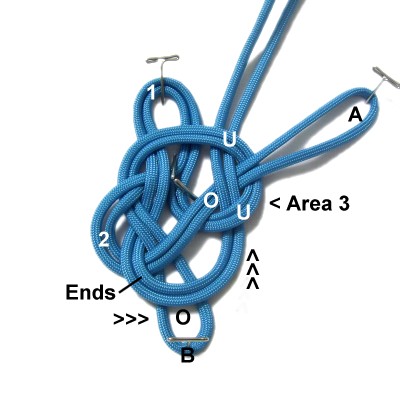
Step 2: Curve the ends
forward, passing them over
bight
A at 2 points -- before and
after area
2.
Move bight
A to the right, passing overbight
B at two points -- before and
after area
3.
Move bight B
backward and to the left.
Place
itover
the ends
at two points -- close to the center
of the knot and near area
1.
Step 3: Move bight
B forward toward area
2.
Weave under
- over - under the three
segments in that area, which includes
the ends as well as bight A. Exit the
area to the right of the ends.
Area 3
will likely change size (smaller), so
reposition bight A over it.
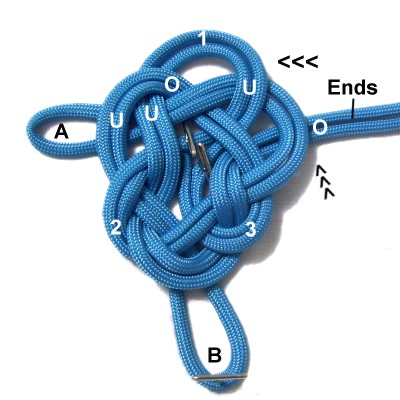
Step 4: Move the ends
to the right, passing overbight
B.
Weave through area
3, under
- over - underthe
three segments, which includes bight
A.
Exit to the left of bight A.
Step 5: Bring bight
Aoverthe ends
heading
backward toward area
1. Move the ends
right as needed.
Weave under
- over - under - underthe four segments in area 1,
heading right to left.
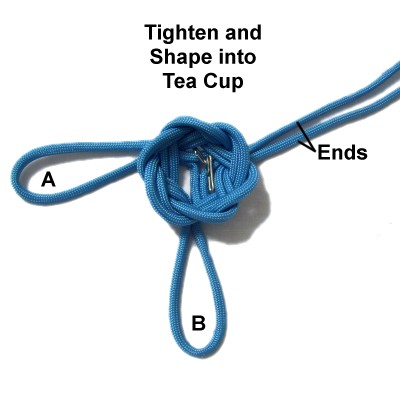
Step 6: Tighten the
Tea Cup Knot gradually, starting near
the center of the knot and working
towards the ends and folded areas of the
bights.
Form the knot into a cup by pushing
down on the center
area.
Press the knot
until it's flat and arrange it so the ends
and bights are in a Y shape.
Adjust the size and shape of the knot as
needed.
Turn the Tea
Cup knot upside down and mentally label
the bights
where they rest now (right and left).
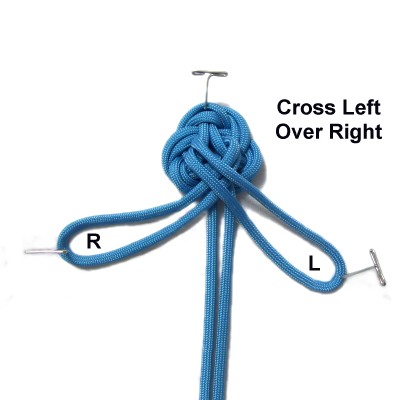
Step 7:
Cross the bights left
over right.
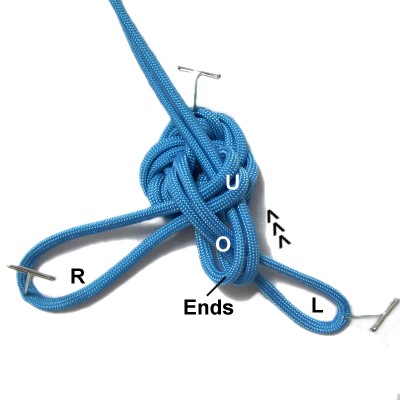
Move the endsover
the left
bight, which is on the right
now.
Pass them under
the right bight, close to the back
surface of the knot.
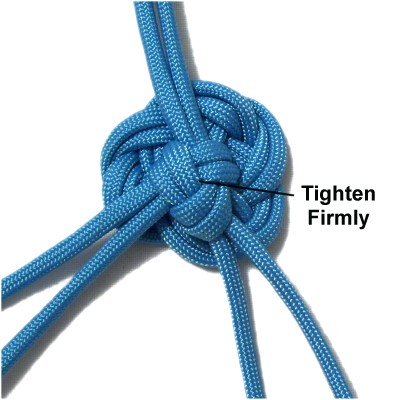
Pull
on the ends and bights so the triangular
shape is tightened firmly against the
bottom of the Tea Cup knot.
You can now use the ends and bights as
attachment points for other cords.
Another option is to finish off the
ends/bights by tucking them into the
lower part of the knot. Apply glue and
cut off the excess material.
By using any
text or images on Free Macrame Patterns, you are
agreeing to ourTerms of Use