|
|
| |
|
| |
| |
|
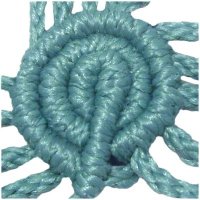
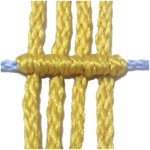
Description: The Spiral Design
is a very unique way of using Double Half
Hitches. The holding
cord determines the shape of any DHH
pattern. So by moving it in a circular path, the
bar will coil around the center point.
You could use this design to form the center of
a Macrame flower. By adding many colors,
you can form a rainbow spiral.
Be sure to use a project board and pins to help
control the cords. You can either spin the
knot as you construct it, or rotate the entire
board.
It's best to use 2mm to 4mm material to
PRACTICE this decorative knot. When using
this design in a Macrame project, use
1mm to 2mm size material, so the knots
are smaller. This will result in a much
neater design than what is shown here.
|
| |
|
|
|
Make sure you
practice tying Double Half
Hitches (DHH)
before you get started.
Try to tie the knots with one hand, while
controlling the holding cord with the
other hand.
Click on the image or link to visit that
page now. |
|
|
|
|
|

|
|
The ears for
the Shaggy Dog
project were made with the Spiral Design.
The nose was also made in a similar way,
coiling the knots around a bead.
Click on the image or link to view the
page. |
|
|
|
| |
| |
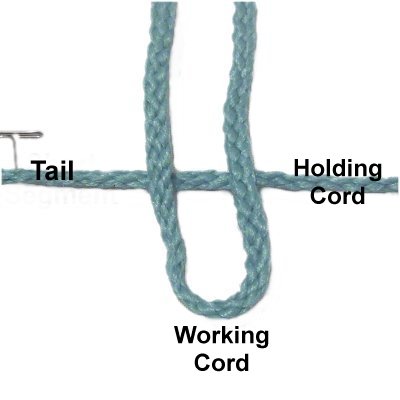
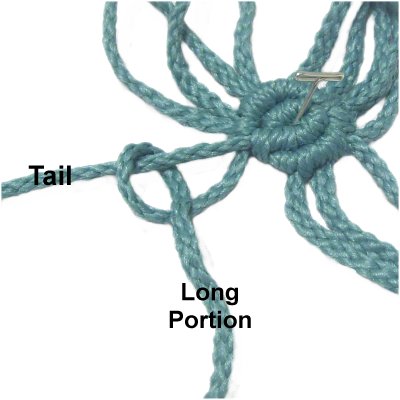
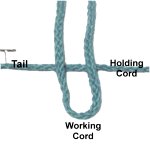
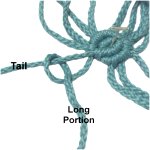
Step 1:
Place a holding cord on your board
horizontally. Approximately 6 inches
from the left end of the cord, secure it with a
pin. That end of the cord is considered the
"tail".
The remainder of the holding cord is called the
"long portion". It will be moved frequently
to form the Spiral Design. Roll it up or
mark it in some manner, so you can easily identify
it.
All the working cords are added using the Reverse
Larks Head knot, which is described in
the next two images:
|
| |
|
| |
|
|
Fold one
working cord in half and place it on
top of the holding cord.
It should be positioned close to the
secured tail. |
|
| |
|
|
|
|
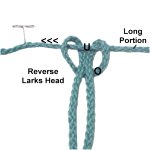
To complete the
reverse Larks Head knot, bring the ends under
the holding cord, and over
the folded area of the working cord.
Tighten the knot, then push it to the
left, so it's resting against the pin.
|
|
|
|
|
|
|
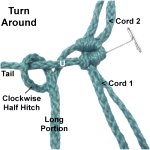
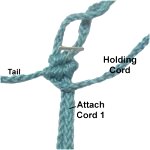
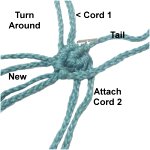
Step
2: Turn the board around,
so the short tail is on the right.
Attach another working cord to the holding
cord with a reverse Larks Head knot.
Move the second cord to the right, so it
rests against the first cord.
|
|
|
|
| |
|
|
Step
2: Curve the long
portion
of the holding cord to the right,
passing over
cord 2.
Attach both halves of cord 2 to
it with counter-clockwise
Double
Half Hitches (left to right).
The image shows a single Half
Hitch. Make sure you tie two.
|
|
| |
|
|
Designer's
Tip: A Half Hitch is tied by making
a loop over
- under the holding cord. The
working end passes over
to complete the loop.
Work with the material so it folds smoothly
around the holding cord. Tighten each knot
as much as possible, so they are all the same
size.
You will have better results if you pull the
holding cord taut with one hand, while tightening
the knot with the other hand. |
|
|
|
|
|
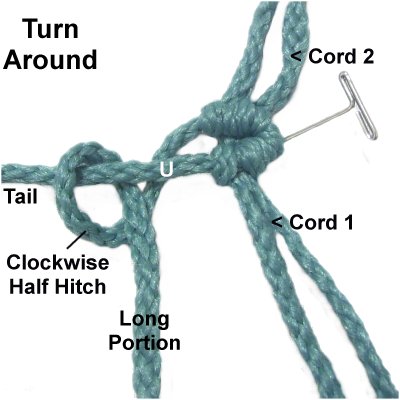
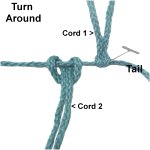
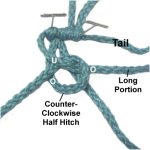
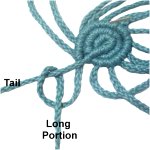
Turn the board
around again, so both parts of the holding
cord are on the right. Push the
knots close together.
Pass the long portion under
the tail, and attach it with a clockwise
DHH (right to left). |
|
|
| |
|
|
Step
3: Move the long portion of
the holding cord to the right, over
cord 1.
Attach both halves of cord 1 to it with
DHH, rotating counter-clockwise
(left to right).
|
|
|
|
Designer's
Tip: Notice the pin in the center
of the knot?
By placing it there, you can rotate the Spiral
Design rather than the entire board. |
|
| |
|
|
|
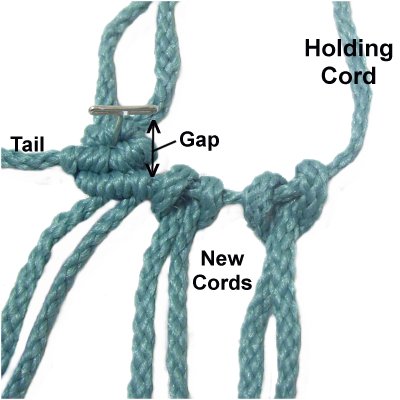
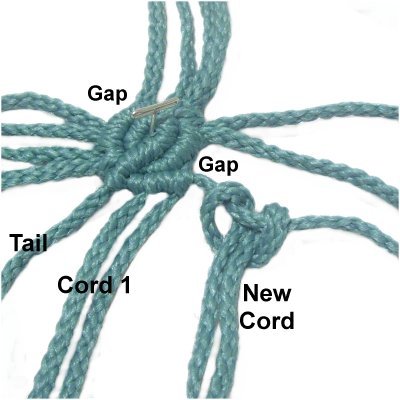
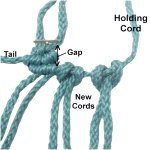
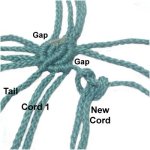
Step 4:
Note that there is a gap between working
cords 1 and 2.
You need to add one (or more) new cords to
span that gap, with reverse Larks Head
knots.
The amount you add depends on the size
material you are using.
|
|
| |
|
| |
|
|
Step
5: Turn the Spiral Design
so the new cords are on your left and cord
2 is in front of you.
Pass the long portion of the holding cord
over
cord 2.
Attach both halves of cord 2 to the
holding cord with counter-clockwise
DHH.
|
|
| |
|
|

|
|
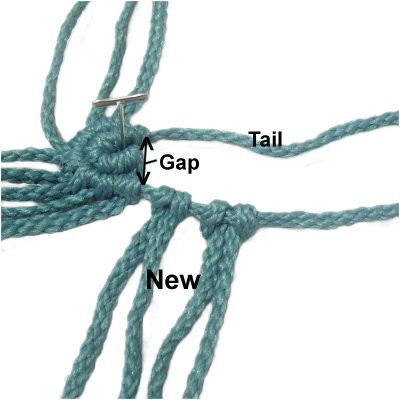
Step
6: There is another gap
where you need to add one (or more) new
cords.
In this case, 2 cords were added with
reverse Larks Head knots. |
|
|
| |
| |
|
|
Step 7: Turn the
Spiral Design (or board),
so both parts of the holding cord are on
the left.
Bring the long portion of the holding
cord under
the tail, and attach it with a DHH.
This completes row 2 of the Spiral
Design.
|
|
| |
|
| |
|
|
Step 8:
Start the third row by attaching both
halves of cord 1 to the holding cord with
DHH.
Attach ALL the other cords with DHH,
adding a new cord whenever there is a
gap. Usually you only need one
or two for the third row. |
|
| |
|
| |
|
|
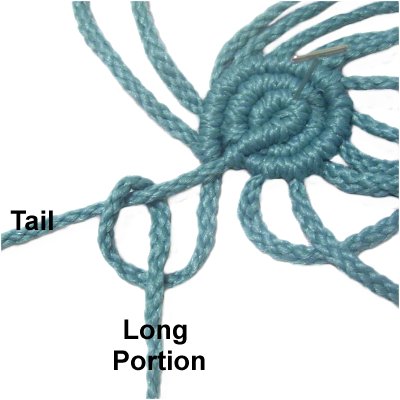
Step
9: Repeat
step 7, attaching the long
portion of the holding cord to the tail.
Repeat
steps 8 and 7 to make the Spiral
Design larger (optional).
|
|
| |
| |
|
|
|
By
using any text or images on Free Macrame
Patterns, you are agreeing to our Terms
of Use
|
|
|
|
|
Have
any comments about the Spiral Design? Contact
Me.
|
|
|
|

|
|
| |