Description:
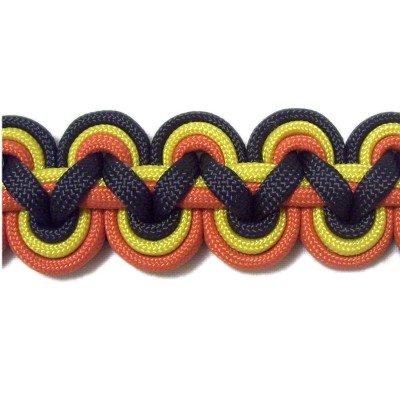
The Spectral Line Bar is a series of
Square knots tied in a unique way to produce a
wavy design featuring three contrasting cords.
The definition of
Spectral Line is: An isolated
bright or dark line in a uniform and continuous
spectrum of light.
This decorative knot definitely fits that
definition in that it has a dark zigzag line
running through the center of a bright wavelength
pattern representing the light.
Paracord is a great material to use when
practicing knots, but this design can be made with
other materials.
This
decorative knot was found on the Fusion
Knots website -- "Spectrally
Clustered Solomon Bar"
The
design described below has been slightly
altered from the original.
Click on the image or link to
visit the site.
Check out the video
gallery, which contains many
interesting knot patterns and techniques.
Preparation and Base
Preparation:
To practice,
cut one dark cord and two bright cords, each at
least 60 inches long. Prepare the tips to
prevent unraveling.
See Cord Preparation
for details on how to prepare Paracord properly,
if you plan to use it.
Multiply the finished
length by 10 if you are using the
Spectral Line Bar in a project. Cut the
cords to that length.
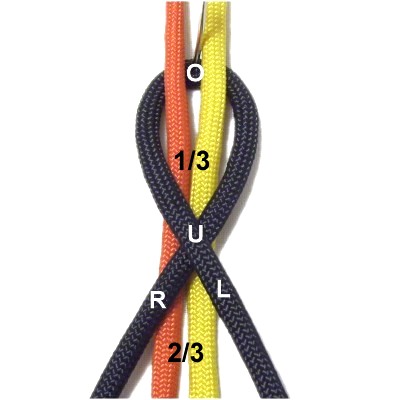
The Loop
Step
1: Make a loop in the
center of the dark cord, crossing left
over right.
Arrange the bright cords through it vertically,
passing under
the crossed area and over
the crook.
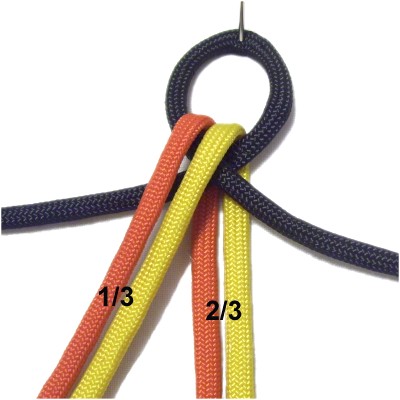
Step 1,
continued: Adjust the bright
cords so 1/3 of the length is in the portion
closest to the back of the board (behind the
crossed area).
The remaining 2/3 is in the portion closest to the
front of the board (in front of the crossed area).
Fold the short
portion of the bright cords
forward, arranging them to the left
of the long portion.
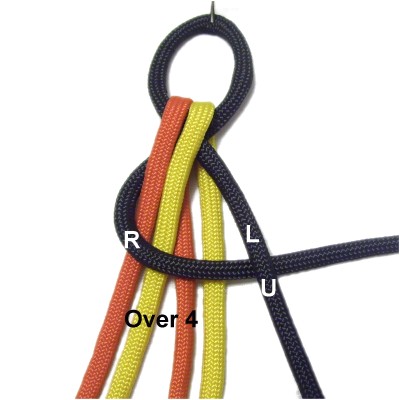
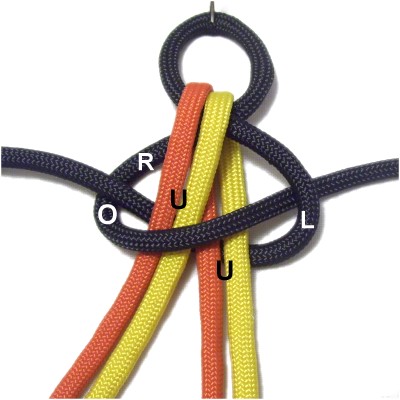
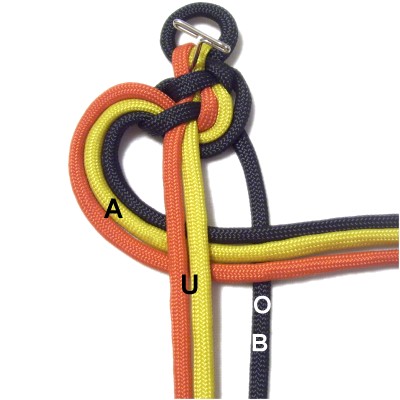
Step
2: Move the righthalf
of the dark cord to the right, passing over
the four bright cords.
Pass it under
the left half of the dark cord.
Move the left
half
of the dark cord under
the 4 bright cords, heading left. Pull it
out on the left, passing it over the
right half.
Adjust the size of the loop as you tighten
the knot by pulling on both halves of the
dark cord. Make sure the bright cords
don't change position.
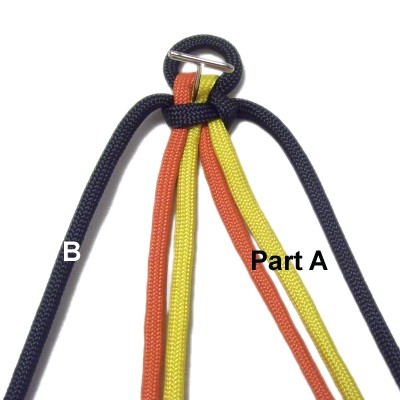
The short
portion of the bright cords on the left
are the fillers, so secure them
vertically. Mentally label the working
cords:
Part A
consist of three cords -- two bright and
one dark, which are now on the right.
Part B
is the single dark cord on the left.
Spectral Line Bar Design
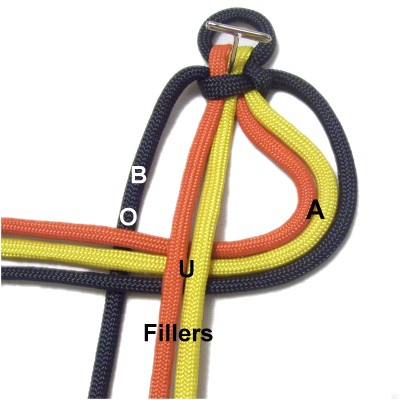
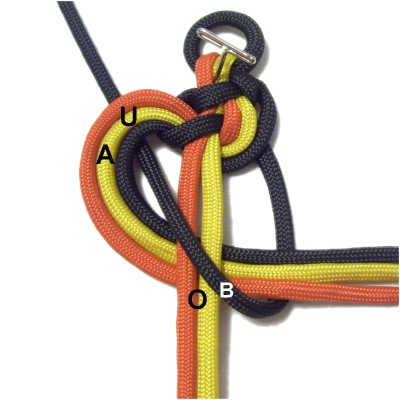
Step
3: Curve
Part A to the left, passing under
the two fillers cords horizontally.
Arrange them over
Part B.
Make sure the 3-cord group is organized so
they don't overlap each other.
Move Part
Bover
the fillers, heading right diagonally.
Pass the cord under
Part A (all 3 cords).
Tighten gradually, making sure the cords
in Part A stay in the same position.
Designer's
Tip: The first curved area for the
Spectral Line Bar will be a little different than
the other areas, since the black cord is slightly
separated from the bright cords (Part A).
You may need to pull the black cord more than the
bright cords in order to eliminate the gap.
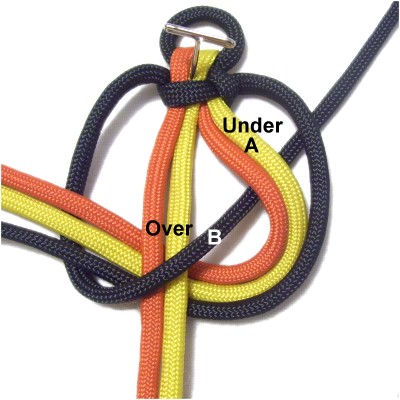
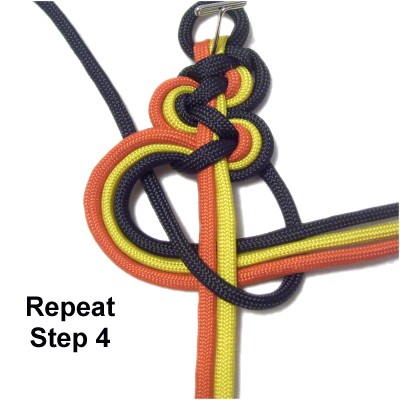
Step
4: Curve Part
A to the right,
passing them under
the fillers and over
Part B.
Keep the cords in Part A organized and
resting close together.
Move Part
Bover
the fillers and under
Part A, heading left diagonally.
Tighten the knot and make sure the fillers
are straight.
Step 5: Repeat
step 3 to make the next
knot for the Spectral Line Bar.
Make sure the fillers are straight after
tightening.
Step
6: Repeat
step 4.
Step
7: To continue, repeat
steps 3 and 4 several times,
until the Spectral Line Bar is the size
you want.
Make sure you stop on Step
4, with the loops on the left.
Finishing the Bar
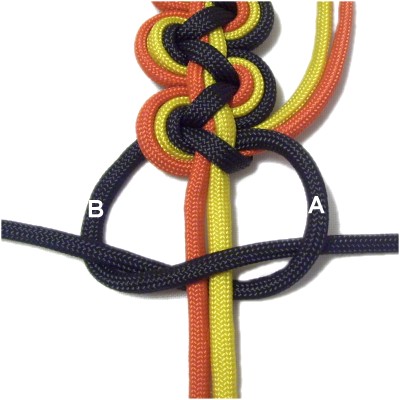
Step
8: Tie the next knot with only
the dark
cords.
Move cord B over
the fillers, and under
cord A, heading left.
Move cord A under the fillers and over
cord B, heading right. Tighten the
knot FIRMLY.
Step
9: Turn the Spectral Line
Bar upside down.
Move the two bright colored working cords
(A) to the back, and pass them under one
of the loop.
Apply glue in the area between the
loops. When the glue is dry, cut off
the excess material.
Step 9,
continued: Tie off the dark
cords with a FLAT finishing knot, such as a Barrel
Knot. Apply glue prior to tightening.
When it's dry, cut off the excess material.
Melt the tips of these cords with a flame if using
Paracord or nylon material.
The remaining
two bright cords were the fillers, so are
long enough to make a button knot if you
need a clasp.
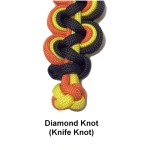
The Knife Knot,
also called the Diamond Knot, is the best
choice. It can be made with two
cords.
Click on the link or image to view the
instructions.
You could add a bead or button to the two filler
cords, if you prefer.
When using a button, pass the cords through it in
opposite directions, then tie a finishing knot to
secure it.
You also have the option of finishing off these
two cords like the others, in the back of the
bar.
By
using any text or images on Free Macrame
Patterns, you are agreeing to ourTerms
of Use