Description:
This Simple Necklace is a great
Macrame project for kids (6+) and
beginners. The knots are easy to
tie, and you can use any type of material
and beads.
Cotton crochet cord, a button (pendant),
and cord beadswere used in the
example shown.
You can use a bead as the pendant
instead of a button. Make sure
the hole is horizontal.
For a necklace over 20 inches, cut the cords
longer.
Apply glue at the tips and allow it to dry
completely before starting.
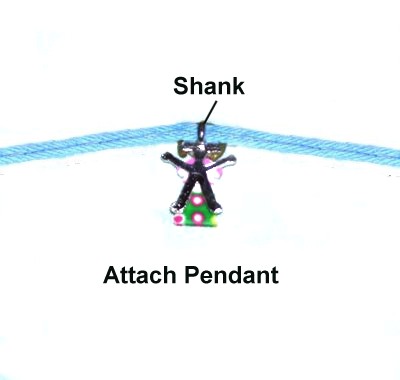
Step
1: Slide both
cords through the shank of the button (or
a bead if you are using one)
Match the ends so the pendant is at the center
of the cords.
Turn the cords so they are vertical.
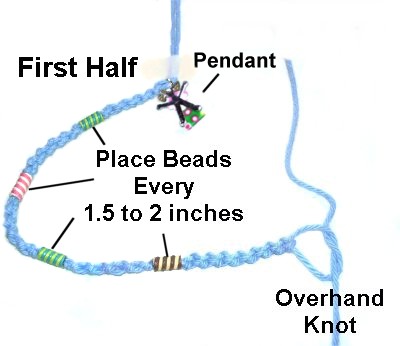
Step
2: The first half of the
necklace is made with the cords in front
of the pendant (closest
to you).
Tie a Half Hitch by passing the right
cord over
- under the left, rotating clockwise.
As you pull it
right, pass over
the right cord to complete the loop.
Tighten the knot.
Designer's
Tip: When tightening the first few
Half Hitches, try to make sure they are not too
small or they will slide through the shank of the
pendant.
All the Half Hitches should be close together
without gaps between them.
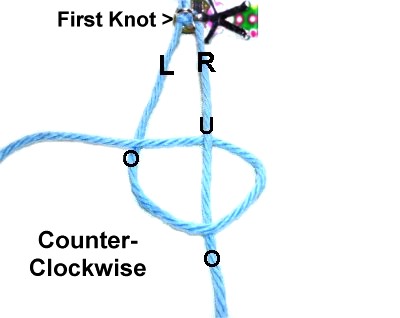
Pass the left
cord over
- under the right, rotating counter-clockwise.
As
you pull the cord left, pass over the
left cord to complete the loop.
Tighten the knot.
Add a bead to both cords (see information
below)
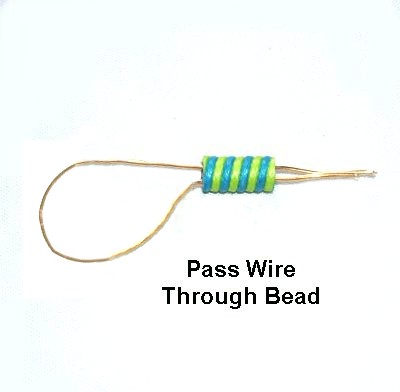
The best way
to add beads is to use a piece of thin
wire.
Fold the wire and pass it through the bead
as shown.
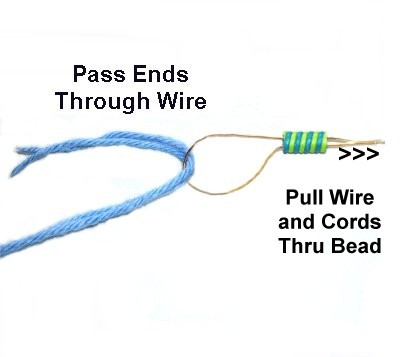
Pass the ends
of both cords through the wire.
Pull the wire, which will bring the cords
through the bead.
Step
3:Repeat
step 2 several times, until the
Simple Necklace is 1/2
the finished length you want to
make.
Place beads every 1.5 to 2 inches
(optional).
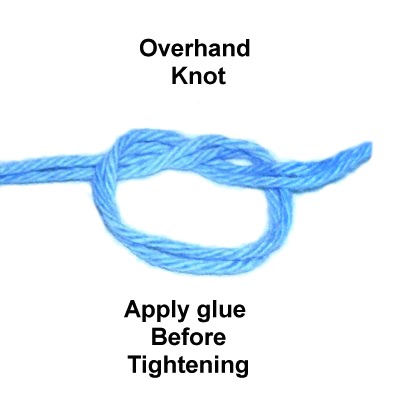
Tie an Overhand knot next to the last Half
Hitch.
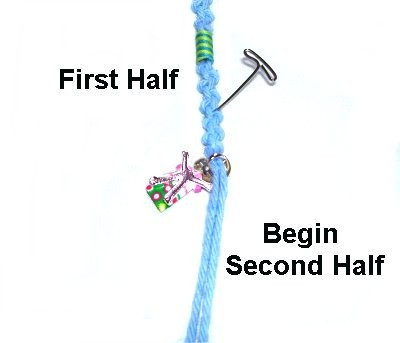
Step
4: Turn the Simple Necklace
around on your board, so you can use the
other half of the cords.
Make sure the pendant is close to the
other knots before you begin the second
half.
Repeat
steps 2 and 3. See
information below.
Designer's
Tip: Arrange the beads so
they line
up with those in the first half.
You can secure the pendant and have the
two halves resting side by side as you
work.
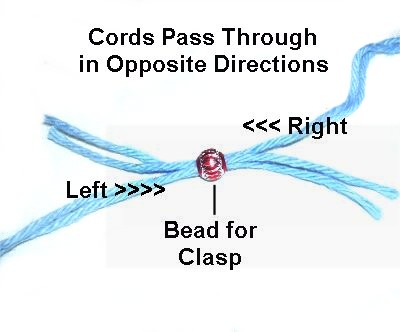
Step
5: Secure the Simple Necklace so
nothing is twisted.
Pass the cords from the right side of the
necklace through the round bead from right to
left.
Pass the cords from the left side through
the bead from left
to right.
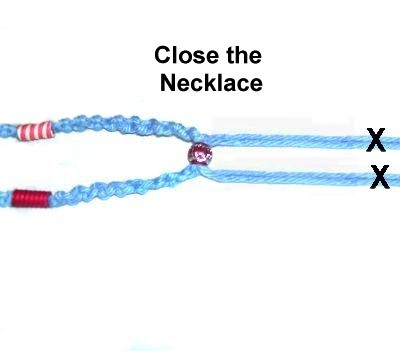
Step
6: Place the Simple Necklace
around your neck to make sure it
fits.
Close the necklace, then open it just wide
enough for your head to fit through.
Just beyond the bead is where the
finishing knots should rest in the next
step (X).
Step
7: Tie a tight
Overhand knot with both cords acting
together, at the point determined in the
previous step.
Apply glue on the inside
of the knot, just before you tighten
it. Let the glue dry, then cut off
any extra material.
By
using any text or images on Free Macrame
Patterns, you are agreeing to ourTerms
of Use