|
|
| |
|
|
|
| |
|
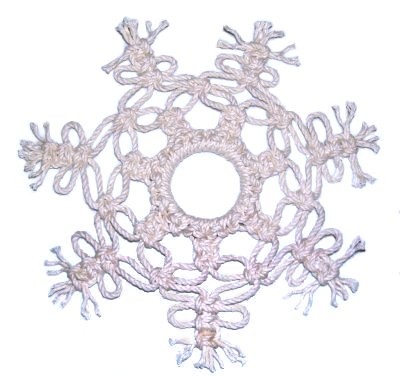
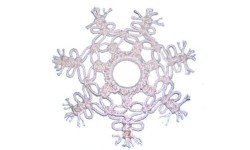
Description: The
Seven Point Snowflake is a wonderful holiday
ornament that's easy to make. It's approximately
6 inches wide, so is the right size for a large
Christmas tree.
You can change the size of this
Macrame snowflake simply by changing the ring
and material size. In the example shown, a
1.5-inch brass ring and Cotton cable cord was
used.
Most snowflake patterns have 5 or
6 points, but this one has 7. The design
features 3 rows of Square knots in an
alternating pattern, along with picots at the
points.
Julie Schermerhorn sent in the
suggestion for this project. She cherishes the
two snowflakes she received many years ago from
her dear friend, Mrs.
Definski.
This custom pattern was written
based on the images she sent me. I am sharing
this beautiful holiday decoration as a tribute
to Mrs. Definski.
|
| |
| |
|
| |
| Supplies
Needed: |
| |
- 2 mm white cord material (14 yards)
- Fabric or Household Glue that dries clear
|
| |
| |
Knots Used:
|
| |
|
|
| |
Preparation
and Mounting
- Cut
14 cords, each 32 inches long.
Prepare the cords with tape, or tie Overhand
knots at the tips of each cord.
|
| |
|
|
|
|
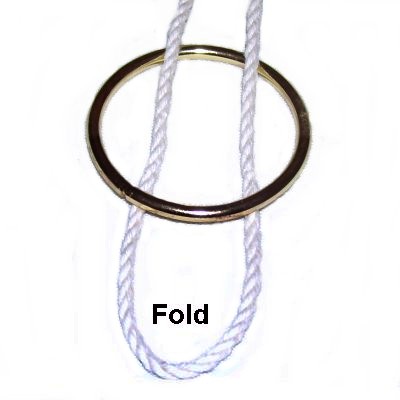
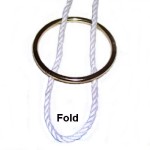
Step
1: Fold one cord in half, and
place it through
the ring with the fold heading toward you.
|
|
| |
|
|
|
|
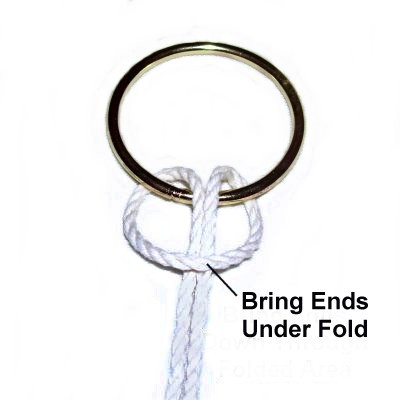
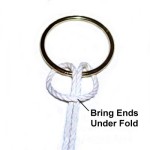
Bring both
halves forward, passing over
the ring.
Pass the ends under
the folded area of the cord.
Tighten firmly. |
|
|
|
|
Designer's
Tip: Tighten all the
knots as firmly as possible, especially if you are
using textured or inflexible material to make your
Seven Point Snowflake.
The knots have a tendency to loosen over time. |
|
|
|
|
|
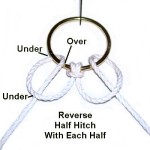
Tie a reverse
Half Hitch by passing each half of the
cord under
- over the ring.
As you pull it forward, pass it under
the cord to complete the loop. |
|
|
| |
|
|
|
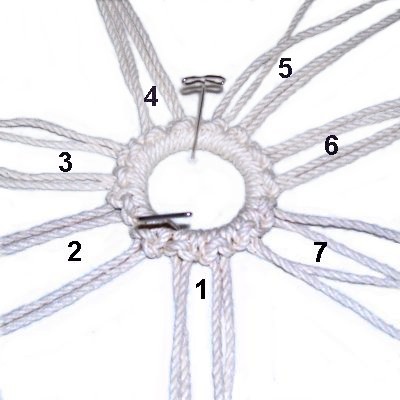
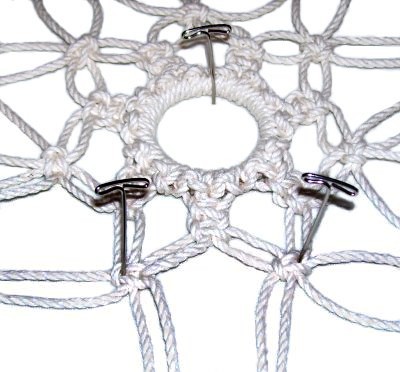
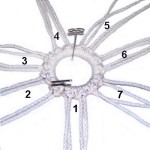
Repeat
step 1, mounting all the cords to
the ring in the same manner as the first.
Organize the cords into 7 groups
containing 4 cords. |
|
|
|
|
| |
 |
|
Snowflake Design
|
|
|
|
|
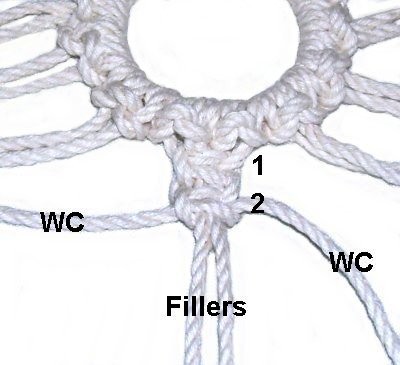
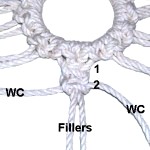
Step
2: With each
group of 4 cords, tie 2 Square
Knots (SK) following the instructions
below.
Pull on the fillers while tightening each
knot firmly,
so the first one rests against the knots
on the ring.
|
|
|
|
|
|
Square Knot
Instructions
|
|
|
|
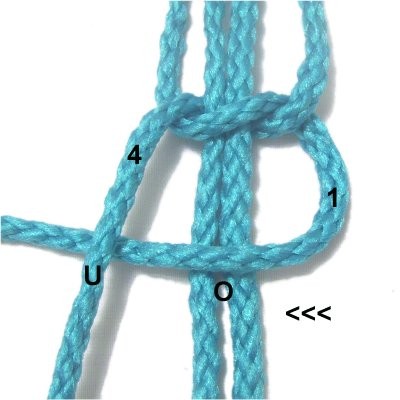
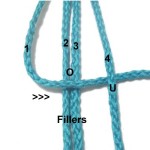
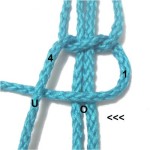
Mentally
number the cords.
Move working cord
1 to the right, passing over
the fillers (2 and 3) and under
the right working cord (4).
|
|
|
|
|
|
|
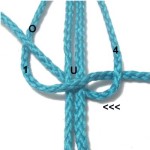
Move working cord
4 under
the fillers and over
cord 1 as you pull it out on the left. |
|
|
|
| |
|
|
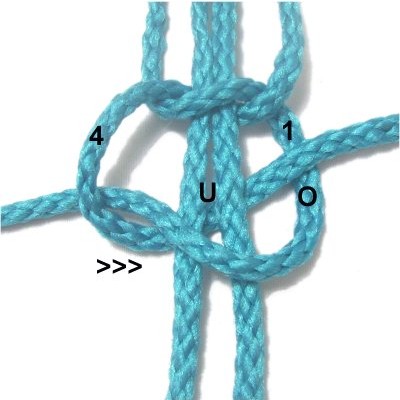
Working cords
1 and 4 have switched
places. So the movements of
the cords are the opposite for the second
half:
Move cord
1 to the left,
passing it over
the fillers and under
cord 4. |
|
|
|

|
|
Move cord
4 under
the fillers and over
cord 1 as you pull it out on the right.
Pull both working cords to tighten the
knot while holding the fillers. |
|
|
|
|
|
Snowflake Design, continued
|
|
|
|
|
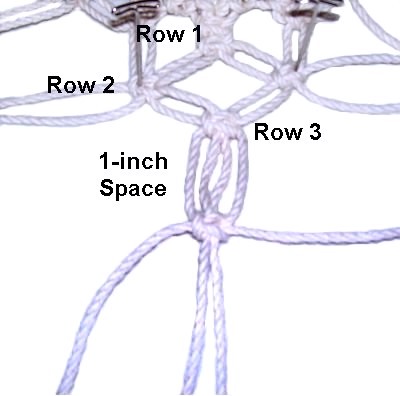
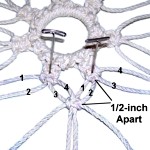
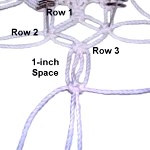
Step
3: Mentally number the
four cords coming from two
adjacent Square Knots.
Alternate cords by using 3 - 4
from the SK on the left, combined with
cords 1 - 2 from the knot on the
right.
Tie a SK with the new group, tightening it
1/2-inch
away from the
previous knots tied.
|
|
|
|
Designer's
Tip: When tying
Alternating Square Knots in a circle,
you need to be careful about selecting the
four cords.
Make sure they come from 2 adjacent knots in the
previous row. |
|
|
|
|
|
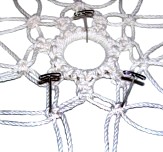
Step
4: Repeat
step 3 with the remaining cords
to complete the second row.
|
|
|
|
|
|
|
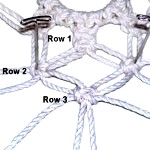
Step
5: Alternate the cords
again, so you use the same groups as in row 1 (step
2).
Tie the third row of ASK all the way
around the Seven Point Snowflake design.
Make sure the knots in rows 2 and 3 are 1/2-inch
apart.
|
|
|
|
|
|
|
|
The Points
|
|
The Seven Point Snowflake gets it's name for the
seven picot designs you will now be making.
One picot is made below each of the knots from step
5, using the same
four cords you just finished with.
Do
not alternate the cords before you tie
the following knots. |
|
|
|
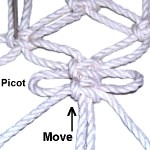
Step
6: Tie a Square Knot 1-inch
from one of the knots tied in row
3.
|
|
|
|
|
|
|
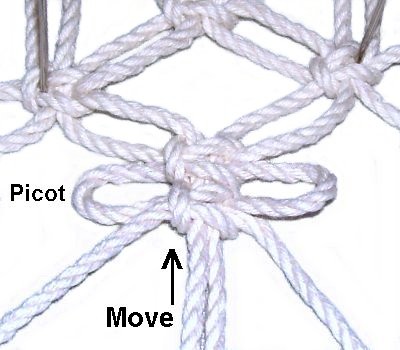
Step
7: Move the knot backward
while holding the fillers steady. It
should rest against
the knot tied in step 5.
This will form two picot loops. |
|
|
|
|
|
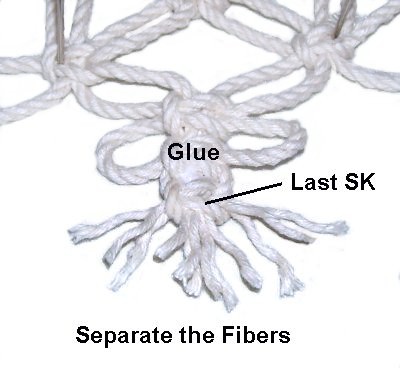
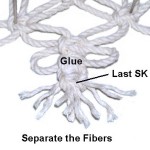
Step
8: Tie one more SK with
the same four cords, placing it close to
the one you just tied.
Apply glue to the fillers
before
tightening the knot.
When the glue is dry, trim the cords to
1-inch. Form a fringe on the points
of the Seven Point Snowflake by separating
the fibers. |
|
|
|
|
Step 9:
Repeat steps 6 -
8 with
the other groups of cords.
|
| |
|
|
|
|
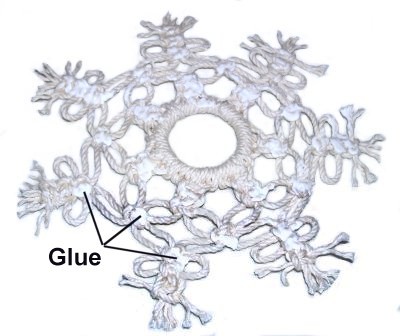
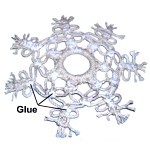
Step
10: (optional) When
using Cotton Cable Cord, there is a chance
for the knots to loosen over time.
You can turn the snowflake upside down and
apply fabric glue to the back
of each knot.
|
|
| |
|
|
|
By
using any text or images on Free Macrame
Patterns, you are agreeing to our Terms
of Use
|
|
|
|
|
Have
any comments about the Seven Point Snowflake?
Contact
Me.
|
|
|
| |
|
| |
|
| |