View the video
gallery, which contains
tutorialsfor a variety of very unique and
appealing designs that can be used for
bracelets and similar projects.
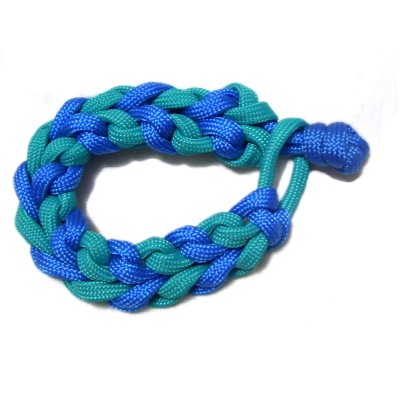
Preparation and Loop
Measure your wrist to determine the size you
need for the River Bracelet.
Multiply
your wrist size by 7,
then cut two cords to that size (one of each
color).
AnAdultshould melt the tips with a
flame if using Paracord. You
can find more information in Cord
Preparation (near the bottom of
the page).
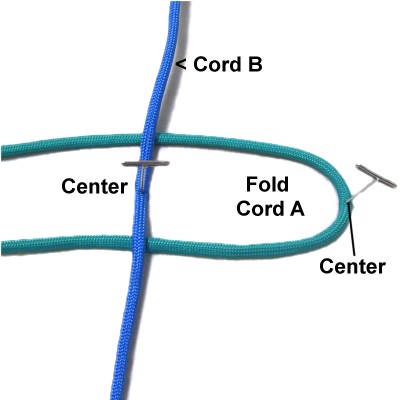
Step
1: Fold cord
A in half, then place it horizontally
on your board with the fold on the
right.
Place cord
B on top, arranged vertically.
The centers should line up.
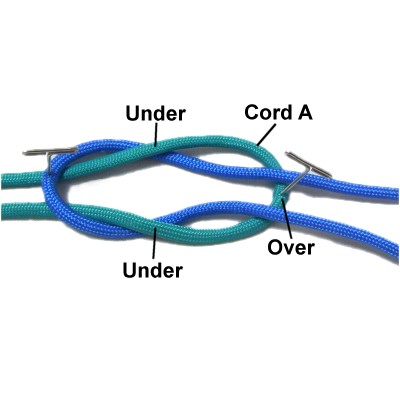
Bring each half
of cord
Bunder
cord A, then pass both halves over
the folded area on the right.
This is called a Reef Knot, and is an
easy way to make a loop for a clasp.
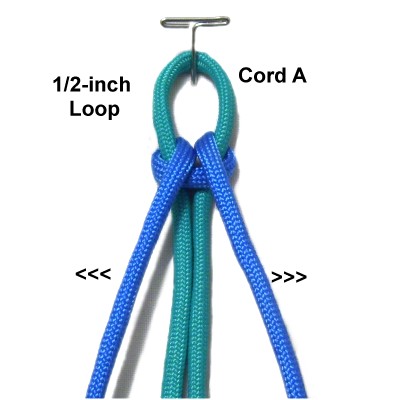
Turn the knot so it's vertical.
Hold cord
A, then pull both halves of cord B
to tighten.
Adjust the loop until it's 1/2-inch
in size. Secure the loop
to your board.
Arrange cord B so the two halves are diagonal
(arrows).
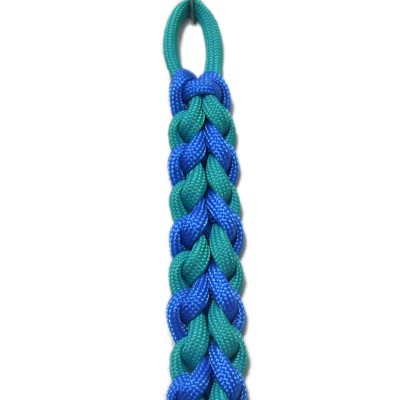
River Bar Instructions
Below are the instructions for making the River
Bar, so you don't need to view them separately.
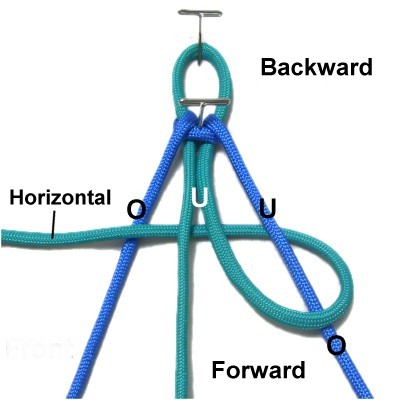
Designer's
Tip: These two terms may be
confusing to beginners:
Backward =
Closer to the back of your board
Forward =
Closer to the front of your board
Step 2: Use the
right
half of cord
A to make a counter-clockwise
loop,
passing it
over
the right half of cord
B.
Move it backward
and pass it undercord
B, heading left. Bring it underboth halves of cord
A, and over
the left half of cord
B.
Keep it horizontal
when you are done.
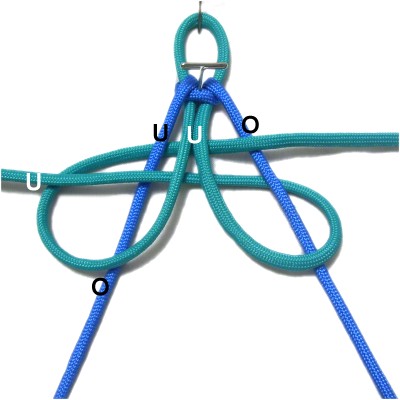
Make a
clockwise loop with
the left
half of cord
A, passing it over
the left half of cord
B, then under
the right half of
cord
A (backward).
Bring it under
the left half of cord
B, under
both halves of cord
A, and over
the right half of cord
B.
Designer's
Tip: When making both loops, the
only time the cord you are using passes OVER
something is when it reaches the first and last
segment.
It passes over one half of the opposite cord as
you get started, then goes over the other half as
you complete the loop.
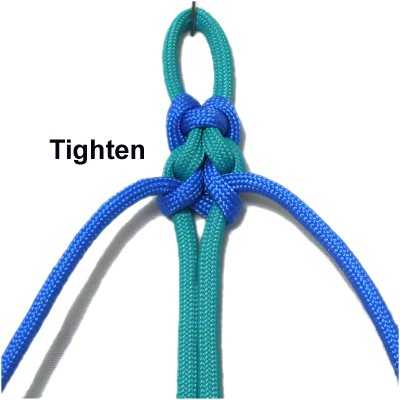
Tighten the knot by holding both
halves of cord
B with one hand while using the
other hand to pull each half of cord
A. The knot should be firm.
Adjust the size of the loop if you plan
to make a button knot for a clasp.
The two cords have now switched
positions.
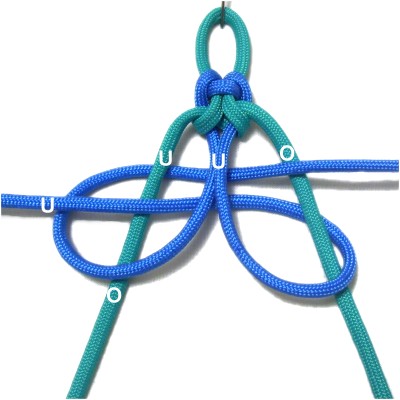
Step 3: Use the right half
of cord
B to make a counter-clockwise
loop,
passing it
over
the right half of cord
A.
Move it backward
and pass it undercord
A, heading left. Bring it underboth halves of cord
B, and over
the left half of cord
A.
Designer's
Tip: Step 3 is the same as step 2,
only the colors have switched.
Make a
clockwise loop with
the left
half of cord
B, passing it over
the left half of cord
A, then under
the right half of
cord
B (backward).
Bring it under
the left half of cord
A, under
both halves of cord
B, and over
the right half of cord
A.
Tighten the
knot by holding both halves of cord
A, then pulling on each half of
cord B.
It's best to tighten all the knots firmly
so they are the same size.
Step 4:Repeat
steps 2 and 3 several times,
until the River Bracelet is 1-inch
less than the size you need.
So if you want a 6-inch bracelet, stop
at 5 inches.
Include the loop when measuring.
Finishing the River Bracelet
Step 5:
The last cord you used to make the loops is now on
the inside.
Both halves of that cord are used to make the
clasp.
Finish off the
other cord (outside) by securing it to the
back of the River Bracelet.
The best way is to slide it under one
loop, and apply glue to hold it there.
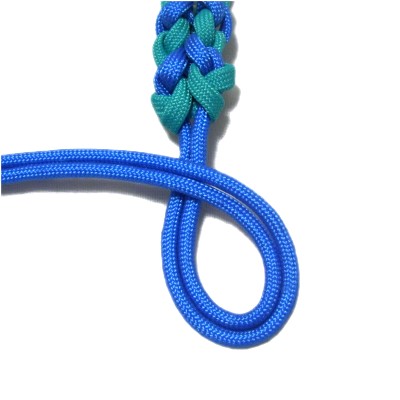
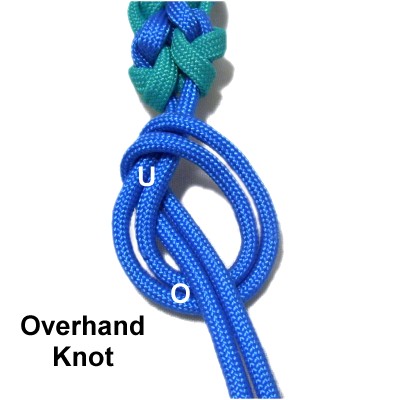
Step
6: To make a simple
Overhand knot for the clasp, make a counter-clockwise
loop with both halves of the cord.
Complete the Overhand knot by moving
the end of the cord through the loop under
- over (from below).
Tighten carefully, so this knot rests
close to the last knots tied in step 5.
Apply glue as you tighten.
Allow it to dry, then cut off the excess
material.
Fuse the material with a flame if using
Paracord or Nylon.
By
using any text or images on Free Macrame
Patterns, you are agreeing to ourTerms
of Use