Ring of Coins
|
| |
 |
|
| |
| |
|
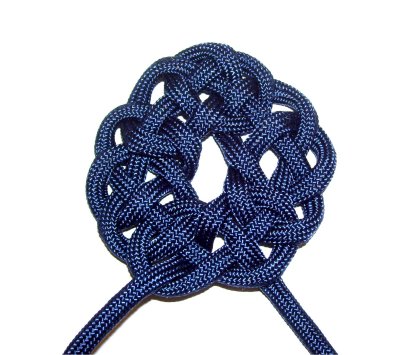
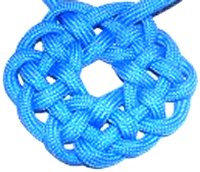
Description: The Ring of Coins
is a historical knot based on the Josephine
Knot, which is also called the Double
Coin Knot.
It's similar in appearance to the Celtic
Circle knot, but is easier to
tie.
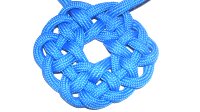
You can add a second cord to double the knot,
or make it very large and fill it in with
several cords.
You can use this decorative knot as a pendant
for a Macrame necklace, or anywhere you need a
compact knot with the ends at the top.
The material used in the example is Paracord,
which must be prepared by melting the ends with a
flame.
|
| |
| |
|
The Ring of Coins is on the Fusion
Knots website.
Click on the link or image to visit.
The Video Gallery contains
tutorials for a large number of unique
decorative knots.
|
|

|
|
| |
| |
|
| |
 |
|
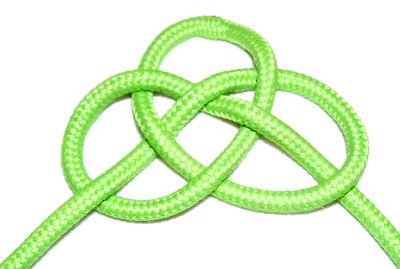
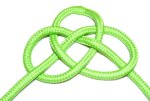
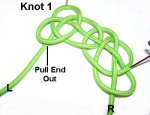
Step 1: Secure a
72-inch cord to your board at the center.
The instructions for the first Josephine
Knot are below.
|
|
| |
|
|

|
|
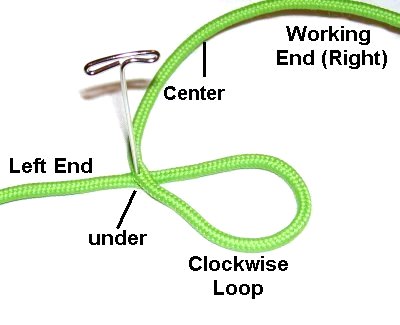
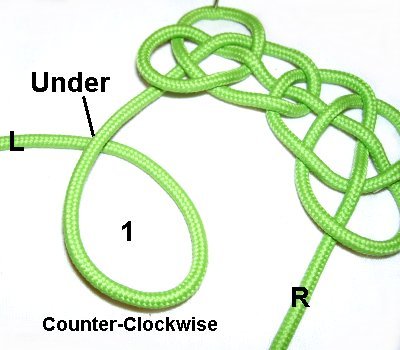
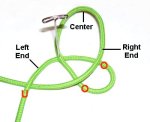
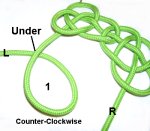
Right
Loop: Make a
counter-clockwise
loop with the left
half of the cord.
The end
should
pass under
to make the crossing point on the left.
|
|
|
|
|
|
|
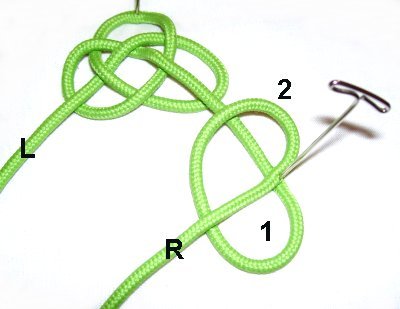
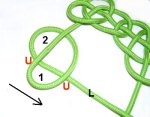
Center
Loop: Bring the right
end down, so it rests over
the first loop.
Pass it under the
left half of the cord, and then bring it
up to the top of the knot
moving
clockwise.
|
|
|
|
|
|
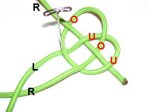
Left
Loop: Weave the right
end through Loops 1 and 2,
moving towards the lower right.
Pass it over
- under - over - under the four
segments.
|
|
| |
| |
 |
|
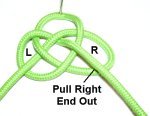
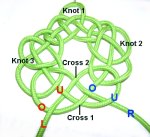
Step
2: Tighten the Josephine knot
slightly, and balance the three
loops. Mentally label the ends where
they are now.
Pull the right
end out of the right loop, so it rests on top
of it. |
|
| |
|
| |
 |
|
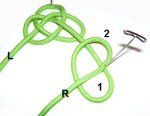
Step 3: Make
two clockwise
loops with the right end.
The second loop should rest on
top of the first loop,
positioned below and to the right of the
Josephine knot above.
|
|
| |
|
| |
 |
|
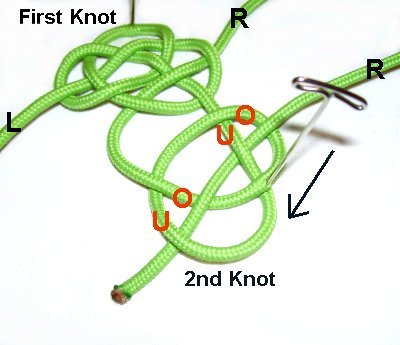
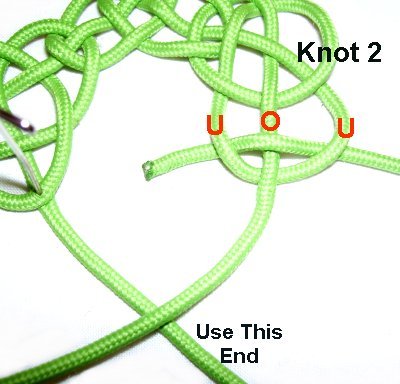
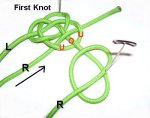
Rotate the right end clockwise,
and bring it up to the first Josephine
knot.
Weave through the three segments of the
right
loop,
under
- over - under.
|
|
| |
|
| |
 |
|
Step 4: Bring the
right end down to the two loops you made
in the previous step.
Weave it over
- under - over - under the four
segments. Move right to left,
towards the bottom.
|
|
| |
|
|
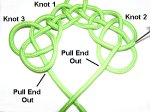
| You now have two
linked Josephine knots for your Ring of
Coins. |
|
|
| |
 |
|
Step
5: Move to the left
loop
of the first Josephine knot.
Pull the left
end out of the loop, so it rests
under
it. |
|
| |
|
| |
 |
|
Step 6: Make a counter-clockwise
loop with the left end.
It should be placed across from the
second Josephine knot on the right, and
below the first knot at the top.
Pass the end under
to form the crossing point.
|
|
| |
|
| |
 |
|
Make a second counter-clockwise
loop by passing the left end under
the first loop.
|
|
| |
|
| |
 |
|
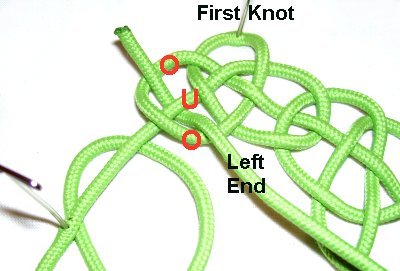
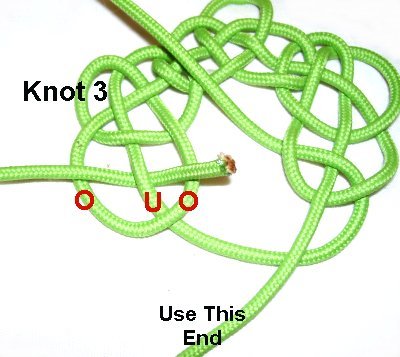
Step 7: Bring the left
end up to the first Josephine knot,
rotating counter-clockwise.
Weave it over
- under - over the three segments
of the left loop.
|
|
| |
|
| |
 |
|
Step 8: Bring the left
end down to the set of loops you made in
step 6.
Weave under
- over - under - over the
four segments.
This completes the third
Josephine knot for your Ring of Coins.
|
|
| |
|
| |
 |
|
Step 9: Pull the ends
out of the lower
loops in
knots
2 and 3.
On the left, the end should rest under
the loop.
On the right, it should rest
over
it.
|
|
| |
|
| |
 |
|
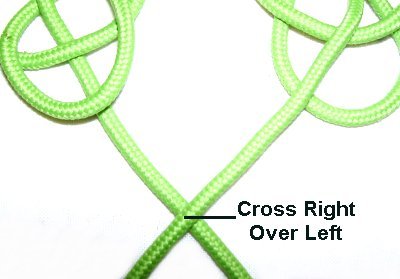
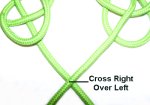
Step 10: Cross the
right end over the left.
|
|
| |
|
|
Step 11: Rotate the end now on
the right
in a counter-clockwise
direction.
Bring it up to the second
Josephine Knot, which is on the right. |
|
|
| |
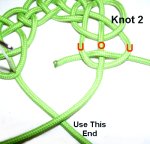 |
|
Locate the lower loop, where you pulled
the end out in step 9.
Weave it through under
- over - under, moving right
to left.
|
|
| |
|
| |
 |
|
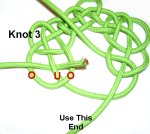
Step 12: Move
the end now on the left
up to the third
Josephine Knot, rotating clockwise.
Locate the lower loop where you pulled
the end out in step 9.
Weave it through over
- under - over, heading
left to
right.
|
|
| |
|
| |
 |
|
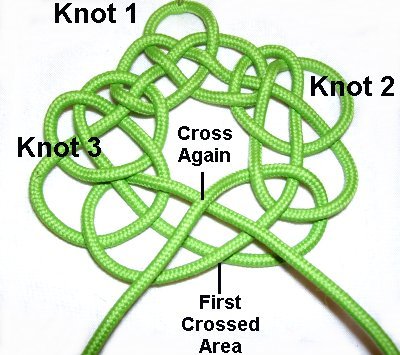
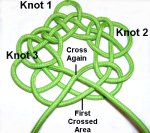
Step 13: Locate the
first crossed area you made in step 10.
Cross the ends again right
over left, above
the first cross.
This prepares the area for the 4th
Josephine Knot for your Ring of Coins.
|
|
| |
|
| |
 |
|
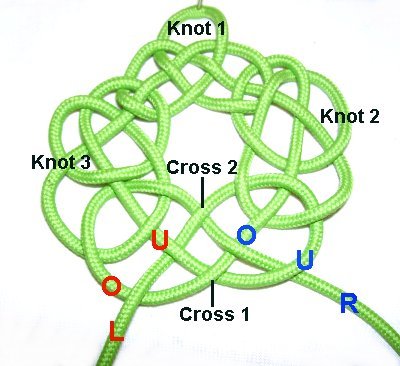
Step 14: Move
the end now on the left,
which is marked in red,
under
- over the two segments just
below it, also on the left.
Move the end now on the
right,
which is marked in blue,
over
- under the two segments below
it, on the right.
|
|
| |
|
| |
|
|
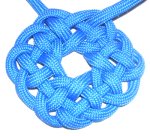
Step 15: Tighten the
Ring of Coins slowly and carefully,
removing the slack from the knots.
Start at one one end and work towards
the other.
Leave some space, so you can see the
overall design clearly.
|
|
| |
| |
|
|
|
By
using any text or images on Free Macrame
Patterns, you are agreeing to our Terms
of Use
|
|
|
|
|
Have
any comments about the Ring of Coins? Contact
Me.
|
|
|
|

|
|
|
| |