|
|
| |
|
|
|
|
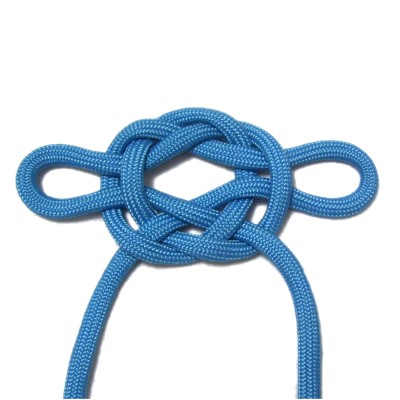
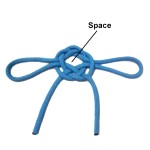
Description: The Pitcher Knot
is an interesting historical knot that is not
very well known. It is sometimes called the Bottle
Sling.
The name comes from the fact that it can be
used to make handles for pitchers and
bottles. The crossed elements surround the
neck and the two bights form the handles.
I've added two images at the bottom of the page
to show you how this knot works.
The Masthead Mat
is a variation of this knot, and the Maedate
knot is related, too.
|
| |
| |
|
| |
|

|
|
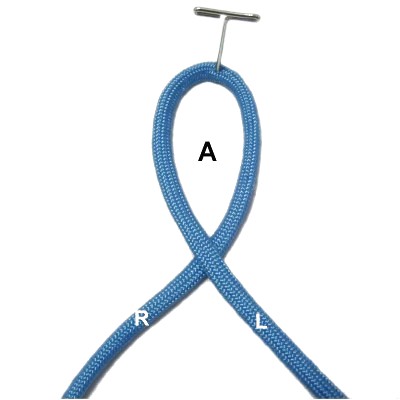
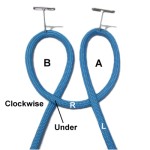
Step
1: To practice, you need
one cord at least 36 inches long.
Make a loop in the center of the cord,
crossing the two halves left
over right.
Mentally label it (A), and secure it to
your board. |
|
| |
| |
|
|
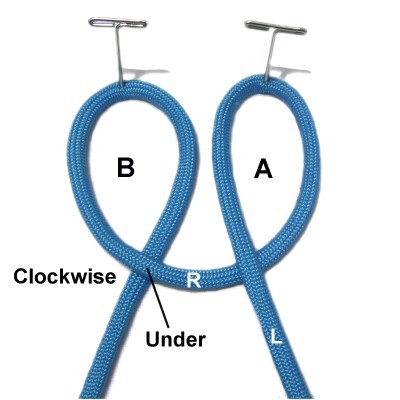
Step
2: Use the right
half of the cord to make a clockwise
loop, placing it to the left
of loop A.
Pass the end under
to form the crossing point.
Mentally label it (B), and secure it.
|
|
| |
| |

|
|
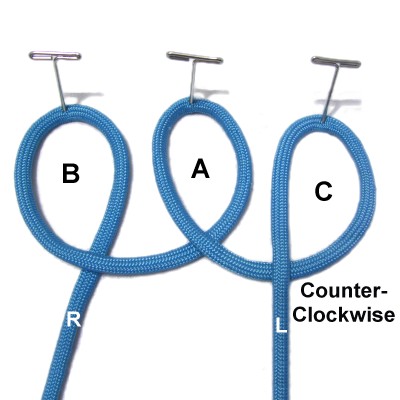
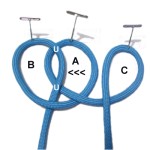
Step
3: Use the left
half of the cord to make the
third loop in a counter-clockwise
direction. Place it to the right
of loop A.
Mentally label it (C) and secure it.
|
|
| |
|
|
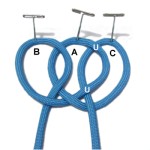
Step
4: Move loop
A to the left,
placing it under
the right side of loop B.
|
|
| |
|
| |
|
|
Step
5: Move loop
C to the left, placing it under
the right side of loop A.
|
|
| |
|
| |

|
|
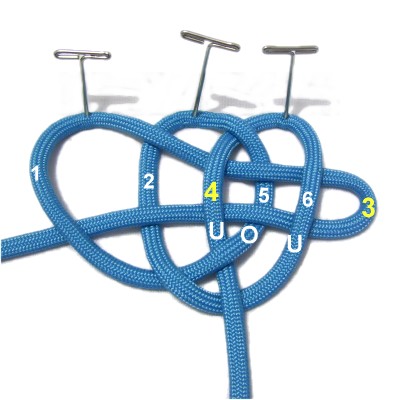
Mentally
number the segments 1 - 6, moving left to
right.
Segments 3 and 4 will be moved in the next
two steps, so make sure you can identify
them easily (they lead to the ends).
|
|
| |
|
| |

|
|
Step
6: Pull segment
3 to the right
to form a bight. Pull material from the
end as needed.
Pass it under
segment 4, over
segment 5, and under
segment 6.
Secure it when you are finished
weaving.
|
|
| |
|
|
|
|
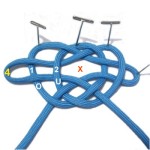
Step
7: Pull segment
4 to the left
to form a bight.
Pass it under
segment 2 and over
segment 1.
The (X) in this image is the space you
will leave open in the next step.
|
|
| |
|
|
|
|
Step
8: Tighten and adjust the
Pitcher knot, so the crossed elements
surround the space in the center.
The two bights can be any
size.
|
|
|

|
|
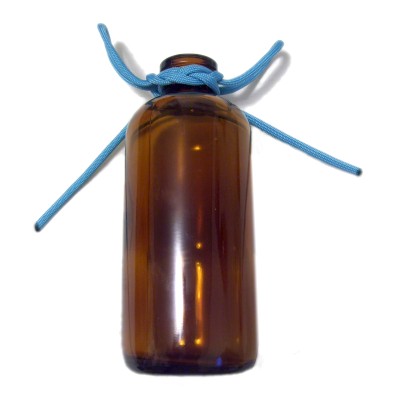
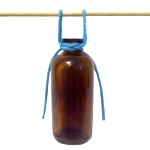
Step
9: (Optional) Pass the top
portion of a bottle through the opening in
the center of the Pitcher knot.
Pull on the ends and bights to tighten the
knot around the neck of the bottle.
|
|
| |
|
| |
|
|
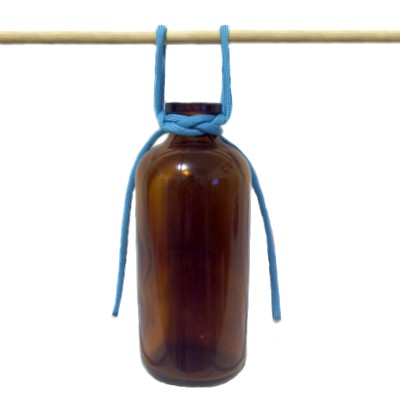
This shows one way
the Bottle Sling can be used.
The bights act like two "handles" that can
be used to suspended the bottle from a
dowel or hook.
You can attach new cords to the knot if
you want to cover the bottle with knots,
or just finish off the ends and leave it
as shown.
|
|
| |
| |
|
|
| By using any
text or images on Free Macrame Patterns, you are
agreeing to our Terms of Use |
|
|
|
| Have
any comments about the Pitcher Knot? Contact Me
|
|
|
|

|
|
|