|
|
| |
|
|
|
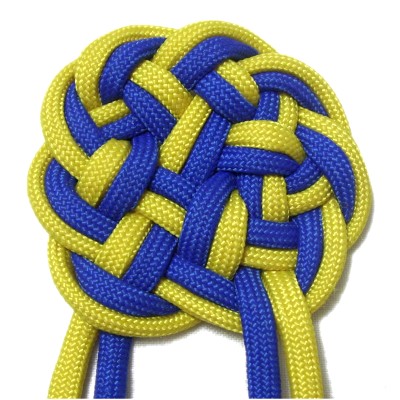
Description:
The Masthead Mat is an usual technique that can be
used to create rugs, coasters, and similar round
items. Pendants and earrings can be
made as well, if you use fine material (2mm or
less).
This design has features similar to the Maedate
Knot and the Pitcher Knot.
Since this is a mat,
the knot is supposed to be filled in with more
than one cord. You can use only one, but
it's hard to get the inside tight enough to
eliminate all the space. |
| |
| |
|
| |
Step
1: To practice, you need 2 cords, at
least 45 inches long.
I recommend you use Parachute Cord when
practicing, or other material that's at least 4mm
wide.
When using Paracord, heat the tips to melt the
outer sleeve, to prevent the inner core from
sliding out. |
| |
| |
|
|
|
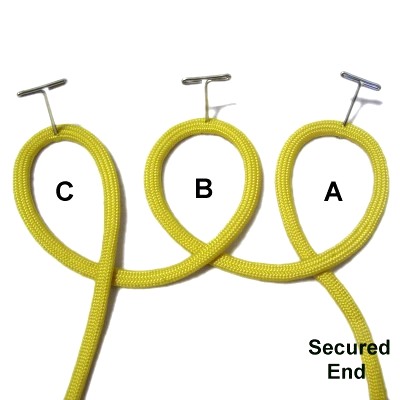
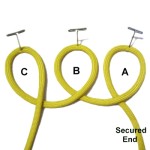
Step
1: Secure one end of a
cord to your board, on your right.
Make three clockwise
loops, starting 12 inches from the
secured end.
Move from right to left, and mentally
label them A - C. The loops should be at
least 1-inch in size.
|
|
| |
| |
|
|
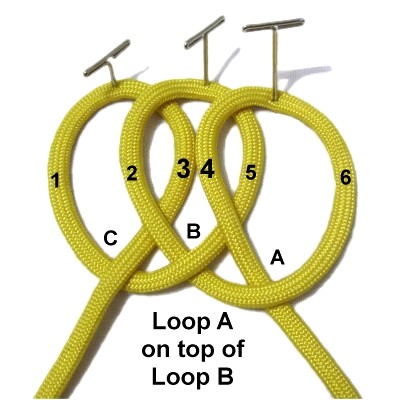
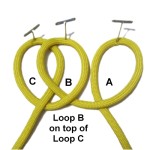
Step
2: Move Loop
B to the left, placing it
partially on top of Loop C.
|
|
| |
| |
|
|
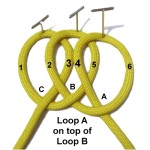
Step
3: Move Loop
A to the left, placing it
partially on top of Loop B.
Mentally number each half of the loop in
the order they are resting now, starting
on the left.
Segments
3 and 4 lead to the ends, and
will be moved in the next steps.
|
|
| |
|
|
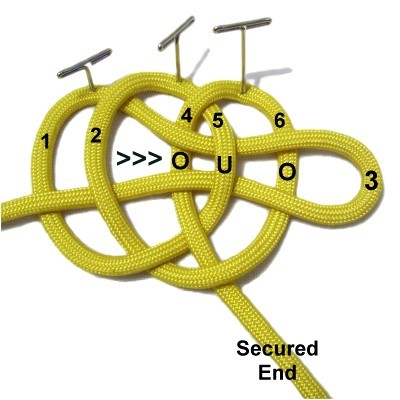
Step
4: Make a bight with segment
3, pulling on the end of the cord
as needed.
Weave it over
- under - over segments
4 - 6, heading right.
Secure it on the right.
|
|
| |
|
| |

|
|
Step
5: Make a bight with segment
4, pulling on the secured end as
needed.
Weave it over
- under segments
2 and 1, heading left.
|
|
| |
|
| |
|
|
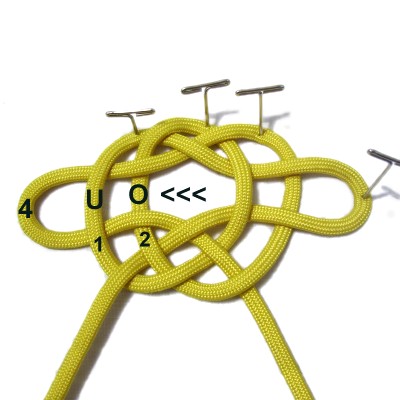
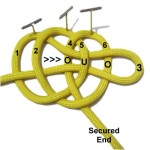
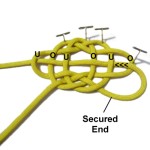
Step
6: Weave the secured end through
the knot from right to left, alternating over
- under the segments.
You start out by passing over
segment 3 on the right.
|
|
| |
|
| |

|
|
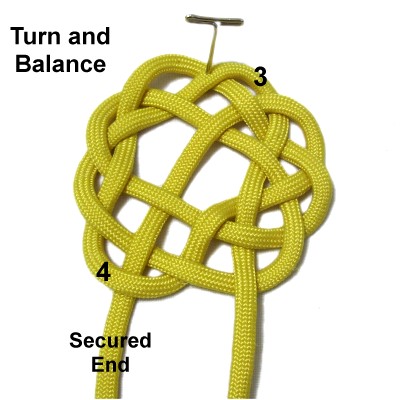
Step
7: The Masthead Mat
should now be turned, so both ends are
at the bottom.
The secured end will be on the left.
Balance the knot, but don't tighten it
yet. You need room to add the
second cord.
|
|
| |
|
|

|
|
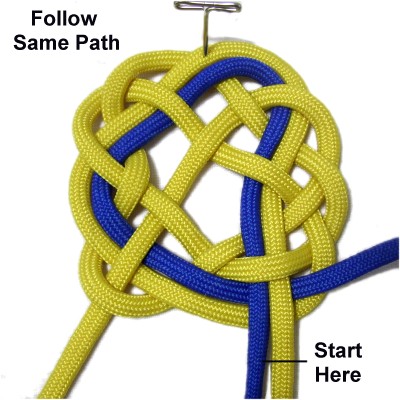
Step
8: Use the second cord
to follow the same
path as the first one, all the
way through the knot.
The best place to start is at the end
of the cord resting on the right.
|
|
| |
|
|
|
|
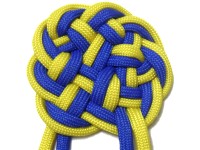
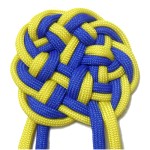
Step
9: The Masthead Mat should
be completely tightened and balanced, so
there are no gaps.
You can finish off the ends by securing
them to the back of the knot.
|
|
|
|
| |
|
|
| By using any
text or images on Free Macrame Patterns, you are
agreeing to our Terms of Use |
|
|
|
| Have
any comments about the Masthead Mat? Contact
Me. |
|
|
|

|
|
|
|