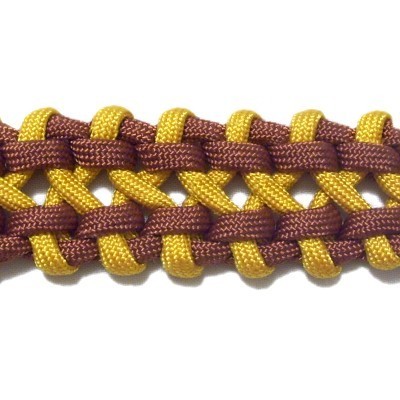
Noise Bridge Bar
Description:
The Noise Bridge Bar is a unique
decorative knot design similar to the Switchback
Path Bar
This
decorative knot is found in Fusion
Knots .
Preparation:
Cut two cords (one of each color) at least 60
inches long to practice the Noise Bridge
Bar. cord
A is brown and cord
B is gold. 8
times the finished length of the item you
wish to make. cord B
longer if you plan to make a button knot for a
clasp.
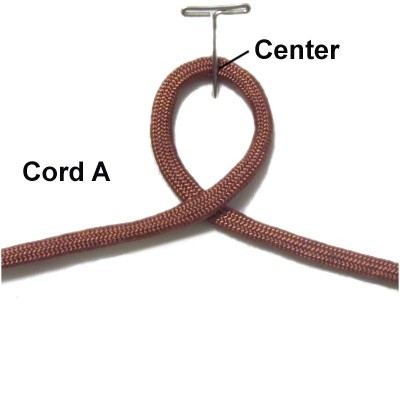
Step
1: Fold cord
A at the center and make a loop
crossing right over left.
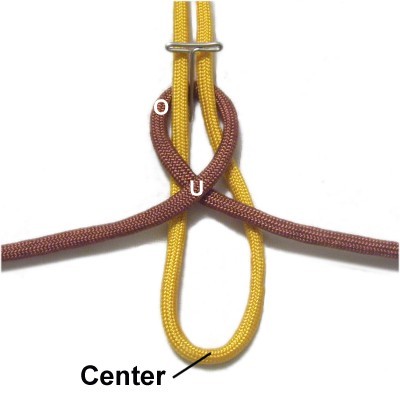
Fold cord
B at the center and slide it
through the loop from below, which is under
the crossing point and over
the crook.
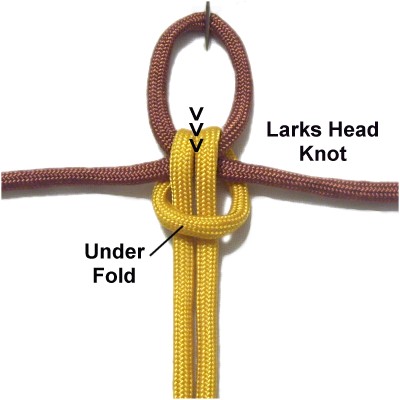
Fold both
halves of cord B forward, and pass them under
the fold (Larks Head Knot).
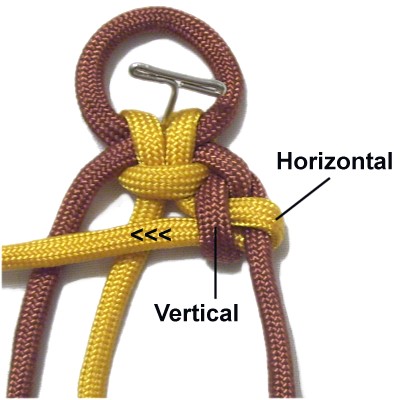
Here's a reminder of some terms used in this
pattern:
Forward - Towards the front of your board
Backward - Towards the back of your board
Vertical - Arranged forward and backward
Horizontal - Arranged side to side
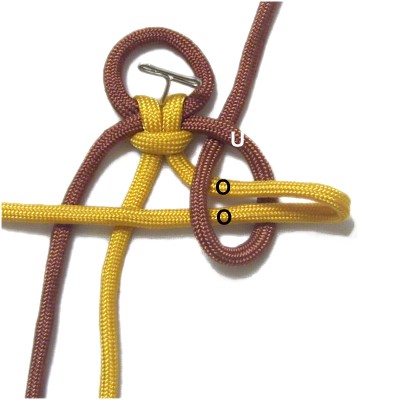
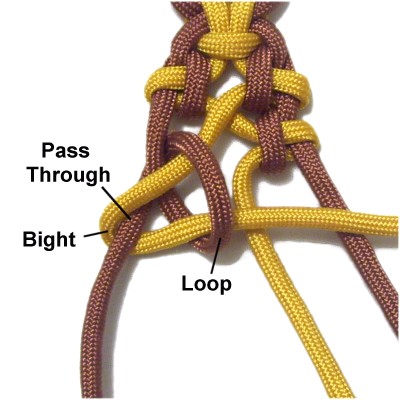
Step
2: Mentally label both
halves of each cord where they rest now.right
half of cord
B to form a bight.upright ,
and place it on cord A horizontally .
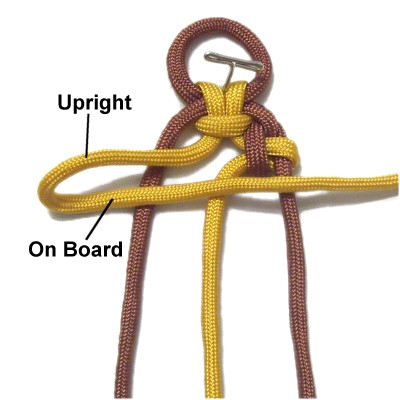
Designer's
Tip: When you fold cord B, the
portion after
the fold should be in contact withbefore
the fold should be above
it, which means it will NOT be in contact with the
board.
Move the right
half of cord
A vertically, passing over
the bight (cord B). under
the segment of cord A to complete the
loop.
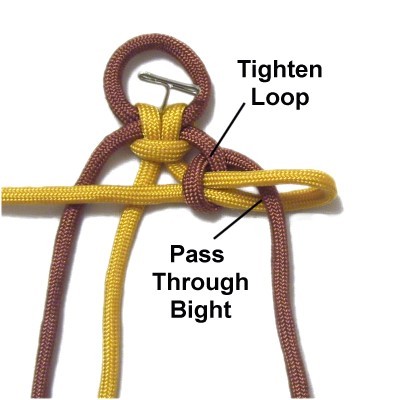
Tighten the
loop made with cord A. bight
heading toward you (forward).
Pull cord
B to tighten the bight, making
sure it remains horizontal.
vertical.
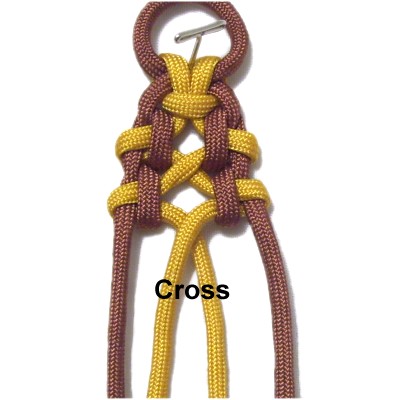
Step
3: Now it's time to make
the next knot, this time on the left side
of the Noise Bridge Bar.cord
B to form a bight. cord
A horizontally, making sure it's
upright.
left
half of cord
A vertically, passing over
the bight (cord B). under
the segment of cord A to complete the
loop.
Tighten the
loop (cord A). It should be the same
size as the one on the right.
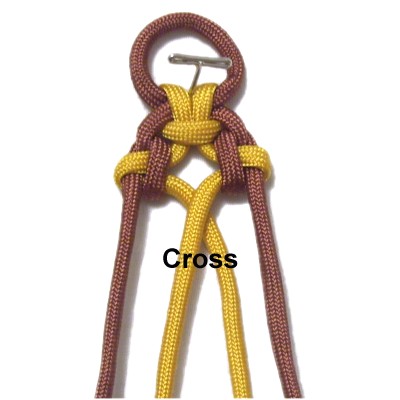
Step
4: Cross the two halves of cord
B. Designer's
Tip: You can either
cross the cords the same each time you
get to this step, or alternate the
direction.
Step
5: Mentally
re-label the two halves of cord
B where they rest now,
since you crossed them.Repeat
step 2.
Step
6: Repeat
step 3.
Step
7: Repeat
step 4.
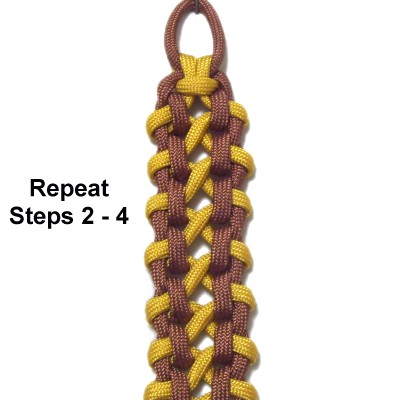
Step
8: Repeat
steps 2 - 4 at least one
more time if you are practicing.
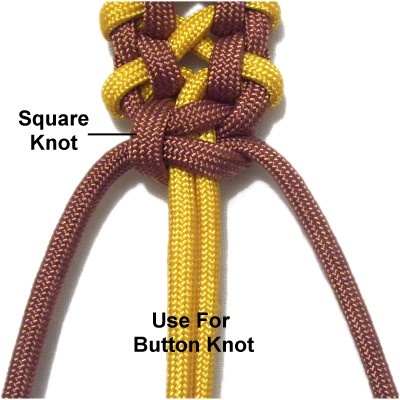
Step
9: Tie a Square
knot cord
A around cord B (fillers).
This is optional if you prefer a different
way to secure the cords.Cord
B can be used to make a button
knot if you need a clasp.
By
using any text or images on Free Macrame
Patterns, you are agreeing to our Terms
of Use
Have
any comments about the Noise Bridge Bar? Contact
Me.