Switchback Path Bar
Description:
The Switchback Path Bar is a unique
decorative knot featuring a zigzag pattern made
with one cord (pink). It's held together with a
path of loops (purple).
This
bar is listed on the Fusion
Knots Video
Gallery contains tutorials for a
variety of unique and interesting
decorative knots.
To practice the Switchback Path Bar, you need
two cords at least 50 inches long. In the
images, cord
A is purple and cord
B is pink. M ultiply the finished
length by 9 if you are using this
technique for a Macrame project. cord
B longer if you plan to make a button
knot for a clasp.
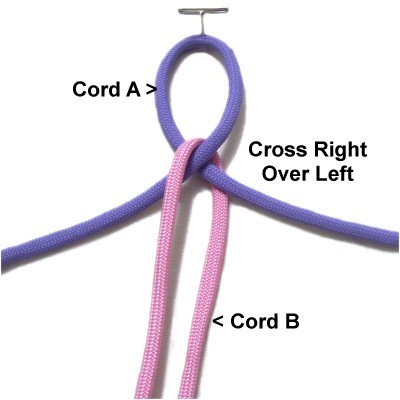
Step
1: Make a loop in the
center of c ord A cord
B through the loop, then fold it
around the crossed area arranged
vertically.
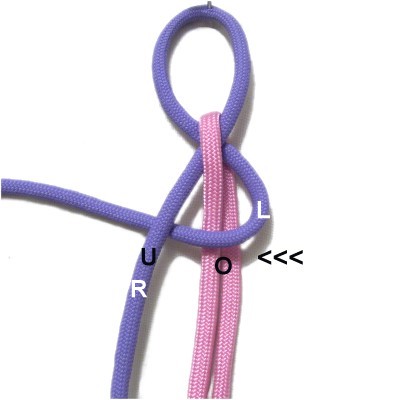
Move the left half
of cord
A to the left, passing over
cord B and under
the right half of cord A.
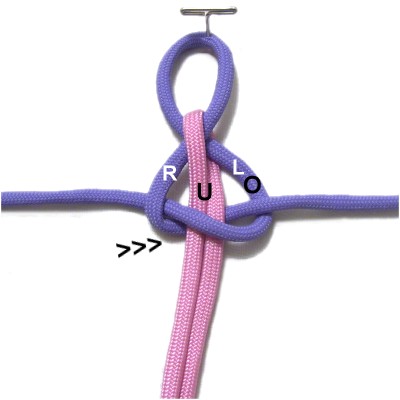
Move the right half
of cord A to the right, passing under
cord B and over
the left half of cord A.
Here are some terms you need to know to
understand the instructions for the Switchback
Path Bar:
Backward = Towards the back of your board
Forward = Towards the front of your board
Vertical = Arranged forward and backward
Horizontal = Arranged side to side
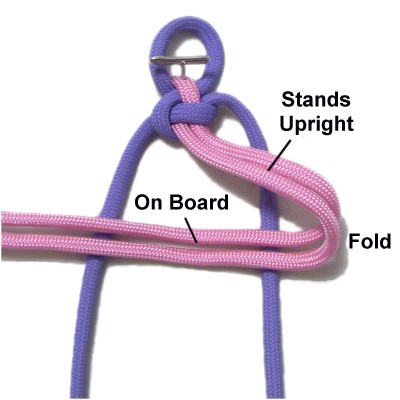
Step
2: Fold both halves of cord
B to form a bight (right to
left). Curve it to the right and place it
on top of cord A.standing
upright above the portion after
the fold, which is resting on the board.
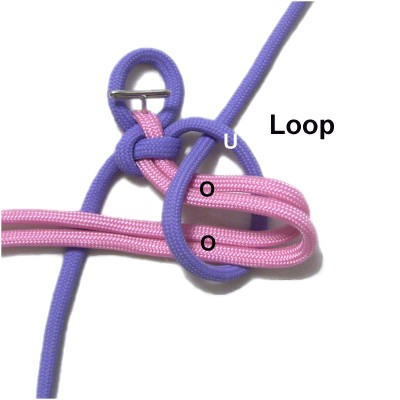
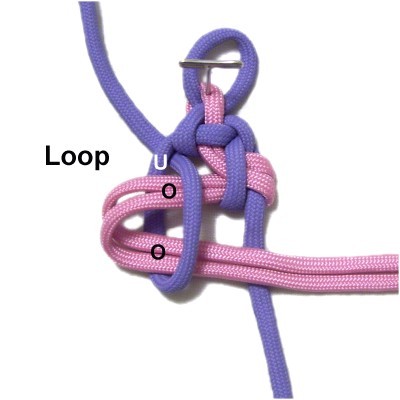
Make a loop
with cord
A by passing over
both parts of cord B and under
cord A, heading backward.
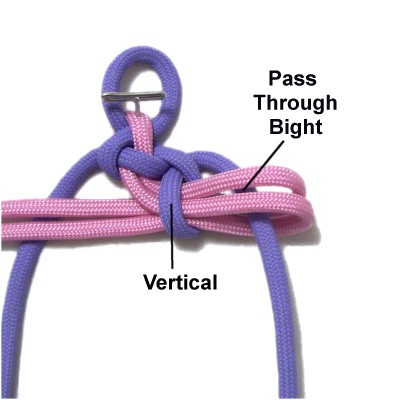
Step
3: Pass cord
A through the bight (cord B)
heading forward (towards you).
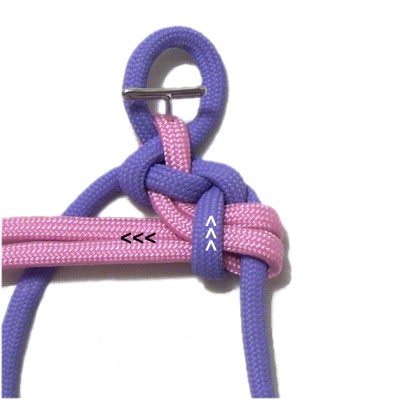
Tighten cord
B by pulling it to the left
(black arrows).
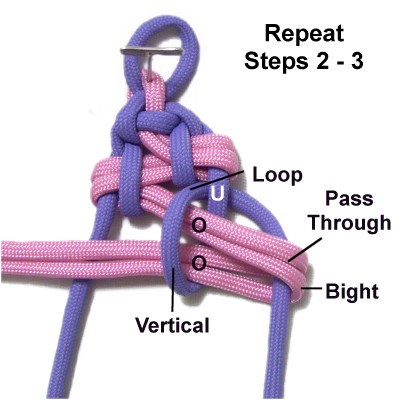
Step
4: Fold both halves of cord B to make the
next bight (left to right).
Make a loop
with cord
A by passing over
both parts of cord B and under
cord A, heading backward.
Pass cord
A through the bight, heading
forward.cord
B by pulling it to the
right.
Step
5: Repeat
steps 2 and 3.
Step
6: Repeat
step 4.
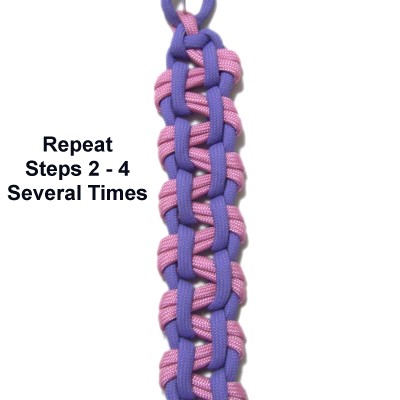
Step
7: Repeat
steps 2 - 4 several more
times if you are practicing.
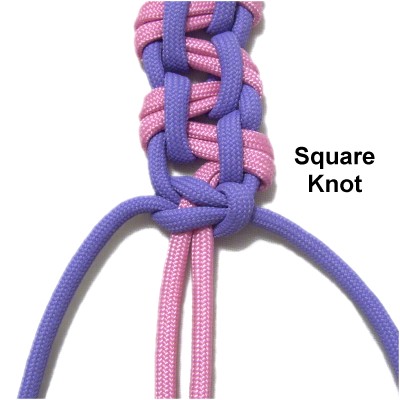
Step
8: Secure the sennit with
a Square Knot cord
A around cord B.
By
using any text or images on Free Macrame
Patterns, you are agreeing to our Terms
of Use
Have
any comments about the Switchback Path Bar? Contact
Me.