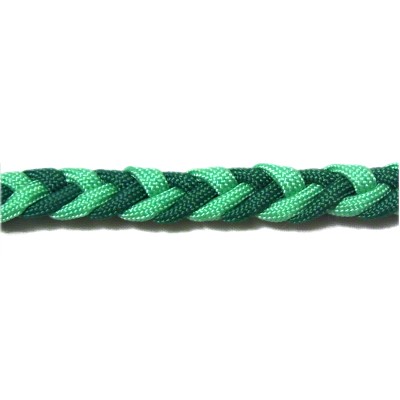
Description: The Lizard Tail
is similar to the Chain
Sennit in the way it's
constructed.It's also
related to the Zipper
Sennit.
A series of bights are passed into one another,
alternating between two colors. The
position of the working ends and the angle of
the bights are important details you need to pay
attention to.
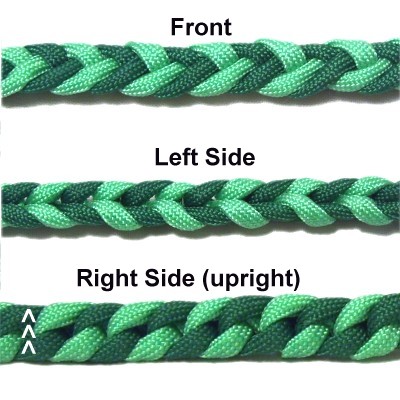
What makes this pattern so unique is the fact
that it is not flat like other knotted or
braided designs. It has three surfaces,
all of them attractive. The front is shown
in the image above (see last image, which shows
all 3 sides).
You can use this design for items like leashes
and belts, or as part of plant hanger
designs. A Macrame wreath can be made with
this technique, simply by using thick material
and linking the ends with additional knots.
Unfortunately, it's difficult to start this
design with a loop. It's better to tie the ends
together as a closure, or tie additional
knots. A sliding clasp can easily be
made with the ends of the two cords.
The video
gallery contains tutorials for
this and other interesting knotting
techniques and designs.
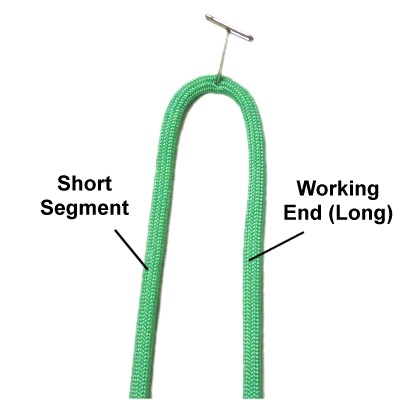
Preparation:
To practice, you need two cords at least 36 inches
long.
When using the Lizard Tail in a project, cut the
cords 6
x the finished length you plan to make.
In the images, cord
A is light green, and cord
B is dark green.
Step 1: Fold cord
A and secure it to your board
vertically.
The right portion is the working end,
and should contain most of the
material.
The left portion should be long enough
to use as a closure. Usually 12
inches is plenty.
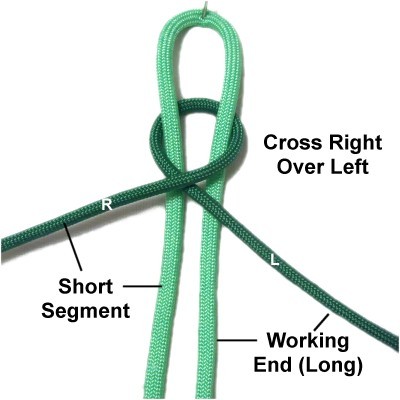
Step 2: Place cord
Bunder
cord A, then adjust it so the LEFT
portion has most of the material.
Bring it on
top of cord A and cross right
over left. The working end will
now be on the right, next to the working
end of the other cord.
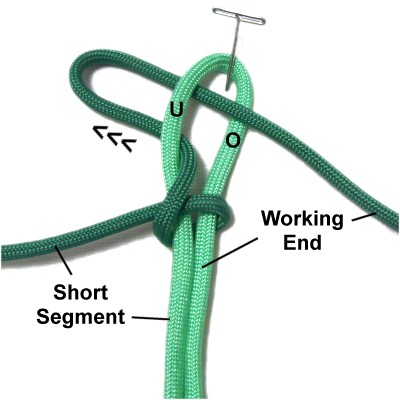
Step 3: Make a bight
with the working end of cord
B. Pass it into the
folded area of cord A under
- over.
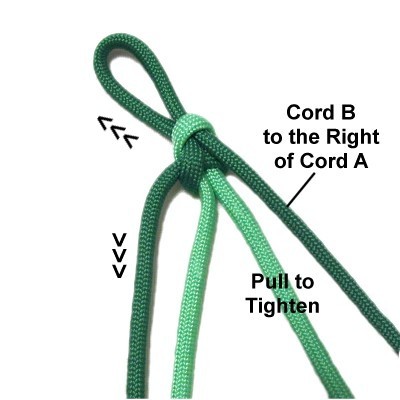
It should rest diagonally (arrows).
Make sure it rests to the right of cord
A when you are finished (see next
image).
Designer's Tip:
The working end of the cord most recently used
should always rest to the right
of the other cord.
Step 4: Pull the
working end of cord
Afirmly,
to tighten the folded area. The
working end of cord B should remain to
the right of cord A.
Arrange the knot as shown in this
image, with the working ends on the
right, and the bight diagonal. The short
segments should be vertical.
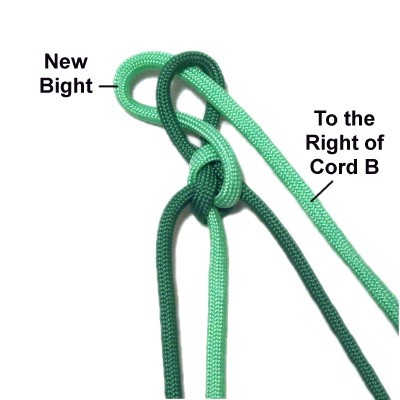
Step 5: Make a bight
with the working end of cord
A, then pass it into the
previous one over
- under.
Make sure it rests to the right of cord
B when you are done.
Pull the working end of cord
B to tighten the previous bight
around the new one.
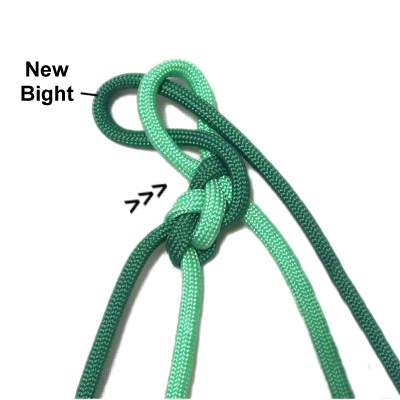
Step
6:Make the next
bight with cord
B, passing it into the
previous one.
Pull the working end of cord
A to tighten the previous
bight around the new one.
Arrows = direction of sennit (see
information below).
Designer's
Tip: Look carefully at the Lizard
Tail design. Note that the bights are made
on a diagonal slant from right to left, but the
sennit is progressing left to right.
As you continue, it will be easier to hold
the sennit as you create it. This will allow
you to straighten the sennit as
needed.
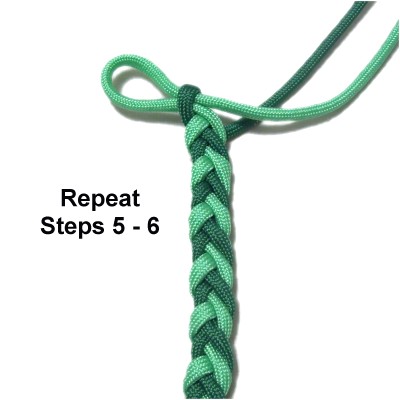
Step
7: Repeat
steps 5 and 6 several times,
until the sennit is the length you planned
to make.
Step
8: Determine which cord made
the last bight, then pass the other cord
straight through it without folding (no
bight).
Tighten the last bight firmly. The
material at both ends of the sennit can
now be used to make a clasp if one is
needed for your project.
The Lizard Tail has three
surfaces. The front is the area
you have been looking at.
The left and right sides come to a
point, so the area stands upright.
By using any text
or images on Free Macrame Patterns, you are
agreeing to ourTerms of Use