|
|
| |
|
|
|
Description: The Chain Sennit
is a historical knot that resembles a linked
chain, which is what you see on the front of the
sennit (shown above).
It sometimes called the Caterpillar
Sennit, due to the design on the
BACK.
This technique is often used by electricians
organize cables, so it's practical as well as
decorative.
This important basic knot is related to several
other knots listed in Learn Macrame, including
the Zipper Sennit
and the Bugle Braid.
This design is a good choice for casual
jewelry, belts and straps. It's easy to tie, so
is appropriate for Macrame projects made by
children and beginners.
|
| |
| |
| |
| |
To practice, you need
one cord at least 36 inches long.
When using this technique in a Macrame project,
you need to cut the cord at least 7
x the finished length you are planning to
make. That will give you a little extra
material so you can tie the ends together, such as
for a bracelet or belt. |
| |
|
| |
| |
|
|
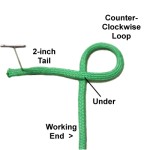
Step
1: Secure one end of the
cord to the board on your left.
Move over at least 2 inches (tail), then
make a loop with the working end, rotating
counter-clockwise.
Pass the working end under
the secured end to make the crossing
point.
|
|
| |
| |
|
|
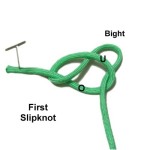
Fold the
working end to make a bight, then pass it
through the loop over
- under (from the top). |
|
| |
|
| |

|
|
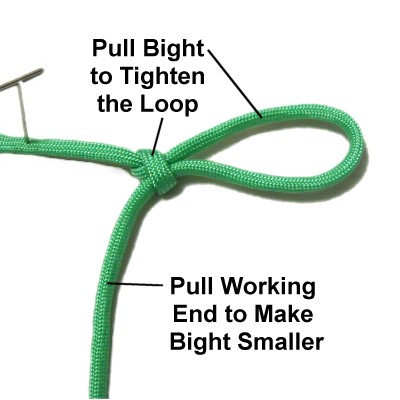
Tighten the
first Slipknot by pulling the bight to
tighten the loop.
Make the bight smaller by pulling on the
working end.
|
|
| |
|
| |
|
|
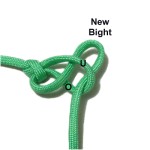
Step
2: Fold the working end to
make another bight, then pass it through
the previous one over
- under.
The tightening process for this knot takes
three steps, which are shown below.
|
|
| |
|
| |

|
|
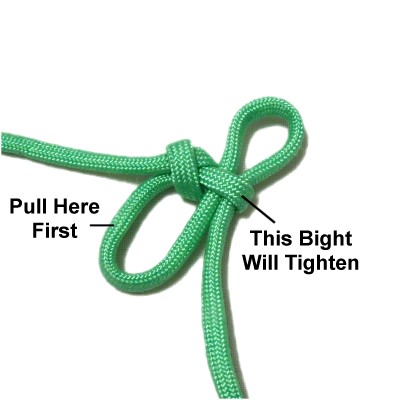
The first step when tightening is to
pull the segment furthest to the left,
which will tighten the previous
bight.
This added step will help to make sure
each link in the Chain Sennit is the
same size.
|
|
| |
|
|
|
|
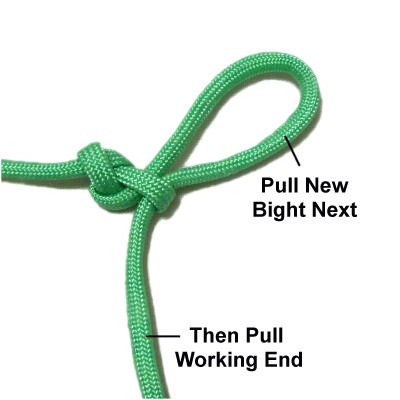
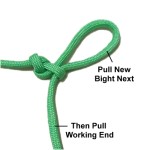
The second step is to pull on the new
bight.
The third step is to pull the working
end to make the new bight smaller.
|
|
| |
|
|
|
|
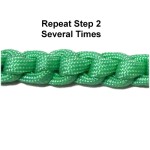
Step
3: Repeat
step 2 several times, or until
the sennit is the size you need for your
project.
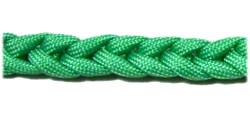
This image shows the BACK of the sennit
turned face up. In the previous images,
the sennit is resting on it's side.
|
|
|

|
|
Step
4: To complete the sennit,
pass the working
end through the last bight you
made.
Then tighten the bight firmly. |
|
| |
| |
|

|
|
This shows the
front and back views of the Chain
Sennit. There should be no
large gaps. |
|
| |
| |
| |
|
|
| By using any
text or images on Free Macrame Patterns, you are
agreeing to our Terms of Use |
|
|
|
| Have
any comments about the Chain Sennit? Contact Me. |
|
|
|

|
|
|
|