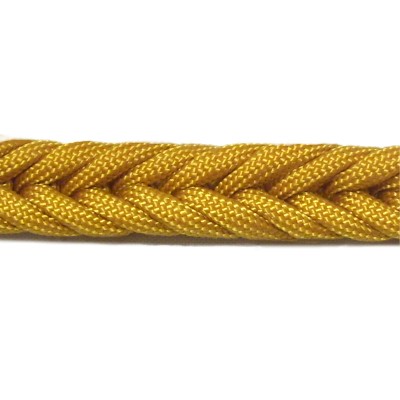
Description: The Bugle Braid
is a historical knot often used to make straps
for musical instruments.
It's also been used in the military, so it's
sometimes called the Military Bugle
Cord or Bugler's Strap.
I've seen this design in a vintage Macrame book
written in the late 1800s, so it's been around
for a long time.
Like the Chain
Sennit, you use one end to form
bights that slide into one another. But in this
decorative knot, you pass through two
loops instead of one. This makes the
sennit stronger and more closely woven than the
regular Chain Sennit.
I recommend you practice this technique with
Paracord or Satin first, since they are both
somewhat slippery, making the process easier.
This technique was found on the Fusion
Knots website.
Click on the link or image to visit the
site.
Be sure to see the video
gallery, where you will find
tutorials for this and other interesting
knot designs.
Preparation:
You need one cord, at least 45 inches long, to
practice the Bugle Braid.
When using it in a Macrame project, you need 10 x
the finished length you plan to make for
just the braiding. Add extra material if you
need to tie the ends together to form a closure,
such as in a belt design.
Read Cord Preparation
to learn how to prepare Paracord if you intend to
use it.
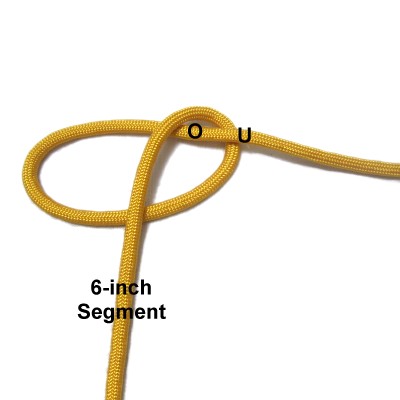
Step 1: Fold the cord
6 inches from one end, if you are just
practicing. (See tip below for
more details)
Mentally label it Loop
1.
Wrap the 6-inch segment around the long
portion of the cord, rotating under
- over. Label
it as Loop
2.
Designer's
Tip: Step 1 can be changed if you
need extra length at this end of the Bugle
Braid. Assuming that you cut extra material,
you can just fold the cord where you want the
braiding to begin.
Please remember that for every inch of braiding,
you need 10 inches of material. So take that
into consideration when determining where to
start.
Wrap the short segment around a second
time, to the left of Loop 2.
Mentally label it Loop
3.
The end of the short segment should be
heading toward the back
of your board.
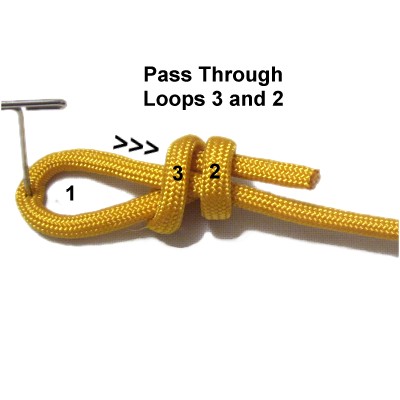
Step 2: Pass the end
of the short segment
through Loops 3 and 2, moving left
to right.
Tighten
Loop 2 by pulling on Loop
3.
Secure the cord by placing a pin through Loop 2.
Remove any other pins.
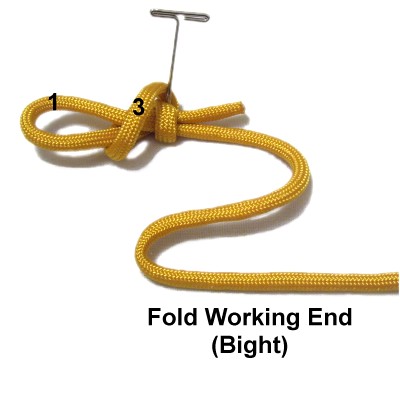
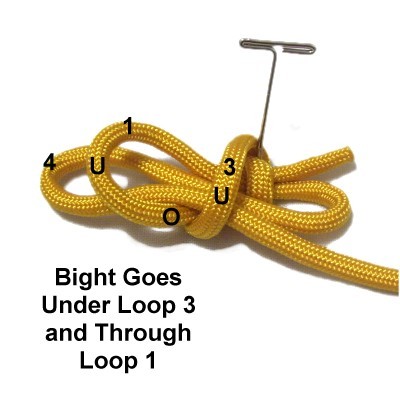
Step
3: Fold the long segment
(working end) to form a bight.
Mentally label it Bight
4.
Make sure you can clearly identify Loops 1
and 3.
Pass Bight 4 underLoop
3 heading right to
left.
Then pass it through Loop
1over
- under (from the top).
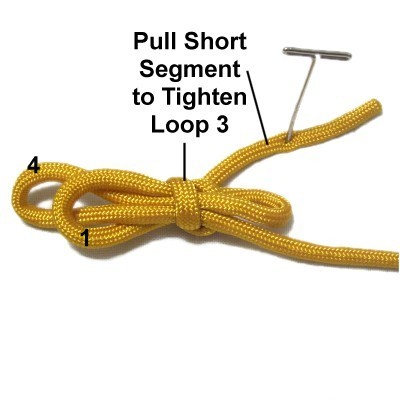
Pull the short segment
to tighten Loop
3.
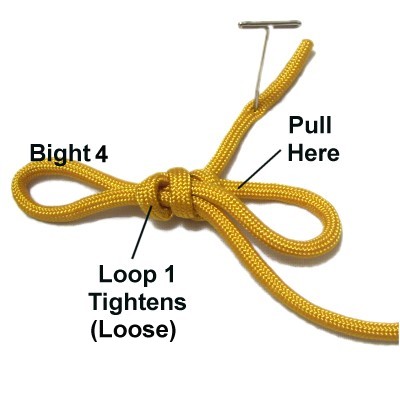
Step
4: Tighten Loop
1 by pulling on the area
indicated, which rests next to the short
end of the cord.
Make sure you keep it loose enough for the
next bight to fit under it.
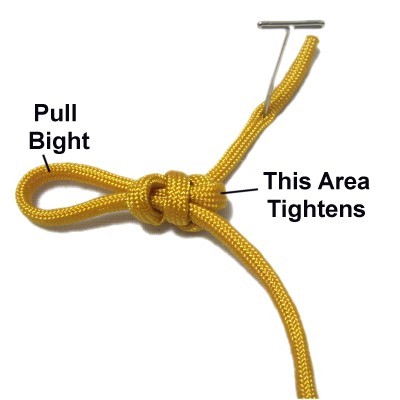
Pull the bight
to tighten the area to the right of the
loops.
Then pull the working end to reduce the
size of the bight.
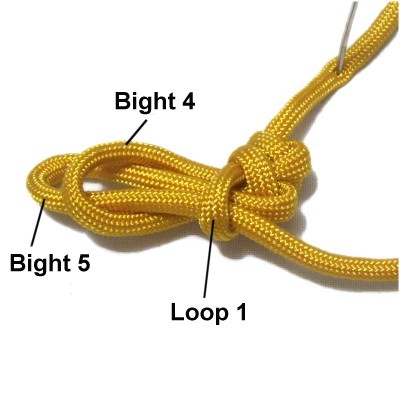
Step 5: Fold the
working end to form a new bight, and
mentally label it Bight
5.
Pass it under Loop 1.
Bring it through Bight
4over
- under.
Repeat
Step 4 to tighten Bight
4 (loosely).
Designer's Tip:
As you continue with the Bugle Braid, here are
some things to pay attention to:
Fold the working end carefully, making sure
it's not twisted.
Pass each new bight through the two
previously made. Pass under
the one partially tightened, and through
the one that is loose.
Try to tighten each bight the same, so the
braid is the same all the way down it's
length.
Keep the sennit on a surface until you feel
comfortable, then you can pick it up as you
work. You will need to bend it periodically so
it lies flat.
Step
6:Repeat
step 5 several times, until you
are almost out of material, or have
reached the size you were planning to
make.
The mental numbering of the new bights
will increase with each step.
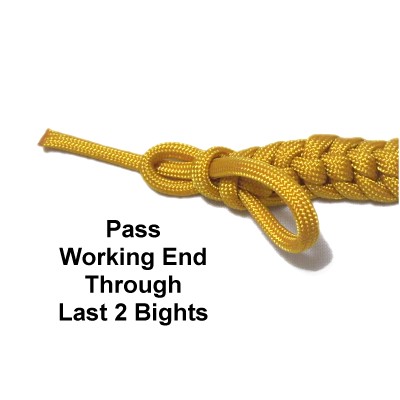
Step
7: Pass the working
end through the last two bights
to complete the braid.
Repeat
step 4 to tighten.
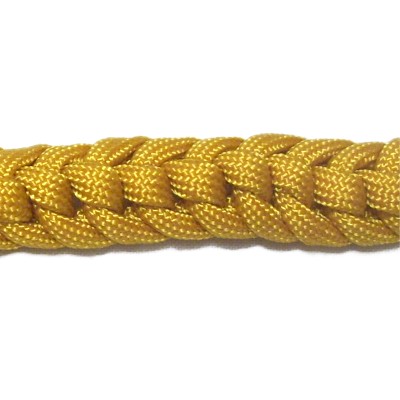
Turn the Bugle
Braid over so you can see the front, and
bend it so it lies flat.
By
using any text or images on Free Macrame
Patterns, you are agreeing to ourTerms
of Use