|
|
|
|
|
|
| |
|
Larks Head Sennits can be made in several ways,
but the most common variations are called alternating
designs. You switch back and
forth between two or more cords.
These techniques look very appealing when made
with two different colors. They can be used as
purse handles, belts, or jewelry.
When making your own Plant Hanger designs, any of
the four techniques on this page will work well
for the long posts between the top and lower
cradle.
Make sure you practice the Vertical Larks Head
knot before you get started on
these patterns. |
|
|
|
|
|

|
| |

|
|
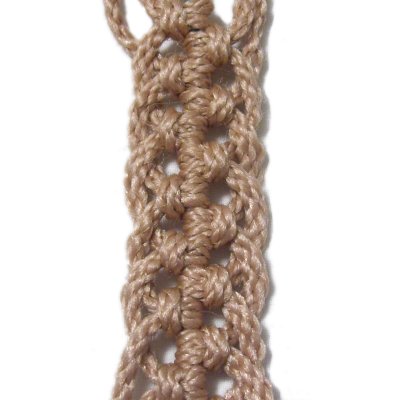
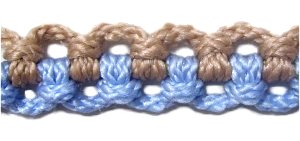
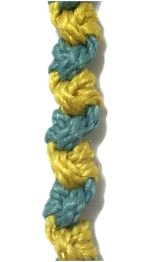
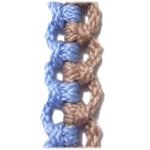
Larks
Head Fish Bone
One of the
most interesting Larks Head sennits is a
Fish Bone design.
You can make
it with more working cords than what is
shown, which will increase the spacing
between the loops along the edges.
You will be able to see the loops better
with additional cords.
|
|
|
| |
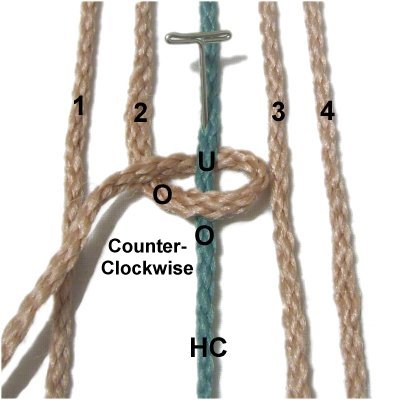
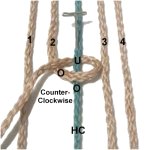
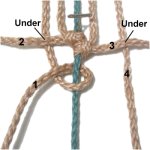
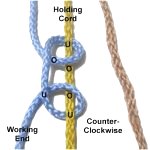
To practice, secure
four 36-inch working cords vertically on your
project board.
Mentally number the cords 1 - 4.
Place one holding cord between cords 2 and 3, as
shown below.
Designer's
Tip: Larks Head sennits are usually
made with one or more
holding cords,
also called the core.
In the examples on this page, the holding and
working cords will be different colors (optional). |
|
|
| |
|
|
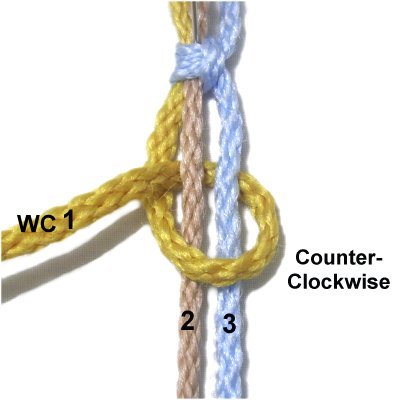
Step 1: Tie a counter-clockwise
loop with working
cord
2, passing over
- under the holding cord.
As you pull it left, pass over
cord 2 to complete the loop.
|
|
| |
|
| |

|
|
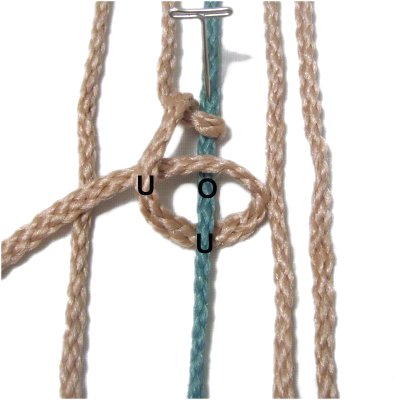
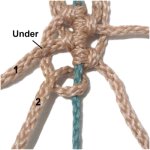
Step 2: Tie the second
loop for the Vertical Larks Head knot,
passing under
- over the holding cord.
As you pull to the left, pass under
cord 2 to complete the loop.
Steps
1 + 2 = One Larks Head knot.
|
|
| |
|
| |
|
|
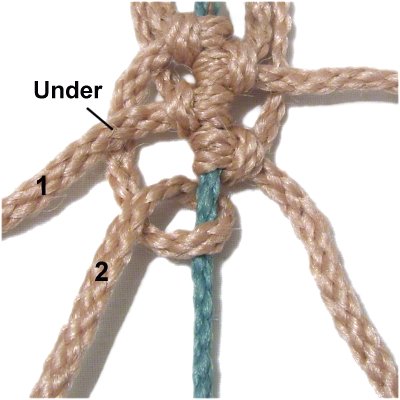
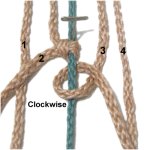
Step
3: Use cord
3 to tie the next Larks Head
Knot below the previous one.
Rotate counter-clockwise
to make the two loops. (only one is shown)
Position cords 2 and 3 so they are horizontal
(see next image). |
|
| |
|
| |
|
|
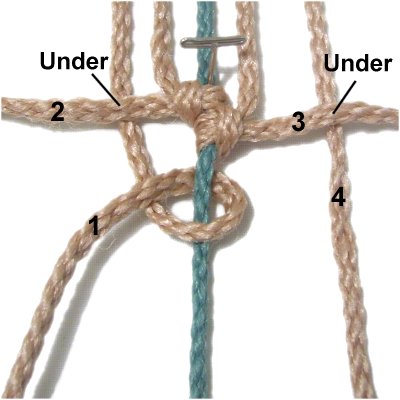
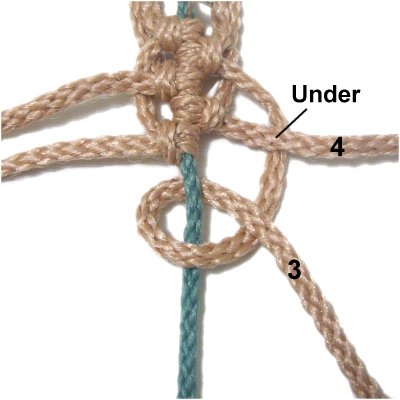
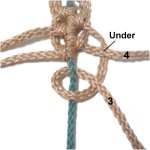
Step 4: Pass cord
1 under
cord 2, then use it to tie the next counter-clockwise
Vertical Larks Head knot.
Pass cord
4 under
cord 3, then use it to tie a clockwise
Vertical Larks Head.
|
|
| |
|
| |
Designer's
Tip: Larks Head sennits like this
one can get confusing. Here are some
pointers:
- Each time you finish tying a knot, position
the cord horizontally, as in the image above.
- As you bring the next cord forward, pass under
the previous cord used on
the same side.
- The knots made with cords 1 and 2 are counter-clockwise,
so the heads face left.
- Those made with cords 3 and 4 are clockwise,
with the heads facing right.
|
| |
|
| |
|
|
Step 5: Use cord
2 next, passing under
cord 1 before tying the knot.
|
|
| |
|
| |
|
|
Step 6: Use
cord
3 next, passing under
cord 4 before tying the knot.
|
|
|
| |
|
|
|
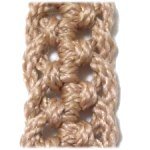
Step
7: Repeat
steps 4 - 6 at least one more
time. |
|
|
|
|
| |
|
|
| |
|
|
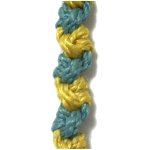
Zigzag
Pattern
Larks Head
sennits can be made without a separate
holding cord.
This
technique shows you how to alternate
between two cords, where one holds the
knot and the other is used to tie
it. The knots will tilt slightly,
forming a zigzag pattern.
This design
is similar to the Alternating
Half Hitch.
|
|
| |
|
| |

|
|
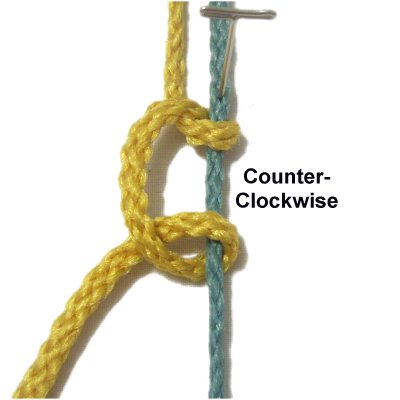
Step 1: Secure two
cords to your board vertically.
Use the left
cord to tie a Vertical Larks Head
knot onto the right cord. Rotate counter-clockwise.
|
|
| |
|
| |

|
|
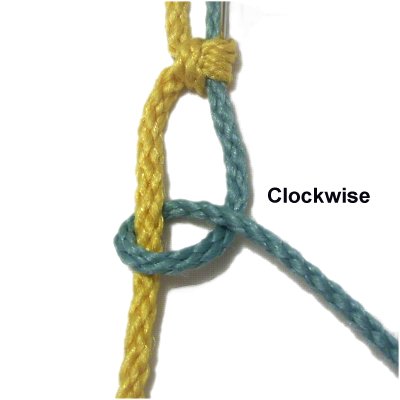
Step 2: Use the right
cord to
tie a Vertical Larks Head onto the left
cord, rotating clockwise.
It's OK if the knot tilts slightly, since
there is no way to keep it completely
vertical.
|
|
| |
|
| |
|
|
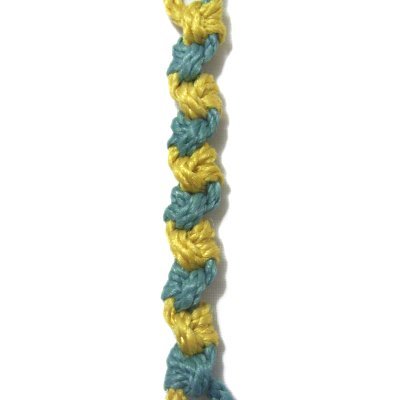
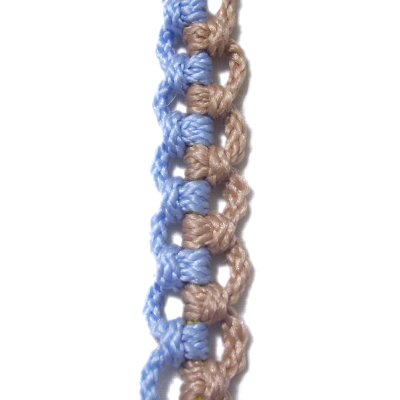
Step 3: Repeat
steps 1 and 2 several times,
since Larks Head sennits are usually long
and slender.
This image shows how the knots tilt,
forming a zigzag pattern.
|
|
| |
| |
|
| |
|
| |
|
|
Alternating
Sennit
This is the
most common of the Larks Head sennits. You
will find it in many Macrame patterns, in
both modern and vintage books.
You will need 2
working cords and one holding cord to
practice. The holding cord should be in
the center.
|
|
| |
|
| |
|
|
Step 1:
Use the left
working cord to tie a Vertical
Larks Head knot onto the holding cord,
rotating counter-clockwise.
Loop 1:
Over - under - over
Loop 2: Under - over - under |
|
| |
| |
| |

|
|
Step 2:
Use the right
working cord to tie a Vertical
Larks Head knot onto the holding cord,
rotating clockwise.
This image shows only the first loop. |
|
| |
|
| |
|
|
Step 3:
Repeat
steps 1 and 2 several times, to
complete the sennit.
Larks Head sennits are supposed to be long,
and as slender as possible. |
|
| |
| |
| |
| |
|
|
| |

|
|
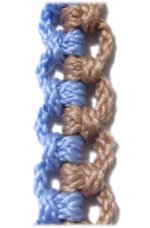
Handle
Design
Larks Head
sennits like this one can be used to make
handles and straps.
The knots
alternate direction like the other designs
on this page, but there are no loops or
loose segments along the edges.
By adding more
holding cords than what is shown, you can
increase the thickness of the
sennit.
|
|
| |
|
| |
|
|
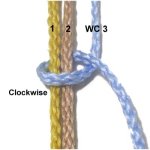
Step 1: Secure three
cords to your project board. Mentally
number them 1 - 3.
Use working
cord 3 to tie a clockwise
Vertical Larks Head onto cords 1 and
2. This image shows only the first
loop.
|
|
| |
|
| |
|
|
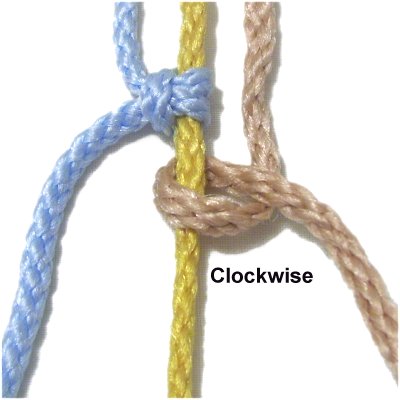
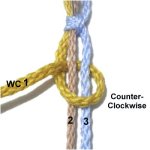
Step 2: Use working
cord 1 to tie a Vertical Larks
Head onto cords 2 and 3 (counter-clockwise).
When you tighten it, make sure this knot
rests against
the first knot.
|
|
| |
|
| |
|
|
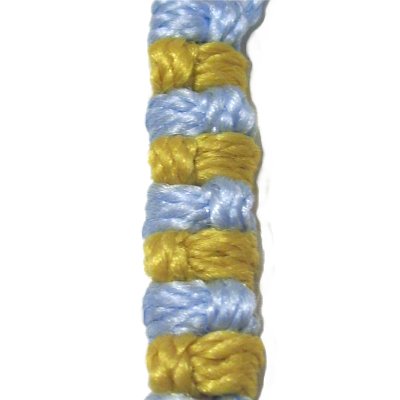
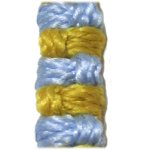
Step 3:
Repeat
steps 1 and 2 several times to form
the rest of the sennit.
|
|
| |
| |
|
|
By using any text or
images on Free Macrame Patterns, you are
agreeing to our Terms of Use
|
|
|
|
|
Have
any comments about Larks Head Sennits? Contact
Me.
|
|
|
|
|
|
| |
| |

|
|