|
|
| |
|
|
| |
|
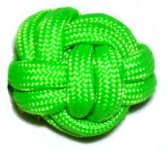
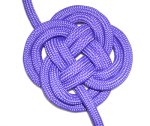
Description: The Globe Knot
is a type of Celtic knot called the Seal
of Solomon, which is also described on
the page called Round Knots.
Instead of a creating a flat design, the knot
is tightened to form a round, finished ball.
Both ends can be tucked inside the sphere, or
the knot can dangle from one portion of the
cord.
This interesting decorative knot can be used as
a head for Macrame animals, or even as part of
jewelry designs.
Try making with thick rope and use it for a
dog's toy, or use fine
material for a pair of designer earrings.
The material used in the example is Paracord,
which requires you to melt the tips to seal in
the inner fibers.
|
| |
|
| |
| |
 |
|
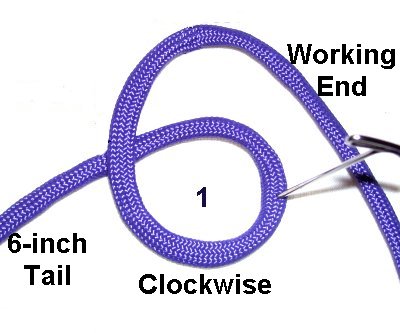
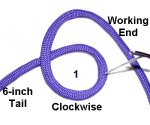
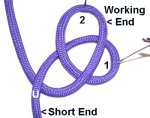
Step
1: Secure one end of a
36-inch cord to your project board.
Make a clockwise
loop 6
inches from the end.
Move the working end above the loop and
secure it.
|
|
| |
|
| |
 |
|
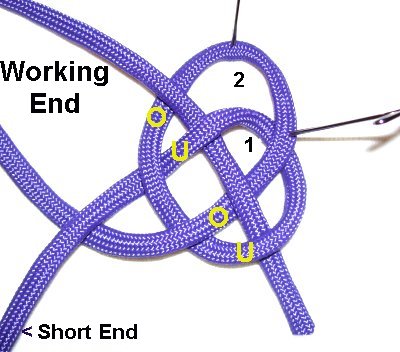
Step 2: Bring the
working end down, passing over
the first loop. This creates a second
loop at the top.
Bring the working end under
the short end (secured).
|
|
| |
|
| |
 |
|
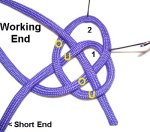
Step 3: Bring the
working end through both loops, moving clockwise.
Weave over
- under - over - under
the four segments.
This creates the third loop on the
left.
|
|
| |
|
| |
 |
|
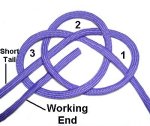
Step 5: To make the
fourth loop, rotate the working end clockwise,
so it's next to the short tail (secured
end).
When you complete the next step, you
will be able to clearly see the fourth
loop of the knot.
|
|
| |
|
| |
 |
|
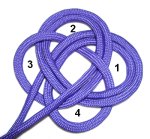
Step 6: Move the
working end through the entire knot, following
the path of the first
portion.
Stop when you reach the secured tail.
Pass the end to the back,
so it rests under
Loop 3.
|
|
| |
|
| |
 |
|
Step 7: Tighten the
knot slightly, so there is only a small
amount of space showing between the
segments.
Start at the tail and work through the
first knot, then tighten the doubled
portion.
|
|
| |
|
| |
 |
|
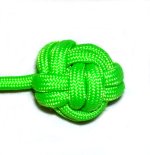
Step 9: Tie an Overhand
knot in the short tail,
close to the tip.
Push the Globe knot into a ball shape,
and arrange the Overhand Knot inside.
Tighten it further, forming a tight
sphere.
|
|
| |
| |
|
|
By
using any text or images on Free Macrame
Patterns, you are agreeing to our Terms
of Use
|
|
|
| |
|
Have
any comments about the Globe Knot? Contact
Me.
|
|
|
|

|
|
|
| |