Visit the website by clicking on this
link or image.
The video
gallery contains tutorials for
a variety of very unique and appealing
decorative knots.
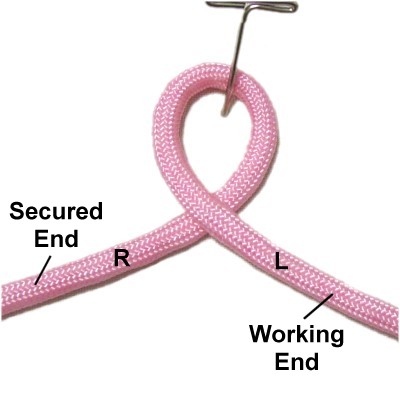
Step 1: To practice,
make a loop anywhere on a cord that's at
least 18 inches long.
Make sure the left passes over the
right to make the crossing point.
Secure the right half of the cord (on
your left).
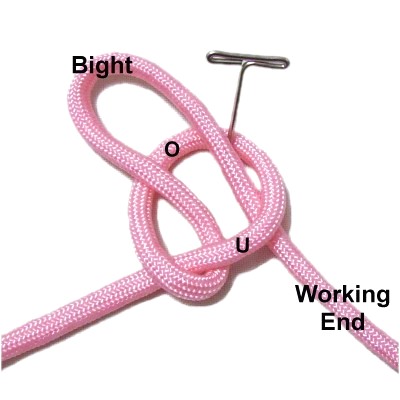
Step 2: Fold the
working end to make a bight, and push it
through the loopunder
- over (from below).
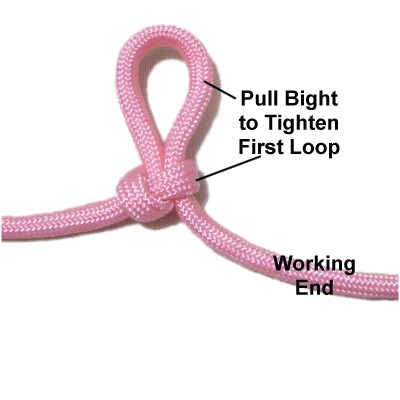
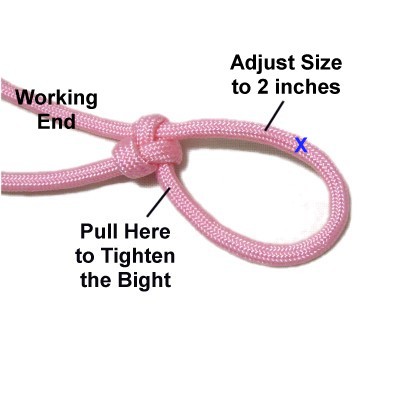
Step
3: Pull the bight to
tighten the first loop.
Reduce the size of the bight by pulling
the working end.
Step 4: Move the
working end counter-clockwise
(right to left).
Pass it through the bightover
- under (front
to back if you are holding the cord).
Step
5: Pull the lower portion of the
new loop in the area indicated, close to
the tightened portion. This will
tighten the bight.
Adjust the size of the loop to 2 inches by
pulling on the working end.
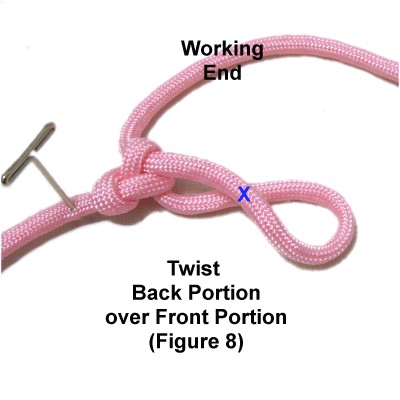
Designer's Tip:
The blue
X you see in the image above is the
segment that moves in the next step.
Step 6: Twist the
loop toward you, so the back portion (X)
crosses over the front portion (figure
8).
This is the most challenging part to
the Eternity knot. The material
make kink somewhat, especially if you
are using Paracord.
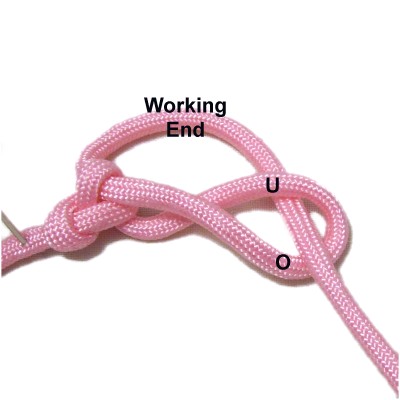
Step 7: Bring the
working end around in a clockwise
direction. Pass it
through the right
opening in the loop under
- over (back to front if you
are holding the cord).
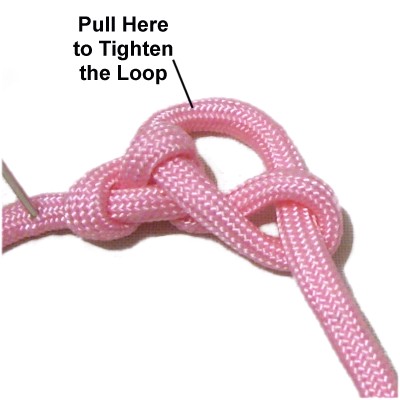
Step
8: Reduce the size of the
loop gradually
by pulling the working end in the area
indicated, near the tightened portions of
the knot.
Work out any kinks in the material.
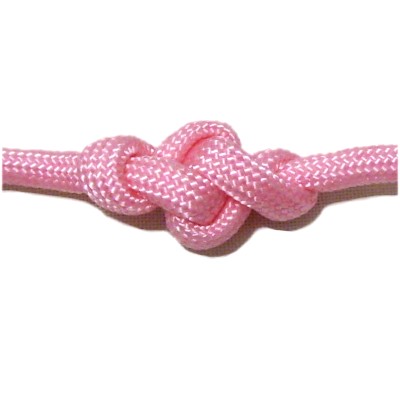
This is the completed Eternity Knot.
By
using any text or images on Free Macrame
Patterns, you are agreeing to ourTerms
of Use