Cut one cord, at least
3 yards long for an Eternity Necklace 26 inches or
less.
Increase the length for sizes over 26 inches.
Prepare the ends with glue
and allow it to dry completely.
I recommend you condition the material with
Beeswax, which will stiffen it slightly, and make
beading easier.
Make sure the hole in
the pendant is horizontal.
Add ajump
or split ringto the pendant if
the hole is vertical.
Important:
When using Satin, make sure you do not pass pins
through the material.
Instead, leanthe pins over the cord (or use tape).
Directions for Eternity Knot
I recommend you make the first Eternity Knot on
the surface of your board. After you are
comfortable tying it, you may find it easier to hold
the cord for the remaining knots.
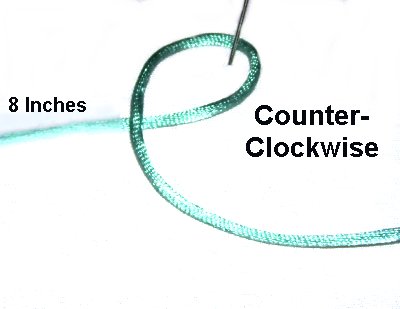
Step
1: Secure one end of the cord on
your left.
Move over 8
inches, and make counter-clockwiseloop.
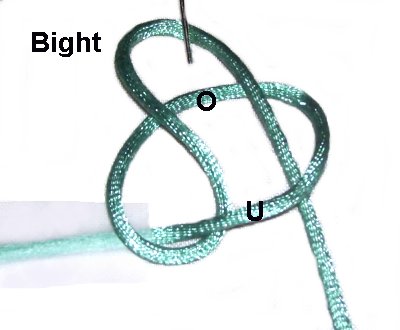
Step
2: Form a bight with the working
end, and pass it through the loopunder
- over(from
below).
Tighten the loop by pulling on thebight.
Reduce the size of the bight by pulling on
the working end.
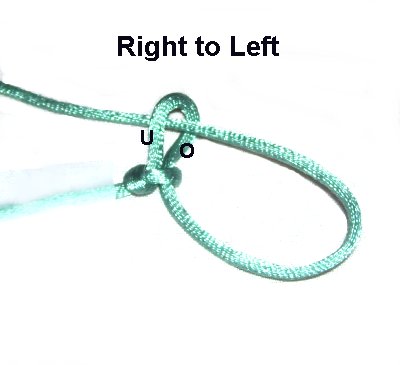
Step 3:
Pass the working end through the bight,
right to left. Make sure it goes
through fromfront to
back, which is the same
asover
- under.
Pull on the new
loop to tighten the
bight. Adjust the loop so it's
around 1-inch in size.
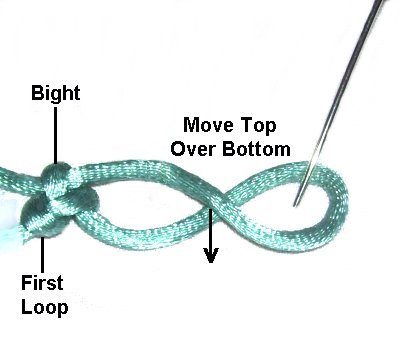
Step
4: Move the top of the
loop over the bottom, to form a figure
eight shape. Secure it to your
board.
I always lean the pin over the portion of
the loop furthest to the right, since that
is where the end passes through in the
next step.
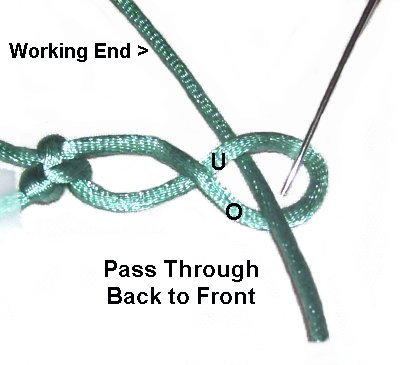
Step
5: Bring the working end through
the right
portion of the loop under
- over(back
to front).
Pull on the working end close to the
tightened portion of the knot, while
holding the loop steady with your other
hand. When it's tightened, pull on
the end.
Design
Tip: This is one of the most
challenging areas in the Eternity Necklace,
because the loop can twist if you don't hold onto
it.
I recommend you hold the crossed
area until it's resting firmly against
the tightened portion. Then hold on to the right area of
the loop (crook), until it's almost completely
tightened.
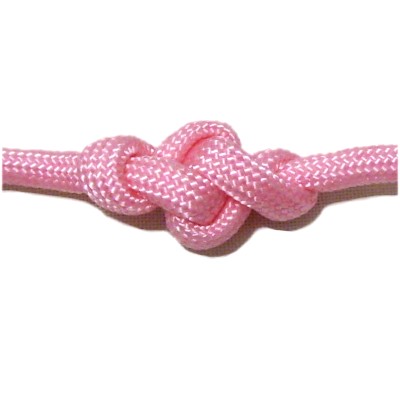
This is the
completed Eternity Knot.
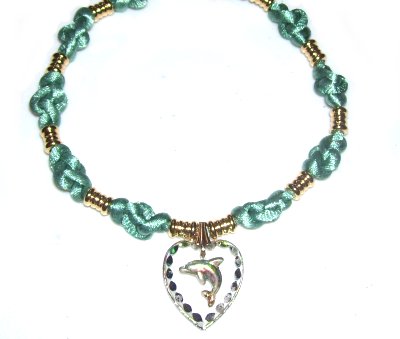
Necklace and Pendant
Step 6: To
make the rest of the Eternity Necklace, you just
add beads between each knot, and continue.
Be sure to read
the following important information:
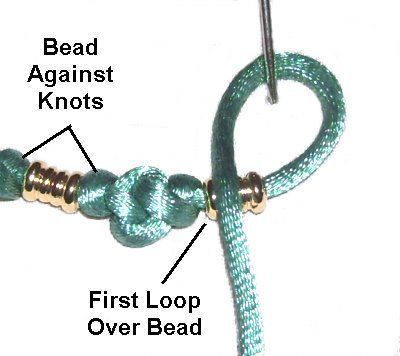
To ensure that
the beads are against
the Eternity Knots, form the first loop so
it rests on
top of the bead.
After you complete step 2 (bight), move
the loop over slightly while tightening
it.
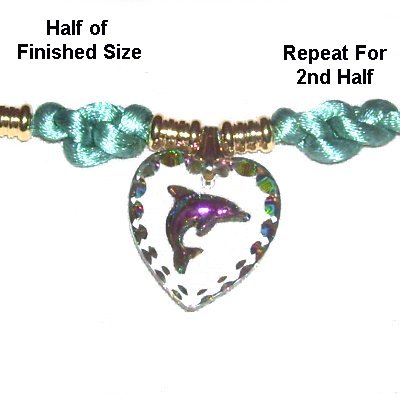
Tie enough
knots to make half
the finished
size minus 3.5 inches.
So if you want the completed Eternity
necklace to be 26 inches, stop at 9.5
inches.
Measure from the first knot, and don't
include the secured tail.
Step 7: Add
a bead, the pendant, and another bead.
Repeat
steps 1 - 6 to create the second half.
The Clasp
The clasp for the Eternity Necklace is a simple
loop and button. There are two beads
present, which help hold the clasp
together.
Step 7: Before
you make the clasp, apply glue to the back
of the
first and last knots. Allow it to
dry completely.
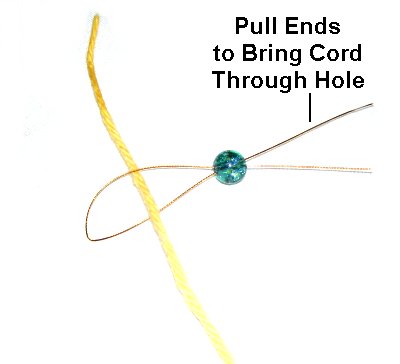
You need to
test the beads to make sure a folded cord can fit
through:
Start by folding the small piece of wire and
sliding it through a bead.
Pass a small
piece of the material you are using
through the folded area.
Pull on the ends to see if the cord and
the wire will pass through the bead. You
need different beads if you cannot get
it through.
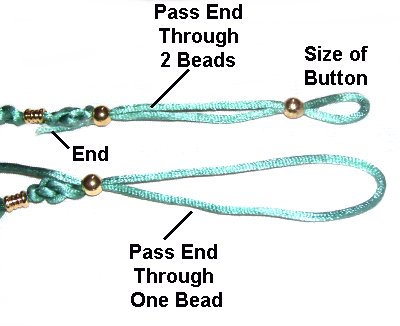
Step 8: For
the first
half of the Eternity Necklace, pass the
wire through twobeads,
and then place the 8-inch portion of the cord
through the wire.
Pull the cord and wire through, but
not all the way. The cord should
remain folded, to form a large loop. (see
image below -- top portion)
The end (tip) of the
cord should be lined up with the first knot.
Slide one of the beads to rest next to the Eternity knot.
Move the
second bead close to the fold.
Adjust the area between the bead and the
fold so it's the size of the button.
The area between
the two beads should be three
inches.
Make adjustments by pulling on the end and
moving the beads if necessary.
Step 8,
continued: On the second
half of the Eternity Necklace, repeat
the same process, but pass the cord through one bead
instead of two.
Move it close to the last Eternity knot.
(see image above, lower portion)
Match the first and last knots, by placing both
ends side-by-side.
Make sure both loops are the same
size.
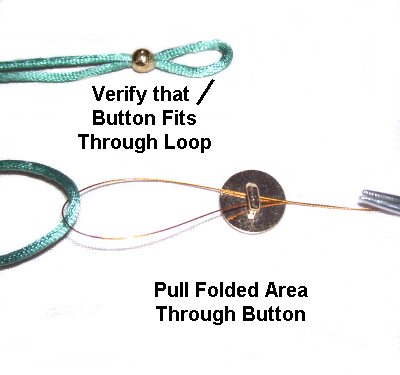
Step
9: Check again that the
button still fits through the small loop
(at the end with two beads).
Use the wire threader or tweezers to pull
the folded area at the opposite end (1
bead) through the button's shank.
Turn the button and necklace so the front
is face up.
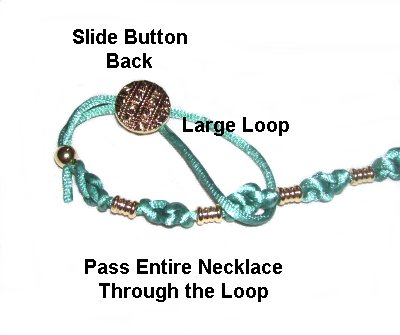
Step
10: Slide the button back
so the folded area beyond it is as large
as possible. Pass the entire Eternity
Necklace through the loop.
This will cause the material to fold
around the shank, since you are actually
tying a Larks Head knot.
Step 11:
Make any adjustments now, since the next
step will be to apply fabric glue, which bonds
quickly.
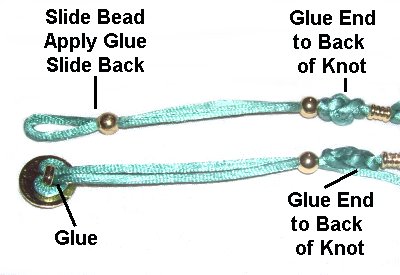
Slide each bead back slightly. Apply glue so
it will be on the inside, then slide it back into
position. Check to make sure the small loop
still fits around the button.
Apply glue around the shank of the button, under
the cord.
For the tips of the cord, apply glue and
adhere them to the back of the Eternity
knots resting next to the beads.
Use clips or tape to hold the ends while
the glue dries. Cut off the extra
material.
By
using any text or images on Free Macrame
Patterns, you are agreeing to ourTerms
of Use