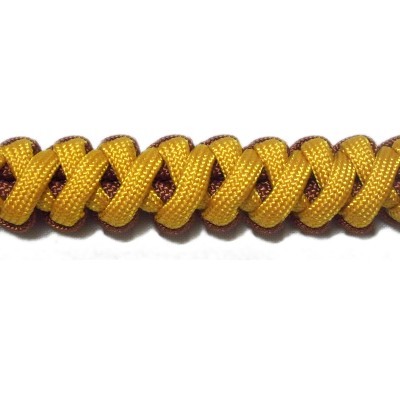
Corset Spine
Description: The Corset Spine
is a variation of the Endless
Falls
There are loops along the edges, making it
somewhat flexible. So this type of sennit can be
used as a belt, a pet collar, or similar
projects. It makes a nice Paracord
bracelet, too.
There is a loop at one end that can be used as
a clasp. You simply tie a button knot at
the other end.
The Corset Spine can be found on Fusion
Knots
Click on this image or link to view the
knot gallery, which contains video
instructions for many great knots.
Preparation:
(Gold
cord in images)
Cut one working cord, 60 inches long (Brown
cord in images)
When using this technique for a Macrame
project, both
cords 7 x
the finished length of the item you are
making.
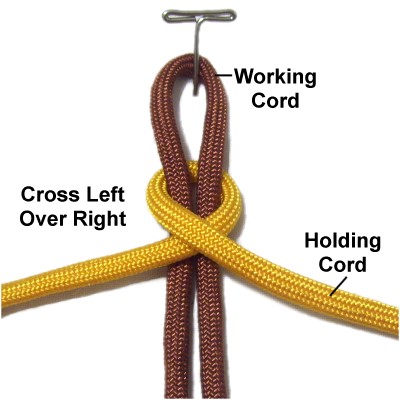
Step
1: Fold the working cord
Place the center of the holding underneath it, then bring
both halves on top of the working
cord.
Cross them left
over right.
Step 2: Turn the cords
upside down, so you are working in the
BACK.
Cross the two halves of the holding
cord again.
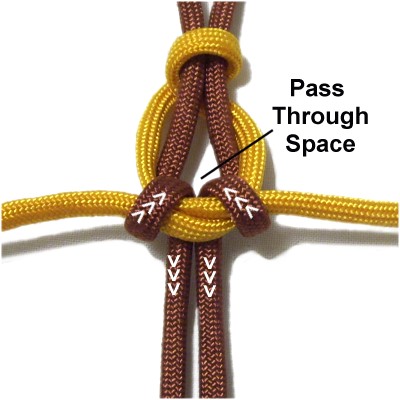
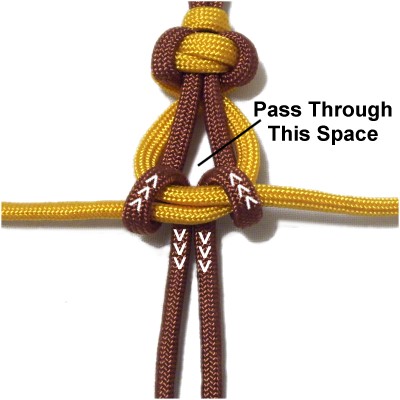
Step 3: Fold both
halves of the working
cord backward, passing over
the crossed area of the holding
cord.
Move them down through the space
indicated, passing under
the crossed area as you pull them toward
you.
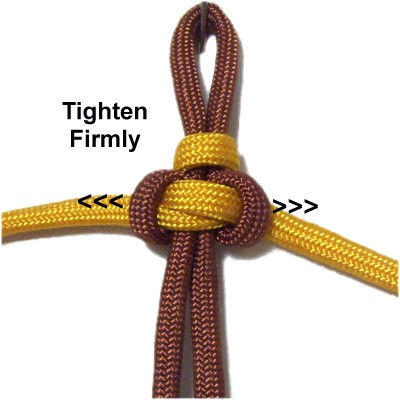
Tighten the knot by pulling both halves
of the holding cord first. Make
sure both the front and back crossed
areas are tight.
Then tighten the working cord.
Push the folded loops right and left,
so they are as flat as possible.
Step
4: Turn the design over again,
so you are working in the FRONT.holding
cord left over right, resting on
top of the working cord.
Step 5: Turn the
design upside down again, so you are
working in the BACK.
Make the second cross with the holding
cord.
Step
6: Repeat
Step 3.
Designer's
Tip: As you continue making the
Corset Spine, see if you can cross the holding
cord in the front without turning the sennit over.
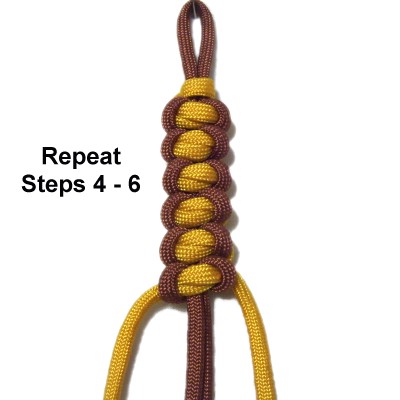
Step
7: Repeat Steps 4
- 6
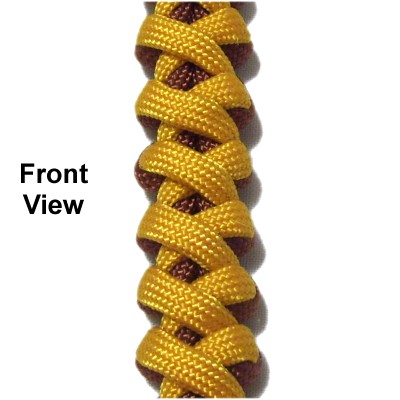
Step
8: Turn the sennit over so
you can see the front.
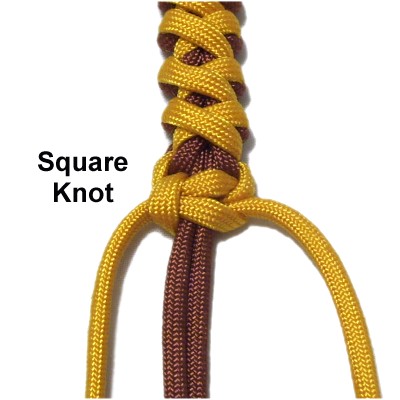
Step
9: Use both the holding
cord to tie a tight Square
Knot (Optional)
By
using any text or images on Free Macrame
Patterns, you are agreeing to our Terms
of Use
Have
any comments about the Corset Spine? Contact
Me.