|
|
| |

|
|
|
Description:
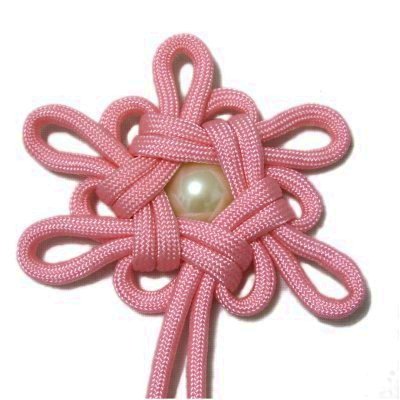
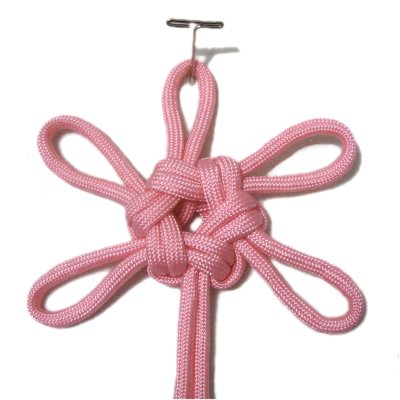
The Chinese Flower knot is a variation of the Good Luck Knot.
It has five large and six small petals that
surround a woven design in the center. When
completed, the knot will have an opening in the
center, which is shown near the bottom of the
page.
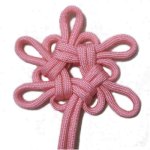
When made with 4mm size material, you can place a
small stone or cabochon
in the center (shown above). I recommend you
attach the stone with glue if using material
that's slick, like the nylon Paracord shown in the
example.
These instructions are written for 4mm size
material, which is the best size for this
design. When making it with finer material
(3mm or less), reduce the size of the bights in
the first step (2.5 inches).
You can make the knot with 6mm cord material, but
it will be very bulky. Increase the length
of the bights if you use it.
|
| |
| |
| |
| |
Preparation:
Cut one cord, at least 72 inches long (2
yards).
Prepare the tips in some manner to prevent
unraveling. See Cord Preparation
for options. |
| |
| |
|

|
|
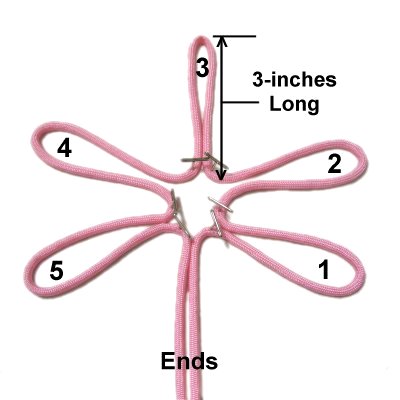
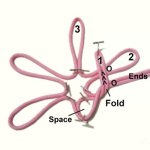
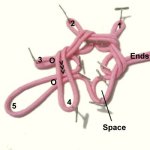
Step
1: Fold the cord in half,
and secure it to your board at the
center. Make the first bight (3) by
moving down 3 inches.
Then make four more 3-inch bights, and
arrange them as shown in this image.
Mentally number them in a counter-clockwise
direction. |
|
| |
| |
|
|
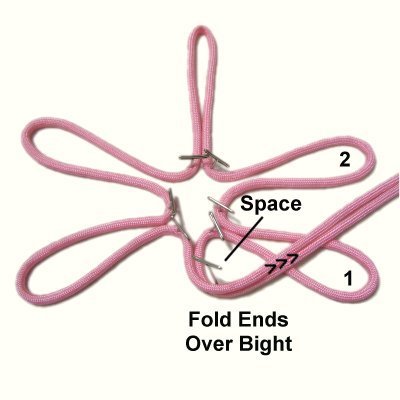
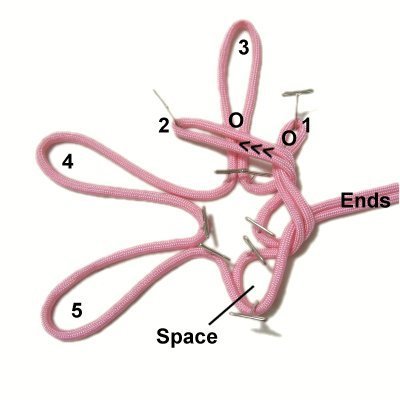
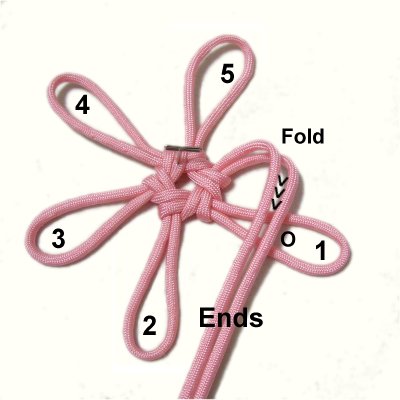
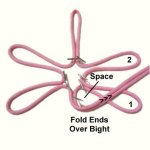
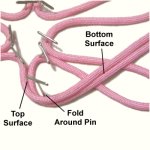
Step
2: Fold the ends
around a pin and bring them to the
right. Place them on
top of bight
1, then secure them to your
board.
Make sure they do not rest on bight
2.
By folding them around the pin, a space is
created. Make sure the space remains
intact after each of the following steps.
|
|
| |
| |
|
|
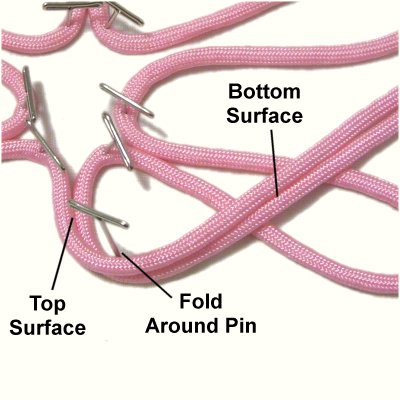
Designer's
Tip: You FOLD the cords for
the Chinese Flower, which is different
than simply curving them.
You actually turn them upside
down after you make the corner,
so the bottom surface that was touching
the board is face up.
|
|
| |
|
|
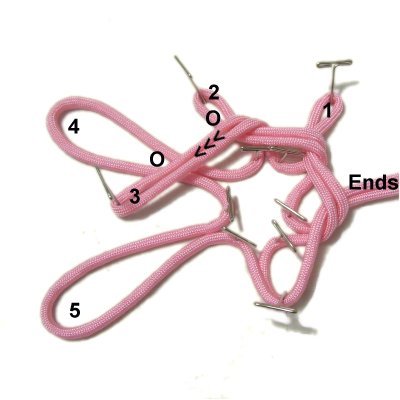
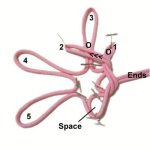
Step
3: Fold bight
1 over
the ends as well as bight 2. Secure
it to your board.
|
|
| |
|
| |
|
|
Step
4: Fold bight
2 over
bight 1 and bight 3.
Secure it to your board.
|
|
| |
|
| |
|
|
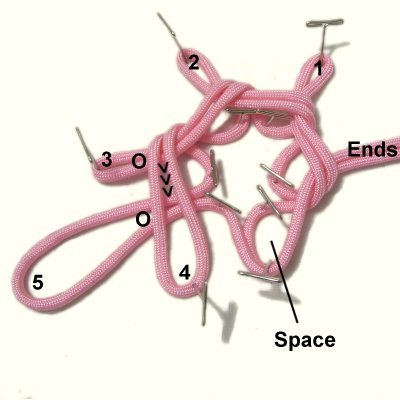
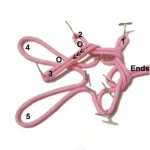
Step
5: Fold bight
3 over bight 2 and bight 4.
Secure it to your board.
|
|
| |
|
| |
|
|
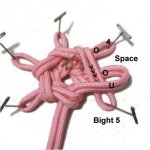
Step
6: Fold bight
4 over bights 3 and 5.
Secure it as you did the others.
Make sure you can clearly see the space
you made when you folded the
ends in step 2.
|
|
| |
|
|

|
|
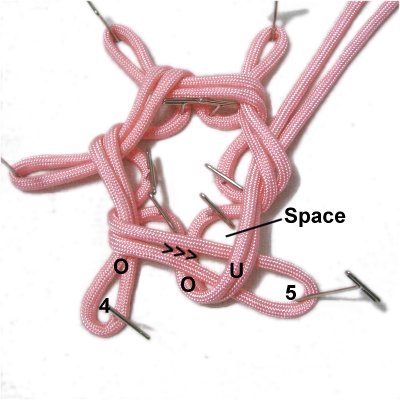
Step
7: Fold bight
5 over
4, heading right.
Bring it THROUGH the space formed by
the ends, passing over
- under the two parts.
Read
the information below before removing
any pins.
|
|
| |
|
|
|
|
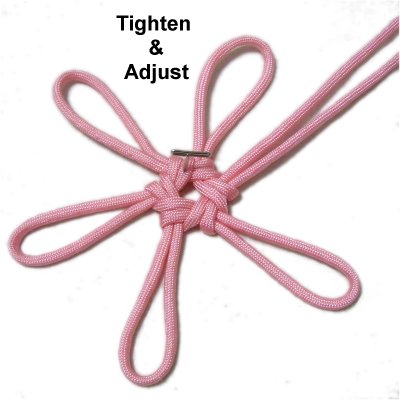
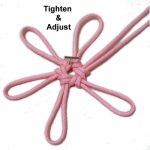
Step
8: To tighten the first
half of the Chinese Flower, pull on the
bights and ends while
the pins are in place.
Then slowly remove all the pins in the
center area first, followed by the one at
the end of each bight.
Tighten more, but make sure you can still
loosen parts of it later on.
|
|
|
|
Designer's
Tip: It's important that you spend
some time tightening and balancing the knot, so
the bights are all the same size.
Measure the bights if necessary. This is the
best time to change their sizes, so make any
adjustments you need before moving on. |
|
|
|
|
|
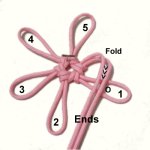
Step
9: Mentally re-number the
cords starting with the bight on the lower
right side.
The second half is made clockwise,
so number them clockwise, too.
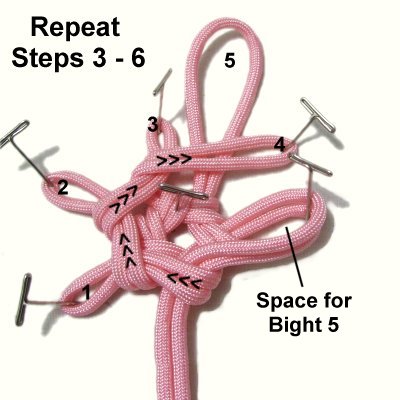
Repeat
step 2, folding the ends
over bight 1. |
|
|
|
|
|
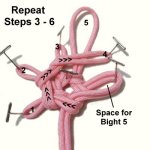
Step
10: Repeat
steps 3 - 6 moving in a clockwise
direction, folding bights 1 - 4.
Because the bights are smaller now, you
will need to fold them close to the first
half of the Chinese Flower. You can fold
them directly on top of it if necessary.
|
|
| |
|
| |
|
|
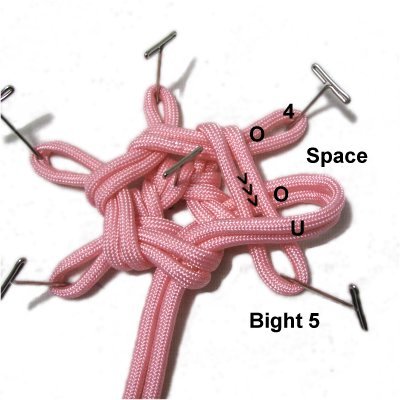
Step
11: Fold bight
5 over bight 4, then move it down
and bring it through the space made by the
ends.
It should pass over
- under the two parts.
|
|
| |
|
|
Step
12: Tighten this portion of the
Chinese Flower the same way you did the
first half.
Be very cautious about removing the pins,
since the loops are shorter and the knot
can come apart more easily.
|
|
| |
|
| |

|
|
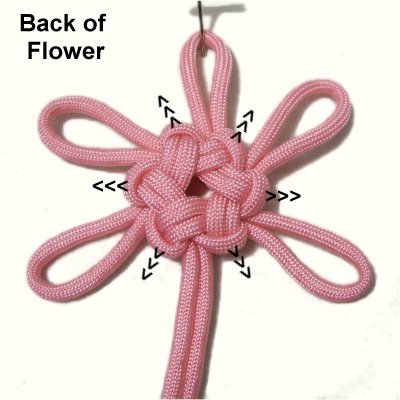
Step
13: Turn the flower upside
down. There are small loops along
the outside edge of the knot.
Pull those loops firmly, and enlarge them
to at least 1/4-inch (larger if
possible). You may need to tighten
the second half of the knot a bit more
afterward.
|
|
| |
|
|
|
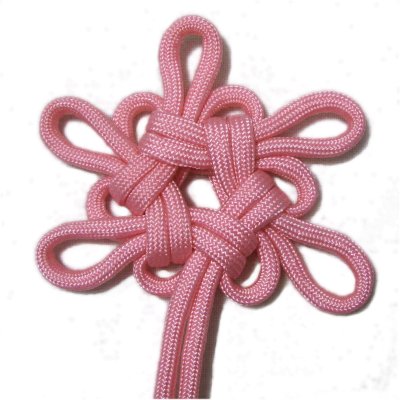
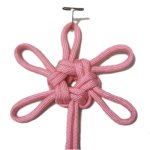
This is what
the Chinese Flower looks like without a
stone or cabochon in the center of it.
Should you decide to add a stone, make
sure it's small so it doesn't stretch the
knot too much.
|
|
|
| |
|
|
| By using any
text or images on Free Macrame Patterns, you are
agreeing to our Terms of Use |
|
|
|
| Have
any comments about the Chinese Flower? Contact
Me. |
|
|
|

|
|
| |
|