|
|
| |
|
 |
|
Description:
This Candy Cane Decoration features the
Crown
Knot. You will be
making the vertical design, which is
unique.
This holiday decoration can be used to
decorate Christmas trees and wreaths.
The
fringe at the bottom is optional.
This Macrame project is suitable for
older children and adult
beginners. It is a great craft
project for children's groups.
Finished
size: 6 inches long x 1 inch
wide
|
|
| |
|
| |
| Supplies
Needed: |
- 4 mm cord material (Red and White)
|
| |
|
|
| |
Cutting Instructions:
|
- Cut 2 cords, each at least 80 inches long
(both colors).
- Cut 2 pieces of craft wire, each at least 8
inches long.
|
| |
| |
|
To change the size from top to bottom,
determine the finished length you want and multiply it by 13.
Cut each cord to that length.
To change the width, cut additional cords or
use a different size material.
|
| |
|
| |
 |
|
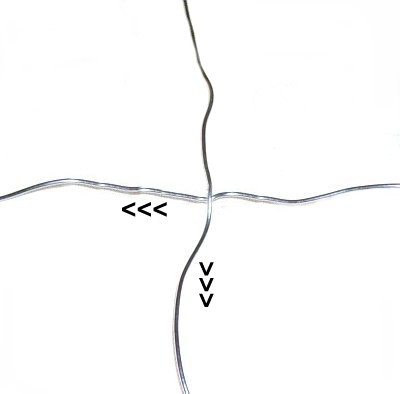
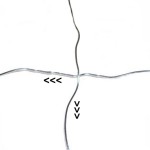
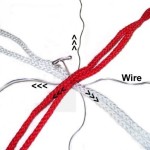
Step 1:
Lay the wires on the project board, so one
is vertical and the other is horizontal.
Make sure the centers are matched up. |
|
| |
|
| |
 |
|
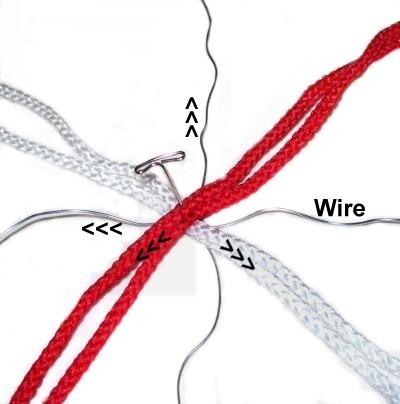
Place the white
cords on top of the
wires, resting diagonally.
Do the same with the red
cords, laying them on top of the white
ones in the opposite direction.
The centers
of both cords need to be resting at the
crossing point of the wires.
|
|
| |
|
| |
 |
|
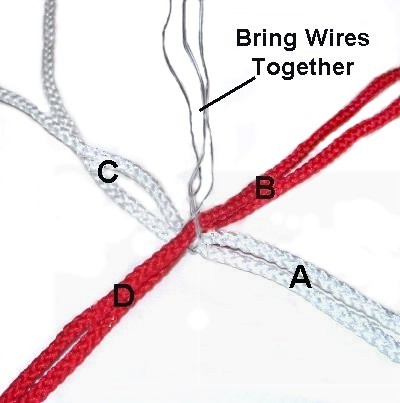
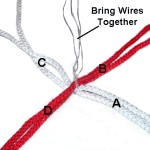
Step 2: Fold the
wires so they pass
around the crossing point of the cords.
Bring them
together in a group standing
upright. You can twist
them together if you wish.
|
|
| |
|
| |
| |
Crown Knot
Instructions
|
| |
| |
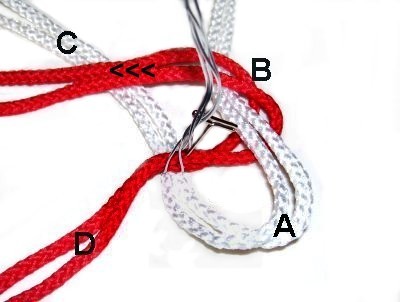
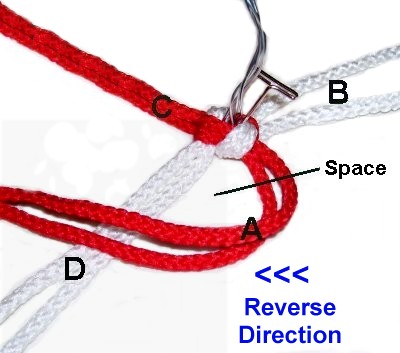
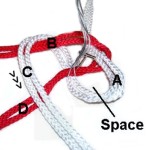
Step
3: The images below show the steps
to make the first Crown Knot for your Candy Cane
Decoration.
Each segment has two cords that act
together. Try to fold the cords rather
than curve them.
Mentally label each segment A - D, starting on the
lower right and moving counter-clockwise. |
| |
| |
 |
|
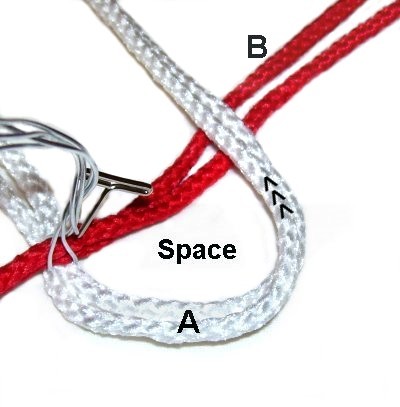
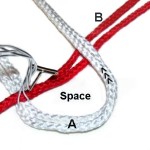
Step
A: Fold segment
A backward so it rests
on top of
segment
B.
Leave a small space for the 4th step.
|
|
| |
|
| |
 |
|
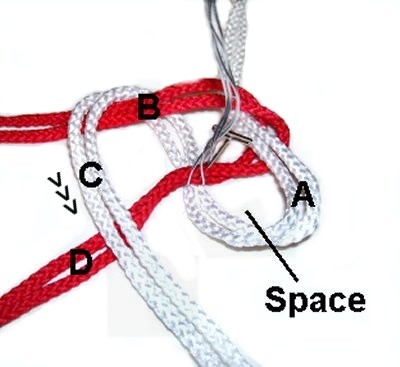
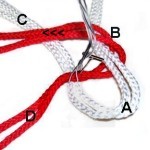
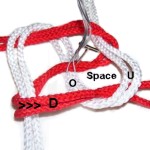
Step
B: Fold segment
B to the left so it rests on
top of
segment
C.
|
|
| |
|
| |
 |
|
Step
C: Fold segment
C forward, resting on top of segment
D. |
|
| |
|
| |
 |
|
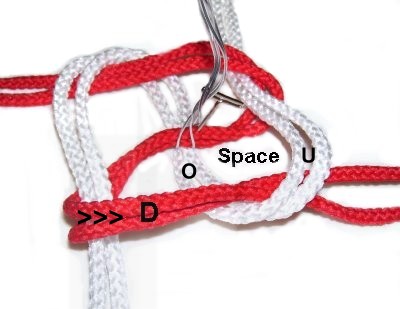
Step
D: Move segment
D to the right.
Pass it through the space
formed with segment A from the top (over
- under). |
|
| |
|
| |
 |
|
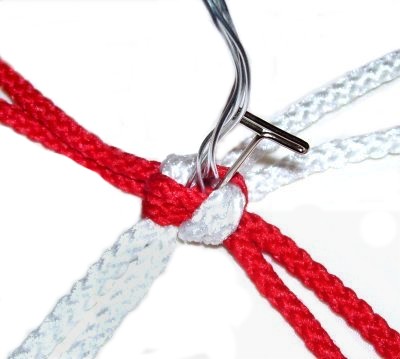
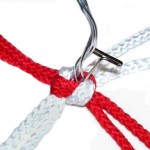
Tighten the knot gradually, neatly
arranging the two cords side-by-side in
each area.
Remove the pin from the center and
position it on the outside of
the Crown Knot.
Do not
move the knot while you tighten it.
|
|
| |
|
|
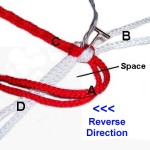
Step 4: Mentally re-label
the four segments where
they are now, starting at the lower
right (see
image below).
For the next Crown knot, reverse
the direction you move the cords
(clockwise). |
| |
|
| |
 |
|
Start with segment
A on the lower right. Fold it left,
resting on top of segment
D.
Continue by folding segments D, C, and
B (in that order). Segment B
passes through the space formed by
segment A.
|
|
| |
|
| |
|
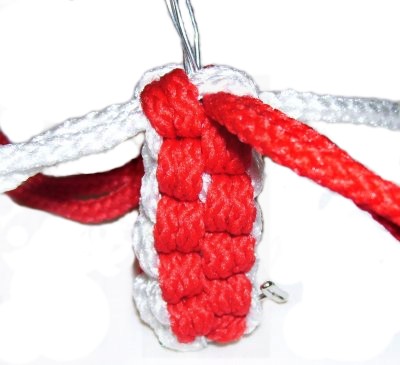
Important: As you
continue making new Crown knots, ALWAYS
start with the cord on the lower
right. The
stripes for the Candy Cane Decoration depend on
this.
Make sure you do not turn the knots when
tightening, or the pattern will be
altered. On two sides the vertical loops
should all be the same color, as shown in the
image below.
Alternate the
direction you progress (clockwise or
counter-clockwise) each time you tie a new knot.
|
| |
|
| |
 |
|
Step 5: Make
several more Crown knots, which will
stack on top of one another as you
progress.
Stop when the Candy Cane is 6 inches
long.
|
|
| |
|
| |
 |
|
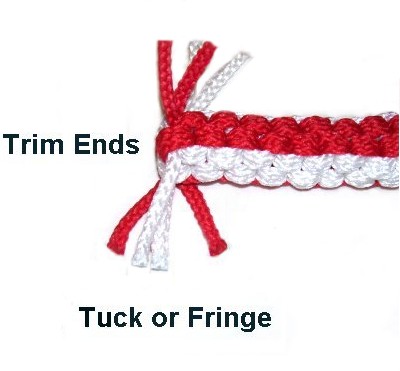
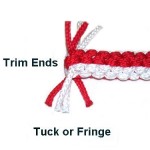
Step 6: Trim the ends
so they are even. You can finish by
tucking each cord into the Crown Knot
sennit.
Another option is to unravel each cord
and brush the fibers to form a soft
fringe at the bottom of your Candy Cane
Decoration.
|
|
| |
| |
|
|
|
By
using any text or images on Free Macrame
Patterns, you are agreeing to our Terms
of Use
|
|
|
|
|
Have
any comments about the Candy Cane Decoration?
Contact
Me.
|
|
|
|

|
|
| |
| |