Description:
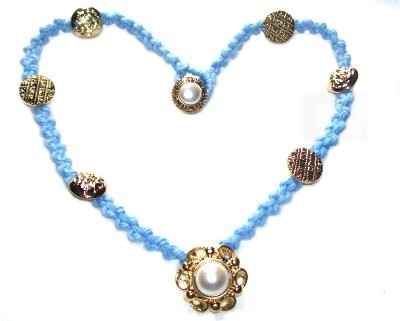
The Button Necklace features
shank-style buttons for the pendant,
clasp, and for decoration. It shows
you how buttons can be used in Macrame
designs.
Only basic decorative knots are used in
this Macrame necklace, so it's a
suitable project for beginners and
children (6+).
The example was made with crochet cotton.
Yarn, Satin, and Hemp are also good
choices.
Step 1:Cut
2 cords, each 4 yards long. Apply
glue to the tips and allow it to dry completely.
For a Button Necklace longer than 24 inches, cut
the cords longer.
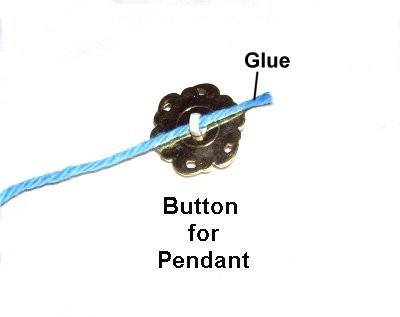
Pass one of the cords through the button
you will use as the pendant.
Center it so both halves are even.
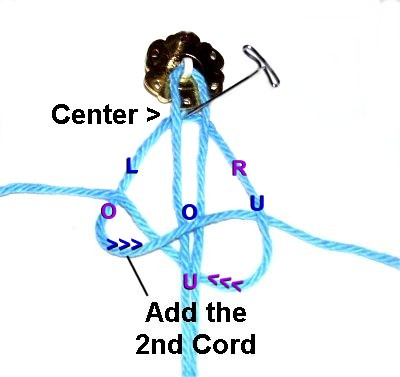
Fold the second cord and place it under
the first one, securing it at the center
(see next image).
Step
2: Make a Half Knot with cord 2
by moving the left
half of it over
both halves of the first cord and under
the right half of cord 2 (left to
right).
Move the right
halfunder
the first cord and over
the left half of cord 2 (right to left).
Button Necklace Design
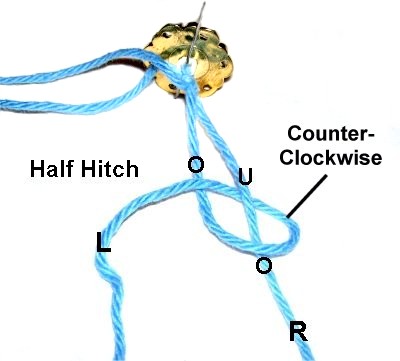
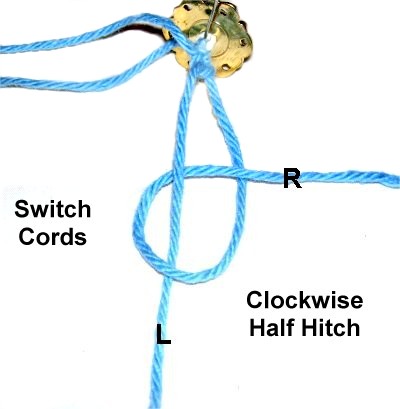
Step
3: Separate the 4 cords
into pairs. Mentally label the two cords
in one
set right and left.
Make a Half Hitch by moving the left cord
over
-
under the right cord, rotating counter-clockwise.
Pull it to the left and bring it over
the left cord to complete the loop.
Switch cords
and make the next Half Hitch with the
right cord onto the left. Tie the
knot in a clockwise
direction.
Be sure to gently tighten the knots so
they are not too tight. Make sure
they are close together and don't overlap.
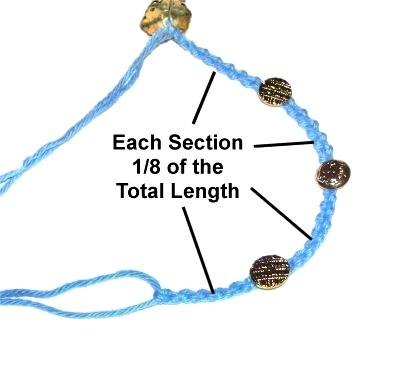
Step 4:
Repeat step 3 several times,
until the sennit is 1/8
thetotal
length you plan to make.
So if you are making an 16-inch Button Necklace,
each Alternating Half Hitch sennit should be
approximately 2 inches long.
Designer's
Tip:Remember that the
total length includes both halves of the necklace,
and each half contains four sennits of knots.
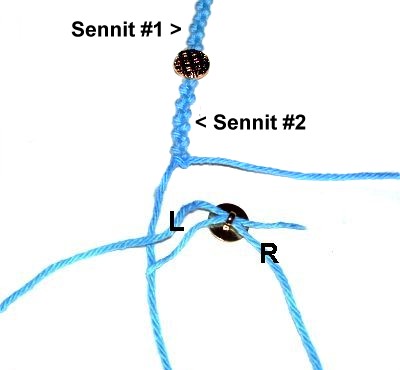
Add the first
button by passing the right cord through
the shank from right to left. The
left cord should pass through from left to
right.
Make sure the button is facing
upward when you are through (the
same as the pendant).
Step 5: Repeat
step 4 again, tying another
Alternating Half Hitch sennit followed by
another button.
Repeat
step 4 two more times, attaching
a button between them.
Measure carefully so the sennits are close
to the same length.
Go back to the
pendant, and use the other two cords to
make the left half of the Button Necklace.
Repeat
steps 3 and 4.Measure
the sennits to make sure they are the same
length as those on the other half, so the
buttons are in the same positions.
Clasp and Finishing
Step
6: First, make sure the
Button Necklace fits. Tie extra
knots if needed. Take into account
that you will have a button-loop clasp.
Tie a tight Overhand knot to secure the
Half Hitches in the fourth sennit, on both
halves of the necklace.
Attach the
button for the clasp at one end of the
necklace. The two cords should pass
through it in opposite directions (like
the others).
Tie one Overhand knot with the two
cords. Apply glue to the button
itself as well as the knot, then tie a
second Overhand knot.
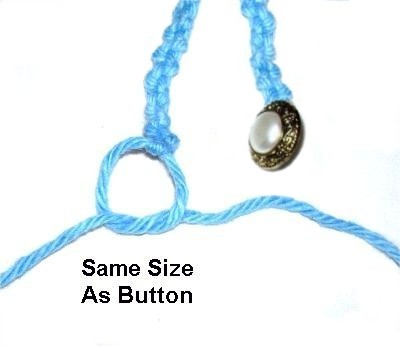
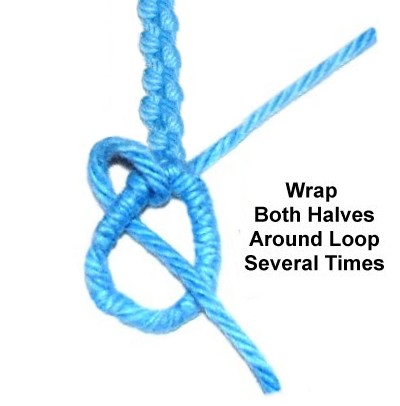
Step
7: Make a loop at the
opposite end of the Button Necklace by
tying an Overhand Knot.
Do
not tighten it.Make
sure it's the same size as the button.
Wrap each cord
around 1/2 of the loop, heading toward the
last Half Hitch in the sennit.
Before moving on to the final step,
pass the button through the loop to
make sure it still fits.
Designer's
Tip: The key to preventing a wrapped loop
from twisting is to hold
it steady while you work.
Try to keep the same tension as you wrap both
cords around the loop.
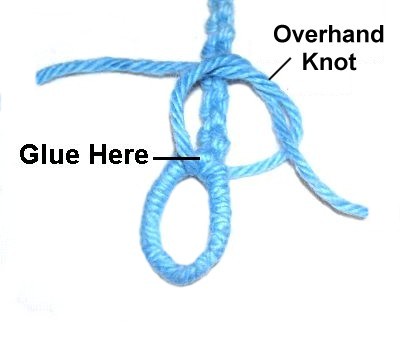
Step
8: When the loop is wrapped
and is able to rest flat without twisting,
tie a tight
Overhand knot with the two cords.
Apply glue while tightening, so it's on
the inside
of the knot.
Step 8,
continued: Apply a light coat of
glue to the entire clasp and let it dry flat for
several hours, before cutting off the extra
material.
Cut off the excess material at the other end,
too.
By
using any text or images on Free Macrame
Patterns, you are agreeing to ourTerms
of Use