Description:
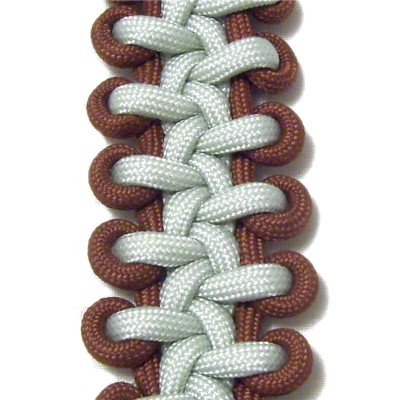
The Boot Lace Bar is a unique design that
combines Half Hitches with extra loops.
This decorative knot includes a Square
knot, so be sure you know
how to tie one.
The loops along the sides represent the
grommets, and the light colored areas are
the laces for the boots.
Paracord was used in the example
shown. The tips of the cords need to
be melted with a flame during preparation.
This
knot design came from the Fusion
Knots website. Click
the image or link to visit.
The video gallery contains many unique
combination knots as well as historical
knots.
Preparation:
To practice,
you need two cords, each at least 1 yard
long. You should have one dark and one light
color.
When making a project with the Boot Lace Bar,
determine the finished length you wish to make. Multiply
the finished length by 9. Cut
both cords to that length.
Cut the light
cord(color
B) longer if you plan to make a button
knot for a clasp.
Prepare the ends in the most appropriate manner
for the material you are using. For details
on how to prepare Paracord, see Cord
Preparation.
The loop at the top is optional, but you should
make it when practicing since it's the best way to
start the bar.
Cord
A = Dark Cord
B = Light
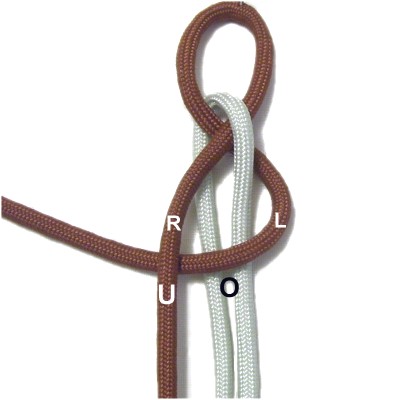
Step
1: Make a loop in the
center of Cord
A, crossing right over left.
Slide Cord
B through the loop
horizontally.
Line up the centers and secure both cords
to your board.
Move the right
half of Cord
B so it's vertical, resting on
top of the crossed area.
The left
half should rest underneath the
crossed area.
Step
2: Move the lefthalf
of Cord
Aover
Cord B, heading left.
Pass it under
the right half of Cord A.
Move the right halfunder
Cord B, heading right.
Pull it out on the right, passing it over
the curved area of Cord A.
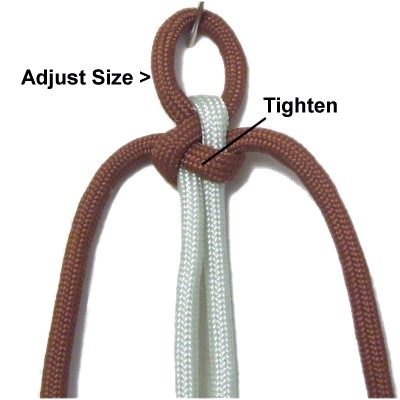
Tighten the
knot and adjust the size of the loop (see
tip below).
Arrange the two halvesof Cord
B so they are side-by-side.
Designer's
Tip: The loop can be used as a
clasp when making the Boot Lace Bar for Paracord
bracelets.
The size of the loop should be only slightly
larger than the item used for the closure (button,
bead, or knot).
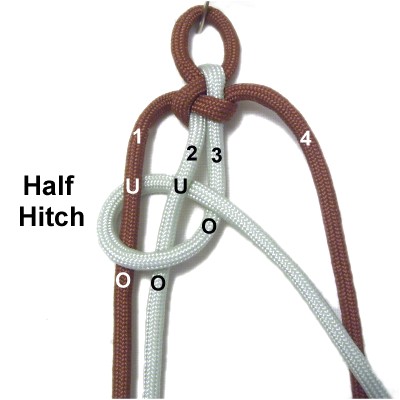
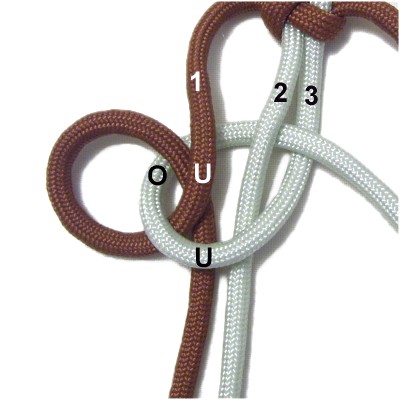
Step
3: Mentally number the
cords 1 - 4.
Tie a clockwise Half Hitch withCord
3over
-under cords 1 and 2.
As you pull it to the right, pass over
Cord 3.
Step
4: Use Cord
1 to make a clockwise
loop, passing the working end through
the Half Hitch over
- under.
Important:
The working end needs to pass under
to form the crossing point. This should
take place inside
the Half Hitch (white U in image).
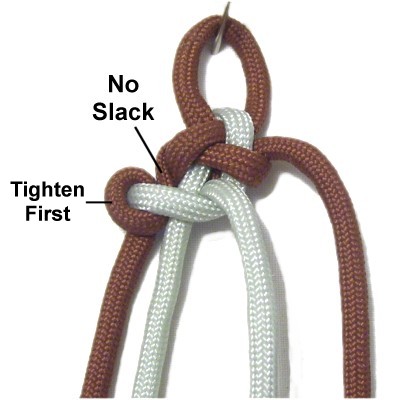
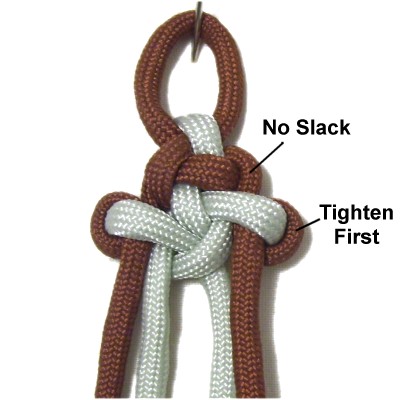
Tightening the
knots in the Boot Lace Bar should be done
in a specific way.
First, work the slack out of Cord
1 in the area indicated in this
image. Then tighten that loop
completely.
Tighten the Half Hitch by pulling on cord
3.
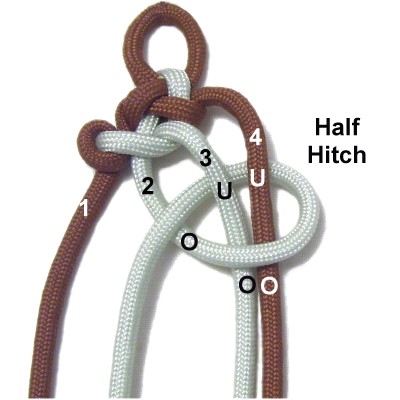
Step
5: Using Cord
2, tie a counter-clockwise
Half Hitchover
- under cords 3 and 4.
As you pull it to the left, pass over
Cord 2.
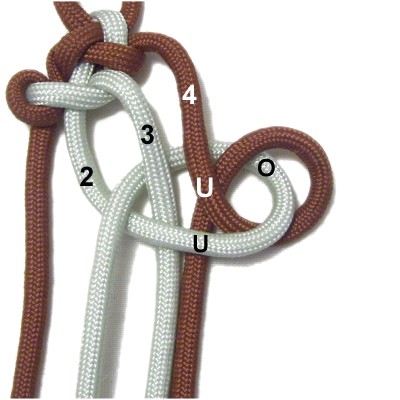
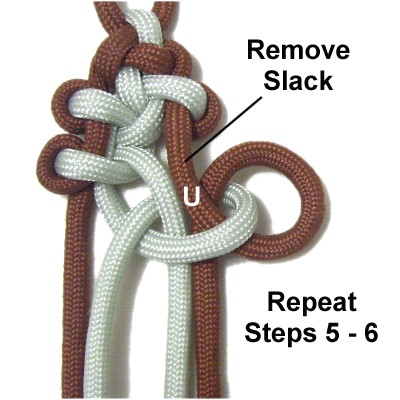
Step
6: Make a counter-clockwise
loop with Cord
4, passing through the Half Hitch
over
- under.
Make sure the working end passes under
to make the crossing point, which should
rest inside the Half Hitch.
Tighten the
loop made with Cord 4 first, followed by
the Half Hitch.
There should be no slack in the area
indicated.
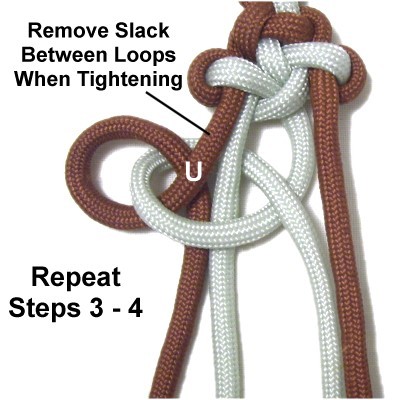
Step 7:
Repeat steps 3 and 4.
Remember to pass the end under
to make the crossing point for the loop
made with Cord
1.
When tightening, be sure to remove all the
slack between
the loops.
Step
8:Repeat
steps 5 and 6.
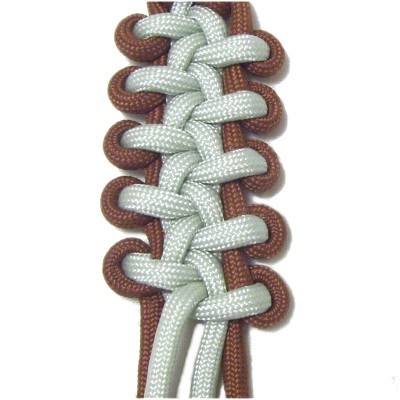
Step
9:Repeat
steps 7 and 8 several more times,
until you have 8 - 12 inches of material
left.
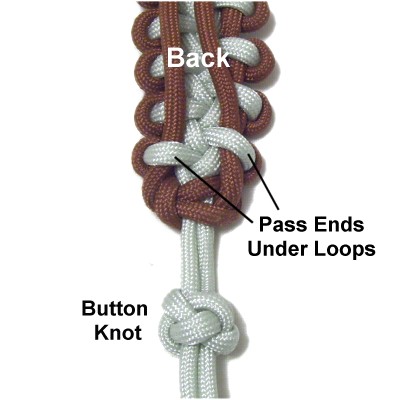
In a Macrame project using the Boot Lace
Bar, stop when the band is the size you
need.