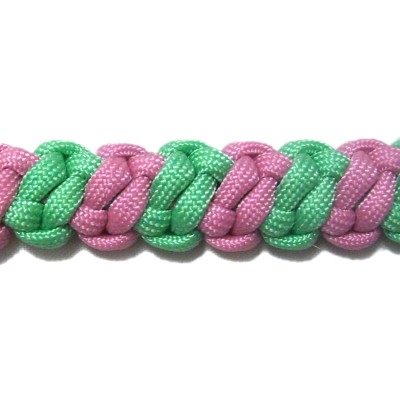
Bonobo Bar
Description:
The Bonobo Bar is a unique decorative
knot that is based on the Half Knot, which are
tied in an unusual manner. The knots are arranged
diagonally, but the sennit has straight
edges. Cord
Preparation
I
found this knot on the Fusion
Knots
Preparation and Clasp
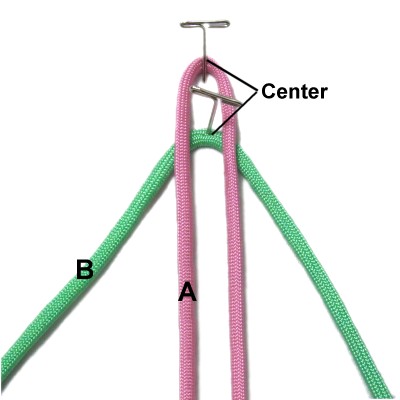
To practice, cut two
cords, each at least 60 inches long. 8
x the finished length of the item you
plan to make, if you are using the Bonobo Bar for
a project.
Fold both
cords in half, placing cord B under
cord A.
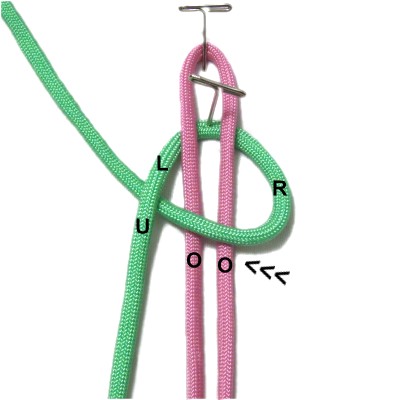
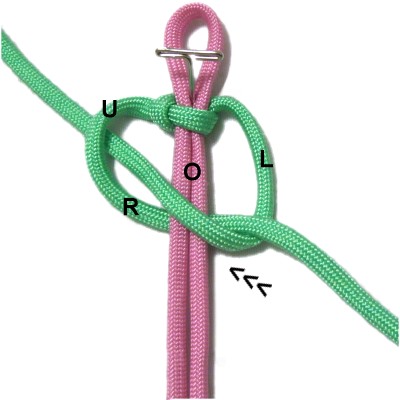
Move the right half
of cord
B to the left, so it rests over
both halves of cord A and under
the left half of cord B.
Move the left half
of cord
B to the right, passing it under
cord A and over
the right half of cord B.
Step
2: Adjust the folded area of cord
A so it's the right size for your
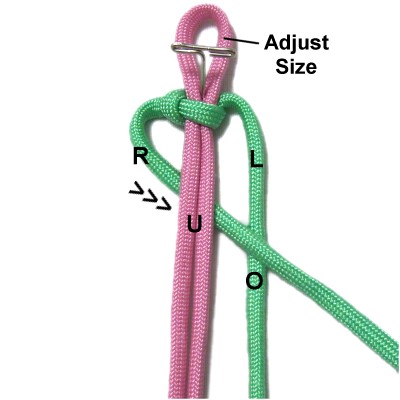
project.right
half of cord
B under
cord A and over
the left half of cord B, arranged
diagonally.
Move the left half
of cord
B to the left diagonally, passing
it over
both halves of cord A. under
the right half of cord B where it curves.
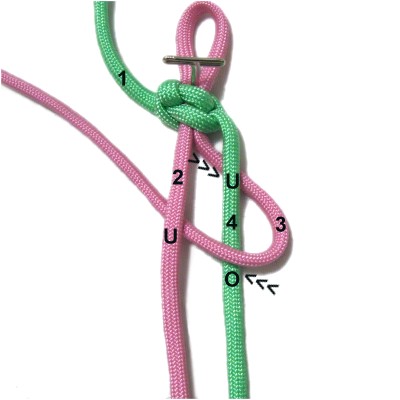
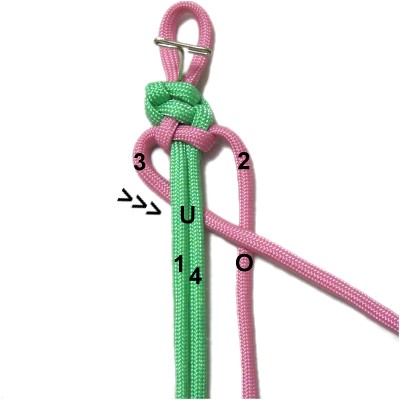
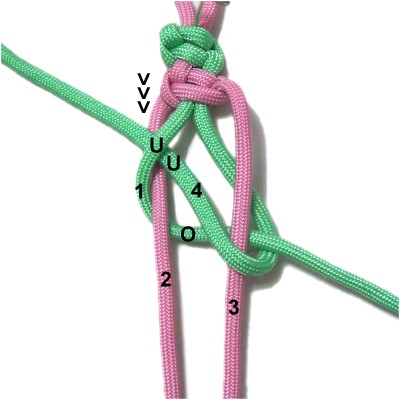
Step 3:
Mentally number the two halves of cord
A as segments
2 and 3. Cord
B should be labeled as segments
1 and 4.
segment
3 to the right, passing it under
segment 4 diagonally.over
segment 4 and under
segment 2 diagonally.
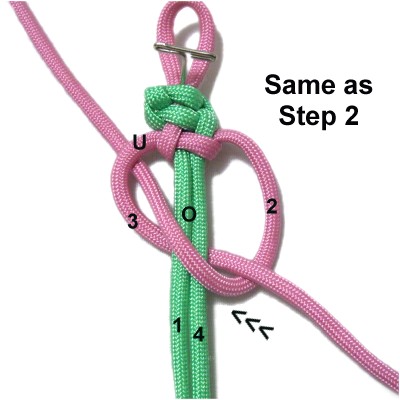
Move segment
2 to the right,
passing it under
segments 3 and 4 diagonally. over
segment 3 in the area where it curves.
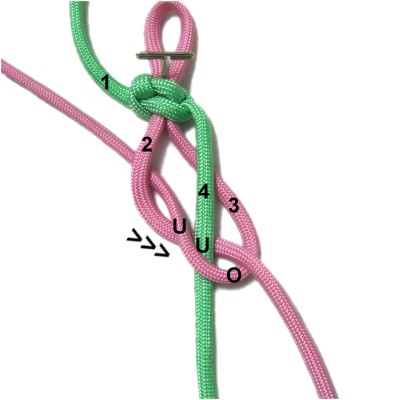
segment
1 forward
(toward you), passing it under
segments 2 and 3 where they cross on the
left.over
segment 2 where it curves.
segments 1 and 4 as you tighten.
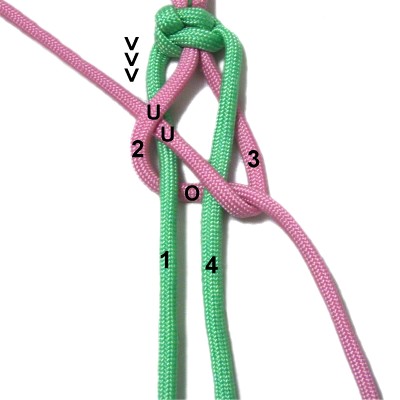
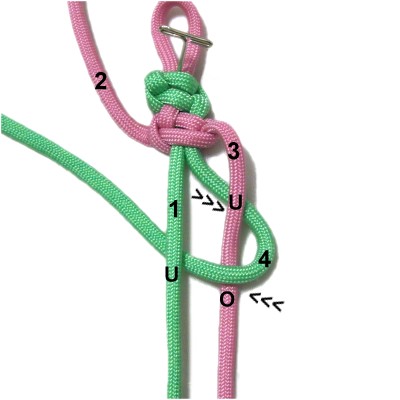
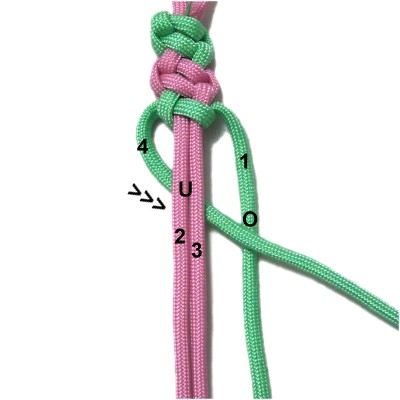
Step
4: Move
segment
3 diagonally to the right,
passing it under
segments 1 and 4 and over
segment 2.
Move segment
2 over
segments 1 and 4. under
segment 3 where it curves.
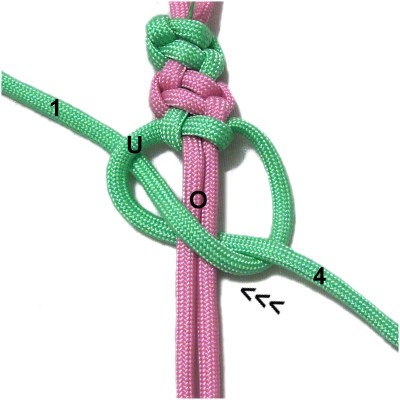
Step
5: Start the next knot for the
Bonobo Bar by moving segment
4 to the left, passing it
under
segment 3.over
segment 3 and under
segment 1 (diagonally).
Move segment
1 to the right,
passing it under
segments 4 and 3 diagonally. over
segment 4 where it curves.
Move
segment
2 forward ,
passing it under
segments 1 and 4 where they cross on the
left.over
segment 1 where it curves.
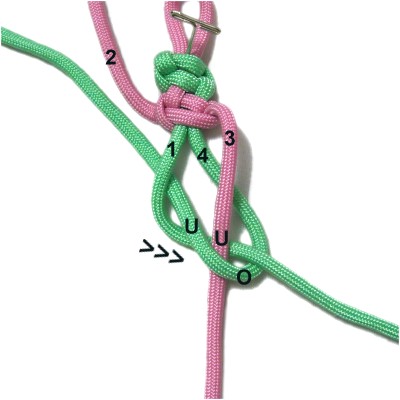
Step
6: Move segment
4 to the right diagonally,
passing it under
segments 2 - 3 and over
segment 1.
Move segment
1 to the left diagonally, passing
it over
segments 2 - 3 and under
segment 4 where it curves.
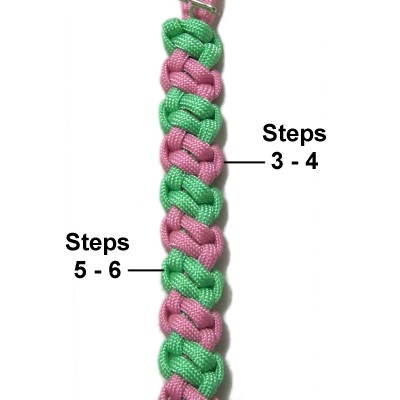
Step
7: Repeat
steps 3 - 6 at least two more
times if you are practicing
the Bonobo Bar.
Step
8: The best way to finish
the Bonobo Bar is to tie the modified Half
Knot as in step
4 or
6. step
4, if you stopped
on step
6 . step
6 instructions if you stopped on
step 4 .
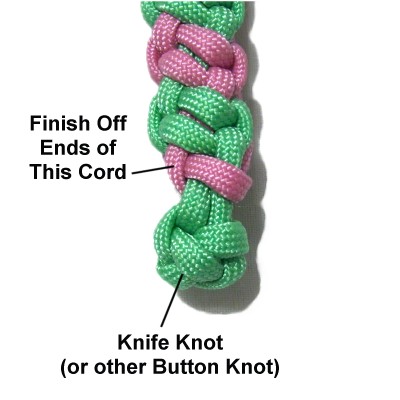
Step
9: Finish off the ends of
the cord used in the previous step, by
securing them to the back of the sennit.Knife Knot
By
using any text or images on Free Macrame
Patterns, you are agreeing to our Terms
of Use
Have
any comments about the Bonobo Bar? Contact
Me.