Description:
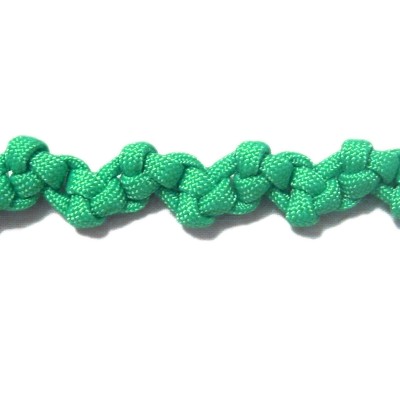
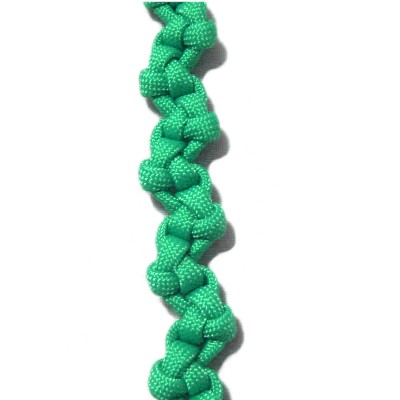
This Alternating Triangle Sennit is unique in the
fact that the Triangle Knots are made in opposite
directions, resulting in a zigzag
pattern.
The end result is a slender chain of knots
suitable for bracelets, belts, necklaces, and
similar projects. These instructions include
a loop you can use for a clasp. A button
knot can be tied at the opposite end.
Please read the bottom section of Cord
Preparation if you plan to use
Parachute Cord, which is the material you see in
the example.
Preparation:
To practice you need one cord at least 45 inches
long.
To use the Alternating Triangle Sennit for a
project, multiply the finished
length you plan to make by 8, and cut the
cord to that size.
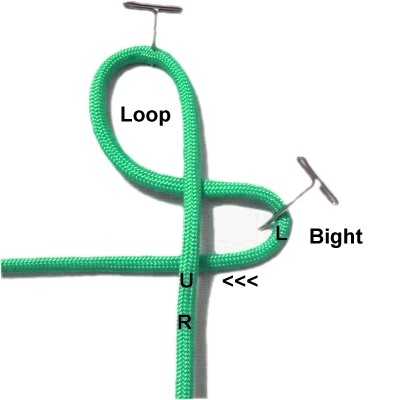
Step
1: Fold the cord and
mentally label each half. Make a loop at
the center, crossing right over
left.
Secure it on your board as shown, with the
right half vertical and the left half
horizontal heading right.
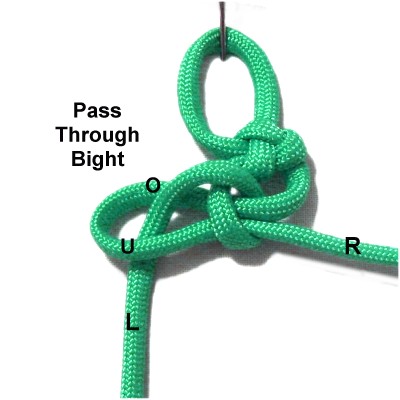
Move the left
half of the cord to the left,
folding it to form a bight.
Pass it under
the right half of the cord horizontally.
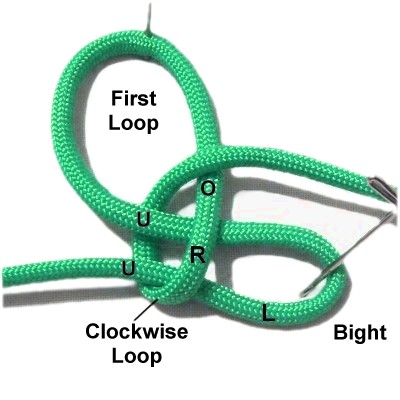
Step
2: Make a clockwise
loop with the right
half of the cord, passing under
the bight vertically, heading backward.
Pull it through the first loop. Pass
over
the right side of the first loop as you
pull it to the right.
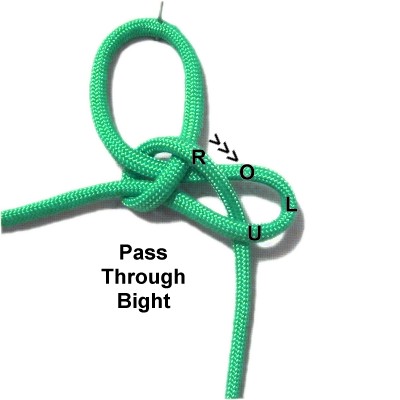
Pass the right
half of the cord through the
bight from the top (over
- under).
Arrange it diagonally (see next image).
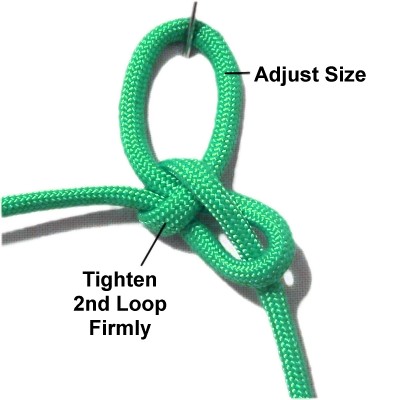
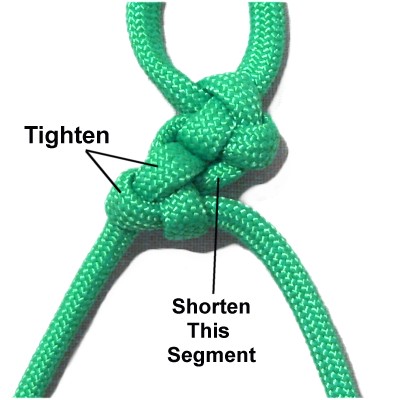
Step
3: Adjust the size of the
first
loop so it's appropriate for
the type of project you are making.
Tighten the second
loopfirmly
by pulling the right
half of the cord.
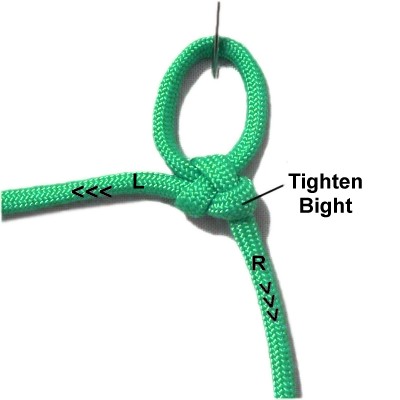
Tighten the bight by pulling the left
half of the cord.
Re-tighten the second loop as needed,
so the entire knot is small and firm.
It's important to tighten each knot in
the Alternating Triangle Sennit firmly,
especially when you are using slippery
material like nylon and satin.
Step
4: Arrange the left
half of the cord so it's
vertical.
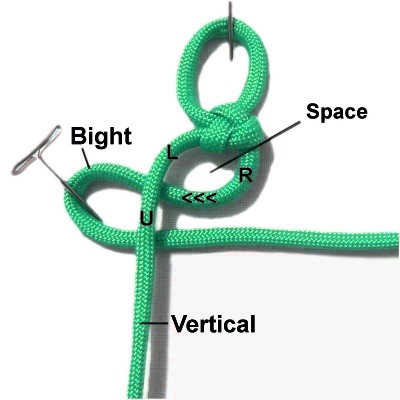
Fold the right
half of the cord to form a bight,
then slide it under
the left halfheading right. The fold
should be on the left.
Make sure there is a space between the
first and second knot.
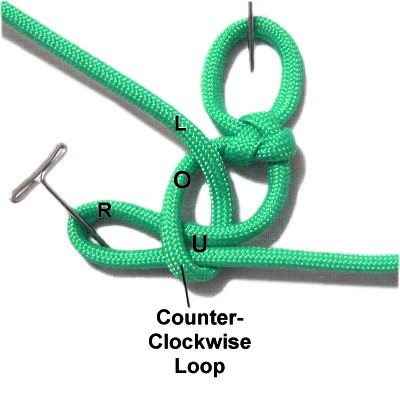
Make a counter-clockwise
loop with the left
half of the cord, passing under
the bight as you move it backward
vertically.
Pull it through the space, then to the
left to complete the loop.
Step
5: Pass the left half of
the cord through the bight over
- under.
Tighten the
loop by pulling the left
half of the cord.
Start tightening the bight by shortening
the segment coming from the first knot, so
the two knots are touching.
Then pull the right
half of the cord to tighten the
rest of the bight.
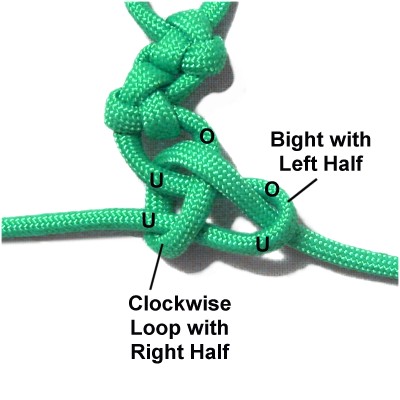
Step
6: The next knot is on the
right, so use the left
half of the cord to make the
bight.
The right half is used to make the loop,
then pass it through the bight.
Shorten the portion of the bight coming
from the left
before tightening the rest of it.
Step
7:Repeat
steps 4 - 6 several timesif you are practicing.
Stop when the Alternating Triangle
Sennit is the size you need for your
project if you are making something with
this technique.
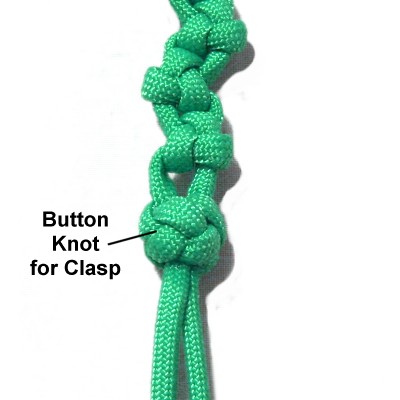
Step
8 (optional): Tie a button
knot if you need a clasp, such as for a
bracelet or belt.
The knot shown here is the Knife
Knot, also called the
Diamond knot, which I recommend.
By using any
text or images on Free Macrame Patterns, you are
agreeing to our Terms of Use