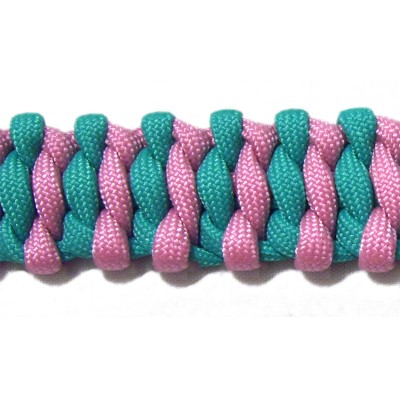
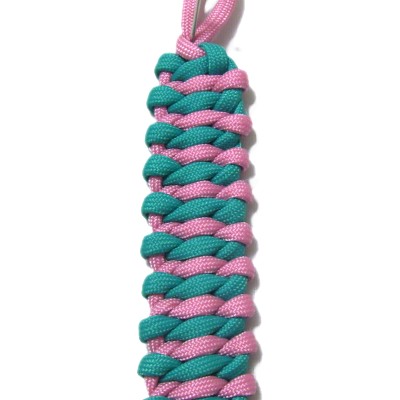
Surreal Bar
Description:
The Surreal Bar is a unique decorative
knot suitable for bracelets, belts, choker
necklaces, and other similar Macrame
projects. The cords are folded so
there is a loop at one end. The loop can be
used as a clasp. You can make it with four
cords if you don't need the loop.
This pattern is from the
Fusion Knots website.
It's listed under the name Surreal
Solomon Bar .
(Click on the image or link to go to
the knot gallery, which contains video
tutorials )
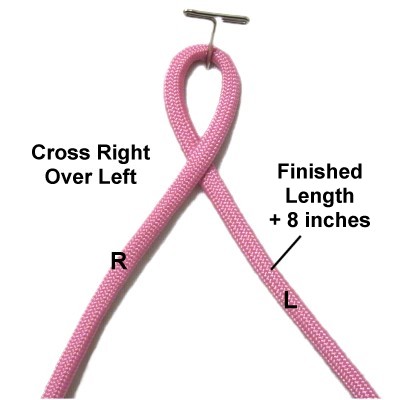
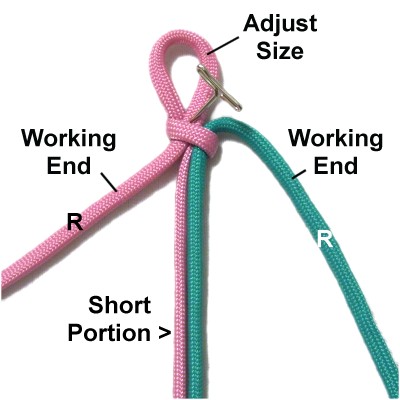
Preparation:
To practice
the Surreal Bar, you need two 60-inch cords
(different colors). In the example, cord
A is pink , and cord
B is turquoise .10 x
the finished length of the item you are
making.Cord
Preparation
Step
1: Measure from the left
end of cord
A down to the finished
length + 8 inches. right
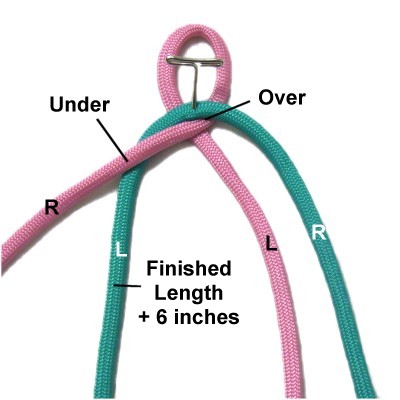
after crossing.
Measure from
the left end of cord
B down to the finished
length + 6 inches. Fold it
at that point.under
the right
portion of cord A.over
the crossing point of the loop. Secure it
at the fold.
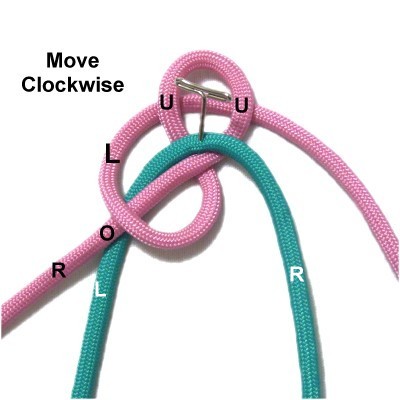
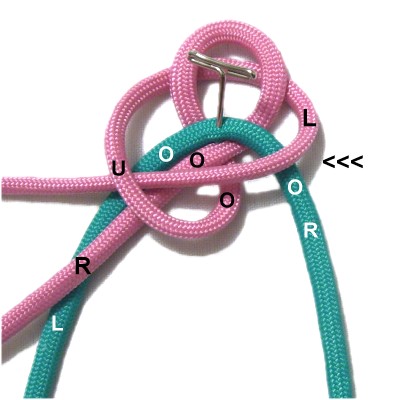
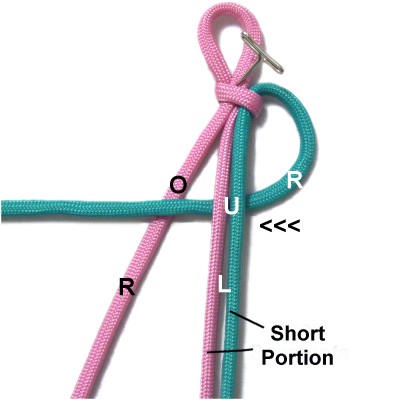
Move the left portion
of cord
A in a clockwise direction,
passing over
the right portion of cord A and the left
portion of cord B. under
the loop.
Move the left portion
of cord
A to the left, passing over
everything in its path, which includes
both parts of cord B and the right portion
of cord A.under
the segment furthest to the left (cord A).
Tighten the
Slipknot firmly. Adjust the size of
the loop at the top by pulling the right portion
of cord
A .
Designer's
Tip: The loop at the top can be
moved too easily, so secure the crossing point of
the loop as
shown in the images.
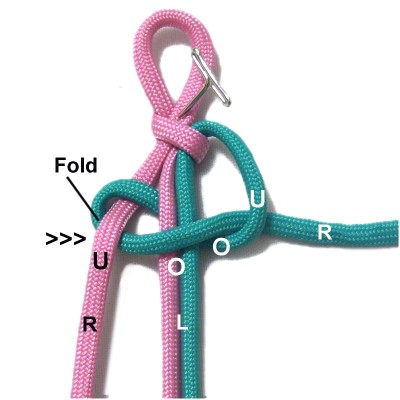
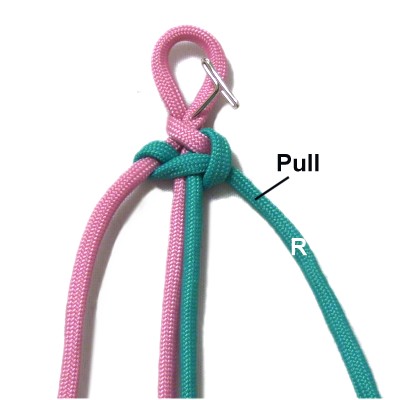
Step
3: Move the working end
of
cord B
under
both fillers, heading right to left.over
the working end of cord A.
Fold the
working end of
cord B
under
cord A, heading left to right. over
the fillers and through the curved area of
cord B over
- under .
Step
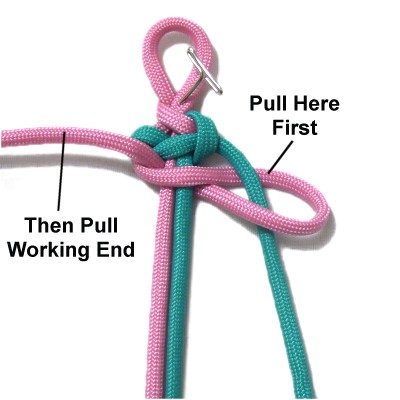
4: Tightening each row in
the Surreal Bar is done in two steps.cord
B where it folds around cord A on
the left. This tightens the right
side of the knot.
Tighten the
left side and center area by pulling on
the working end of cord B.
Step
5: Move the working end of
cord
A over
the fillers, heading left to right.under
the working end of cord B.
Fold the
working end of cord
A over
cord B, heading right to left. Pass
it under
the fillers.under
- over .
Step
6: Remember that tightening
the Surreal Bar is done in two steps.cord
A close to the folded area to
tighten the left side, then pull the
working end.
Step
7: Repeat
steps 3 - 6 several times, or
until the Surreal Bar is the correct size
for your project.
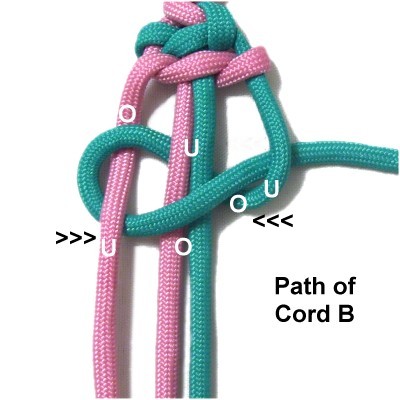
This image shows
the path of cord
B (step 3).
cord
A
(step 5).
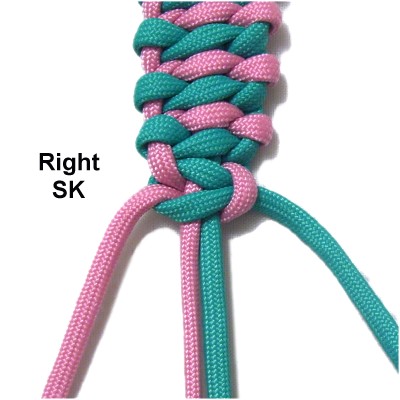
You can finish
the Surreal Bar by tying a RIGHT SK with
the working cords around the
fillers. fillers
can be used to tie a button knot if you
need a clasp. The working ends would
be finished off.
By using any
text or images on Free Macrame Patterns, you are
agreeing to our Terms of Use
Have
any comments about the Surreal Bar? Contact
Me.