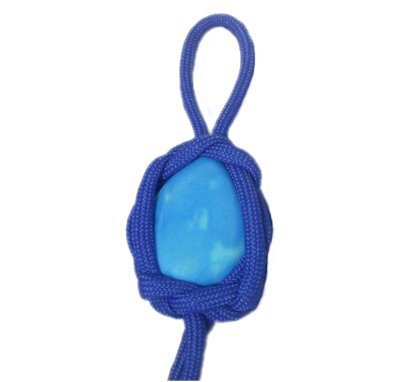
Description: The Stone Pendant
is a decorative knot that is designed to wrap
around a stone, marble, or similar item. It
surrounds the stone snugly, like a frame, so
it's not a flat design.
Try to use a stone that is oval in shape and
has thick edges. Make the pendant first,
then search for a stone that will fit.
You should add glue if you want the stone to be
permanently attached to the cord material.
This project is somewhat challenging for
beginners, so you should have some experience
tying Macrame knots in general before you try to
create it.
Important:This
Micro-Macrame design is NOT suitable for cabochons,
since they are too thin and will slide out
of the knot.
The Pendant
Setting is better for using
flat stones, cabochons, or coins.
Click on the image or link to view the
page.
The Stone Pendant design is on the Fusion
Knots website, under
the name "Marble Lantern".
Click on the link or image to visit the
site.
See the video gallery to view the
tutorials for other interesting knotting
techniques and designs.
Supplies Needed:
2mm to 4mm cord material
Project Board and pins
Step 1:Cut
one cord, 60 inches long. Apply
TAPE to the tips to prevent unraveling.
When using Parachute cord to
make your Stone Pendant, melt the tips with a
flame so the inner fibers cannot slide out, then
apply tape.
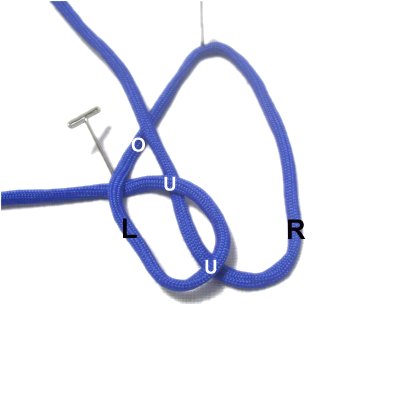
Step
1: Secure the cord to your
board in the center.
Use the left
halfto make a counter-clockwise
loop, passing the end under
to make the crossing point.
The loop should rest 2 inches below the
secured area.
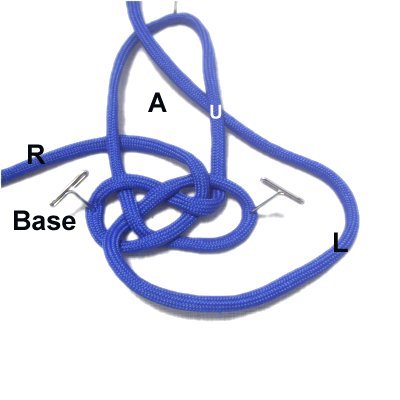
Step 2: Fold the right
half of the cord as shown,
sliding it partially under
loop 1, and over
the area above it.
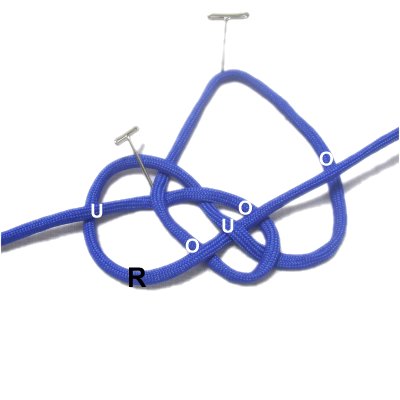
Step 3: Move the right
half of the cord under
the left half as you bring it down and
to the right.
Weave it through the first loop, over
- under - over the three
segments. Pass it over
the portion on the outside.
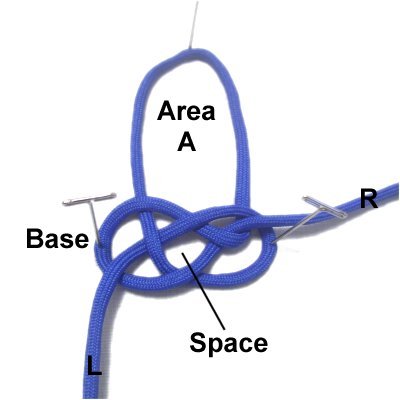
Step
4: Tighten and balance
the design, which is called the base. Keep
both loops secured to your board
while you construct the rest of the
knot.
The portion closest to the center
should be mentally labeled "area
A". It should still be
secured at the top (center).
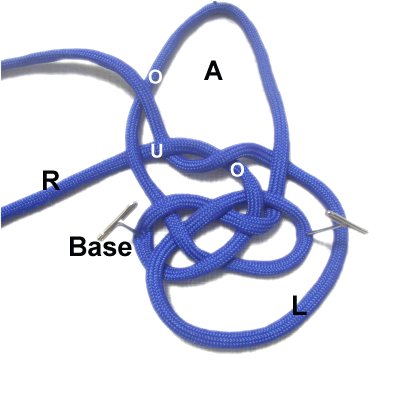
Important:
Note the diamond
shaped space in the center of the base.
As you work on the rest of the Stone Pendant,
make sure you can identify that space, since
it's important in steps
9 and 10.
Give yourself plenty of room between the top
of area A down to the base.
Step 5: Move the right
half of the cord over
the top right area of the base.
Then move it to the left, passing under
the left
side of area A.
Designer's Tip:You will
be working in the areas above
or below the base for the remainder of
the Stone Pendant.
Identify the base, and the diamond shaped area, before you
complete each step.
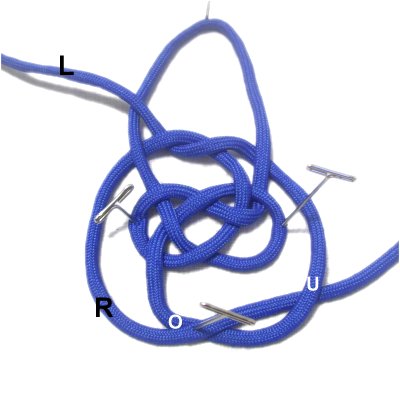
Step 6: Move the left
half of the cord
in a counter-clockwise
direction, around
the base.
Bring it under
the right
side of area A.
Step 7: Bring the left
halfover-
under the right half of the
cord, where you curved it to the left
above the base (step 5).
Move it up and to the left, passing over
the left side of area A.
Step 8: Move the right
half of the cord down to the
area below
the base.
Pass over
- under the left half of the
cord, in the area were you moved it
around the base in step 6.
Secure it where the two cords cross.
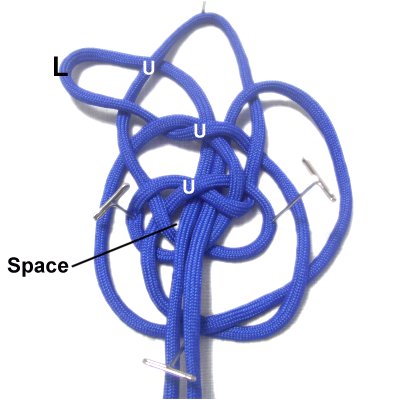
Important:
Make sure you can clearly identify the base and
the diamond shaped space, before you work on the
next step.
Step 9: Bring the right
end up to area A, passing over
the right side of it.
Pass it under
the two crossed areas as you pull it out
through the diamond shaped space.
It will pass over the remaining
segments below the space.
Step 10: Bring
the left
end up to area A, passing under
the left side of it.
Pass it under
the two crossed areas, making sure it
stays to the left of the other end.
Pull it out through the diamond shaped
space.
Step
11: Keep area A secured
to your board, but removed the other
pins.
Pick up the base and ends with one
hand, and pull downward.
The remaining segments should be pushed
upward with your other hand.
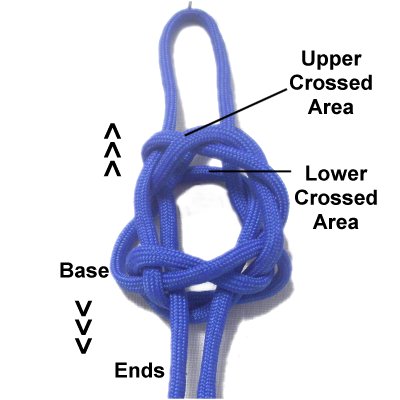
Step 11,
continued: The
lower crossed area that you constructed in
step 8 will be moved to the top area of the
Stone pendant. It should be resting behind
the upper crossed area.
Remember
that the Stone Pendant is not flat. As
you tighten, there should be four distinct areas
-- top, bottom, and sides.
Tighten the
base first, then gradually remove
the slack all the way through the
knot. The area at the top will
look similar to the base.
Reduce the size of the top loop (area A)
if necessary.
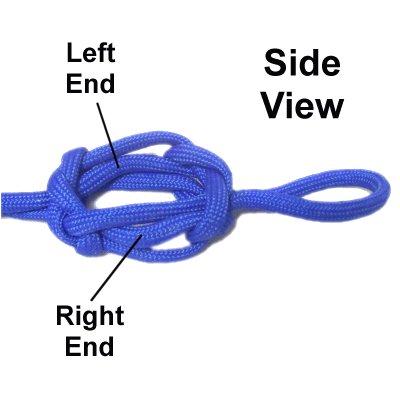
The two ends
are pushed to the sides and will rest
between the other two segments.
Tighten and shorten the knot gradually,
until the pendant is slightly
smaller than the stone.
Place the stone inside, stretching
the knot to fit. Pull on the ends and
the loop firmly.
You can add glue if you wish.
By using any
text or images on Free Macrame Patterns, you are
agreeing to ourTerms of Use