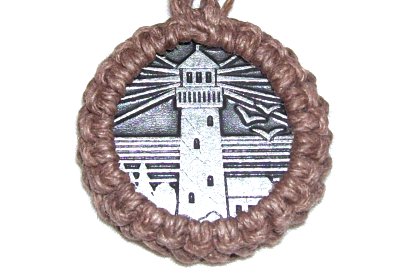
Description: The Pendant
Setting is a popular Macrame technique used to
wrap the edges of cabochons, flat stones, or
coins. It features the decorative knot called
the Vertical
Larks Head, along with crossed
elements.
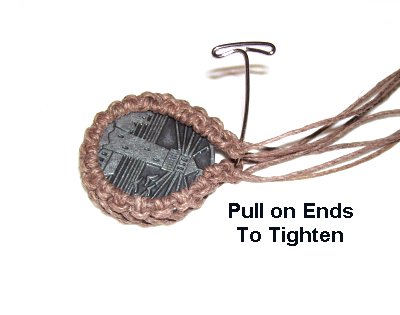
After the setting is tightened, the ends can
be used to make the necklace, or to form a loop
(right image above). You need to decide ahead of time
which variation you prefer to use.
Make sure the stone has even edges, if you plan
to use one.
Below are cutting instructions for both
variations (see Preparation).
This Micro-Macrame decoration is easy to tie,
but you will be working with very fine material,
which makes it a bit more challenging.
Hemp material was used in the example.
Nylon, waxed cotton or polyester are good
choices, too.
Special thanks goes to Victoria de
Freitas for helping me learn this
technique.
Supplies Needed:
Fine Cord Material (1mm or less)
Cabochon, Coin or Stone
Project Board, pins, and tape
Preparation
Cutting
Instructions for Pendant Setting with Loop:
Measure the
diameter of the widest area
of the stone or coin you are wrapping, usually
near the center.
Multiply
the diameter
x 4 to get the coin
size. Working
Cords: Multiply the coin
size by 14. Cut 2 cords to
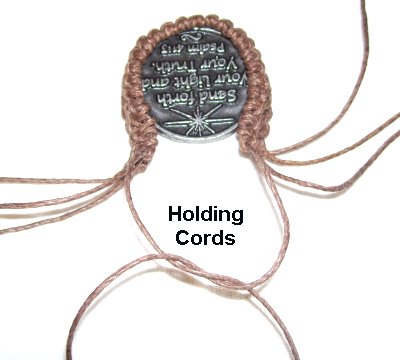
that length. Holding
Cords: Cut two cords, each
at least 18 inches long.
Cutting Instructions for Pendant
Setting +
Necklace:
Neck
Size: Measure from
your chest (where the pendant rests) around to
the back of your neck, and to the front again.
Step A: Cut 2 holding
cords, yourneck
size x 2.
Step B: Measure the
diameter of the widest area
of the stone or coin you are wrapping. Multiplythe
diameter x 4
to get thecoin
size.
Step C:Cut 2 working cords,
your
neck size x 4+coin
size.
Prepare the ends of the four cords with glue, to
prevent unraveling.
I recommend you also coat the cords with beeswax,
to make knotting easier.
Larks Head Design
Step 1: Place a piece of
masking tape on your work surface with the sticky
side face up,
arranged horizontally.
Place the center
of the two working
cords at the middle of the tape,
arranged vertically.
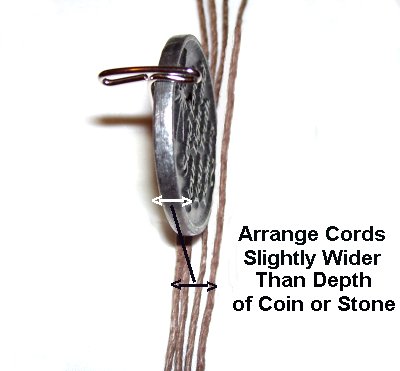
Do the same with the holding cords, placing one
to the right and left of the working cords.
As you arrange the two holding cords,
place them slightly wider than the
depth of the coin or stone.
(The depth is the thickness
from front to back).
Turn the tape over and stick it to your
project board. Secure the top portion of
the cords, since you will work with the
bottom half first.
Design
Tip: The cords were separated more than
usual in the images below, so you could see the
details of the Pendant Setting better.
You can secure the holding cords lower down, so
they remain the same distance apart as you
progress.
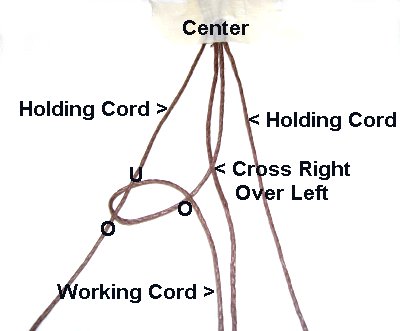
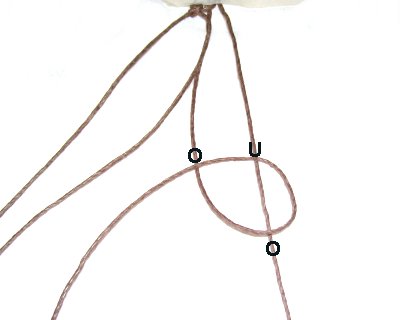
Step 2: Cross the two
working
cords right over left.
Make a loop with the working cord now on
the left,
onto the left holdingcord.
Rotate clockwise,over
- under - over as shown.
Tighten the loop gently,
so it's against the tape.
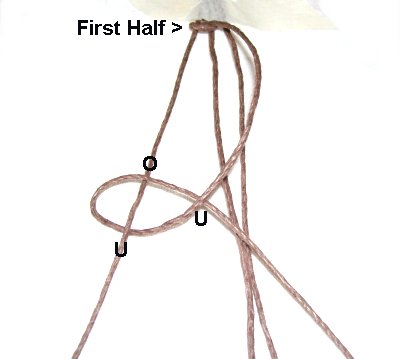
Important:
Tighten the first
half of the Larks Head knots carefully,
to maintain the proper spacing.
The second half of the knot can be tightened
firmly, but for the first half, be gentle.
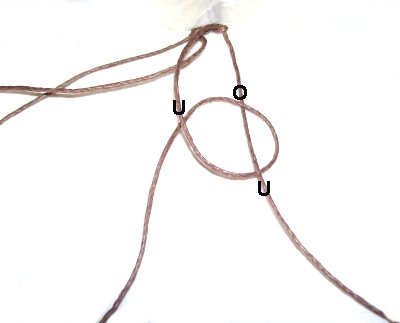
Step 3: For the second
half of the knot, move the same working
cord under
- over - underto
make the loop.
Steps
2 + 3 = one Vertical Larks Head
knot.
Step 4: Use the
working cord now on the right
to make a Larks Head knot onto the rightholdingcord.
Rotatecounter-clockwise,over
- under - over.
Step 5: Tie the second
half under
- over - under.
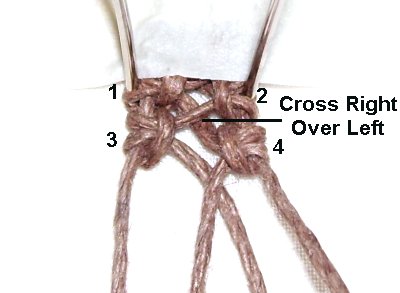
Cross the
working cordsagain,
right over left.
Repeat
steps 2 - 5.
Here's a closer view of the crossed
areas you should see down the entire
length of the Pendant Setting.
Make sure you always cross
the cords before you tie the
two knots. It's best to cross right over
left each time, but not absolutely
necessary.
After you tie a few more knots, check
to see that the knots are separated
appropriately for the stone or coin.
The edge of it should fit between
the two rows of knots, as it sits on the
crossed areas.
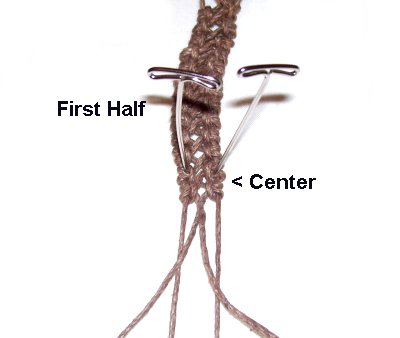
Continue tying knots until the sennit
is 1/2
thecoinsize (see preparation).
Push the knots close
together before
you measure the sennit.
Step 6: Turn the
design around, so you work with the
other half of the cords. Secure the
sennit to your board to hold it steady.
Repeat
steps 2 - 5.
Step 7: Check the
size, by pulling on the ends of the holding
cords, fitting the Pendant
Setting around the coin or stone.
The last knots tied at each end should
meet when you pull the cords firmly.
Add
or remove knots as needed.
Important:
Make sure the knotted design is balancedbefore you
move on to the next step.
The ends should be at the top
of the coin or stone.
Step 8: Locate both
ends of one
holding
cord.
Tie the two ends together with atight
Overhand Knot.
Make sure you pull the ends firmly
before tightening the knot.
Turn over the coin or stone, and repeat
this process with the ends of the other
holding cord.
Finishing Method 1: No Loop
The following steps describe one method for
finishing the Pendant Setting. This variation is
used when you plan to go straight into a necklace
design.
The advantage to this option is that you have 8
cords available, and can easily add more if
necessary.
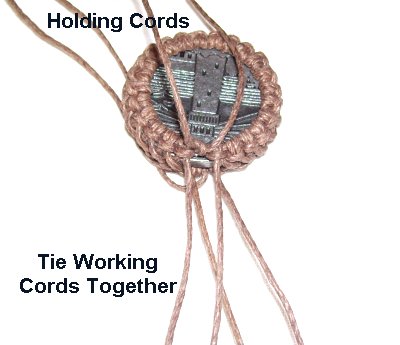
Move the
holding cords aside, since you have
already tied them together.
Tie the ends of the working cords
together with Overhand knots (two cords
per knot).
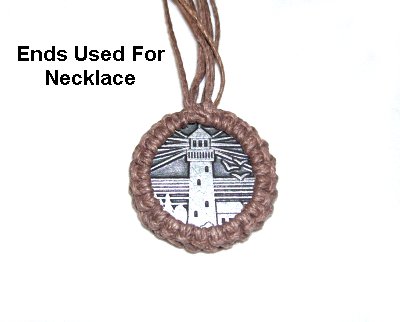
Once the Pendant Setting is completed,
the ends are used to make the necklace.
You'll have four on the right as well
as the left.
(see information below)
Important:
Make sure you only cut the working
cords, if you decide to reduce the number
of available cords.
Apply glue to the knots before you do any cutting.
Finishing Method 2: Loop
The second method for finishing the Pendant
Setting is to make a loop at the top. The
instructions below show you how to make one with a
Square Knot design. You can use other types
of knots the same way.
The advantage for this option is that you can make
the necklace with an entirely different color or
material. The necklace cords just
slide through the loop.
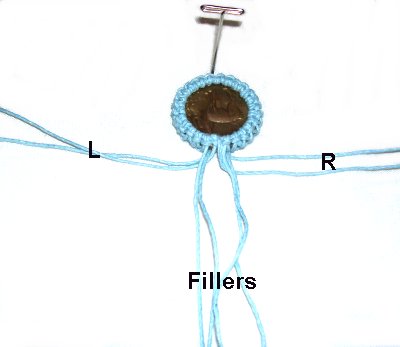
Organize the
cords so that there are two working cords
on the right and left, and 4 fillers in
the center.
You'll be tying Square Knots using 4 cords
instead of two, following the instructions
below:
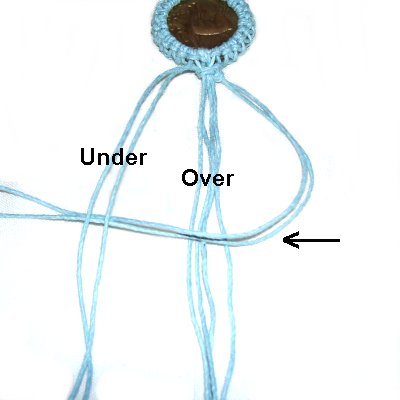
<<
Move the left
working cords to the right, over
the fillers and under
the right working cords.
Move the
right working cords under
the fillers and over
the left working cords, as you pull them
to the left. >>
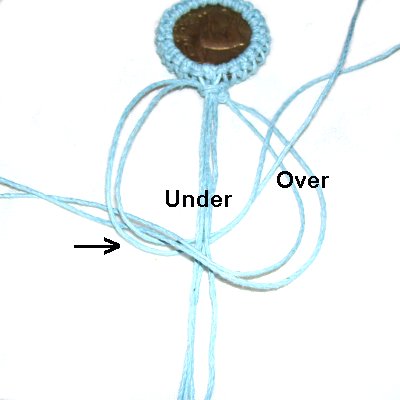
<<
Move the working cords now on the right
to the left, over
the fillers and underthe
other set of working cords.
Move the working cords now on the leftunder
the fillers and over
the other working cords, as you pull them
to the right. >>
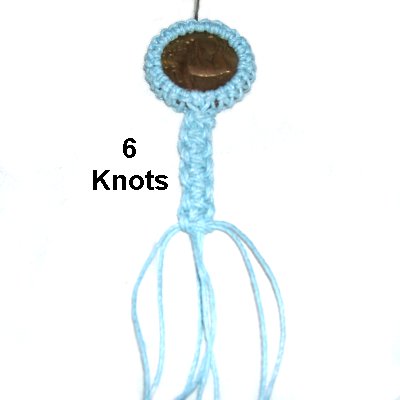
<<
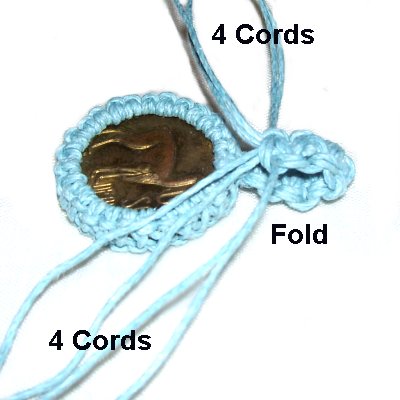
Tie a total of 6 Square Knots.
Tighten each one firmly.
Fold the loop forward, towards the front
of the pendant. >>
Organize the cords into two groups
of four. >>
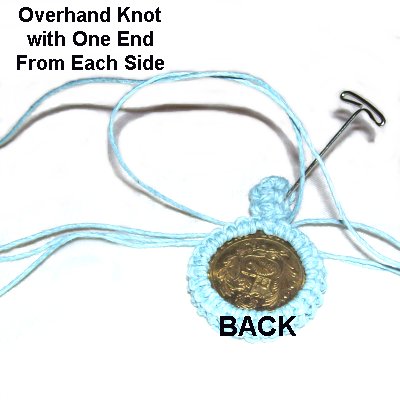
Turn over the
Pendant Setting, so you are working in the
back.
Select one cord from each side and tie a tight
Overhand knot. Repeat with the
others.
Apply glue and allow it to dry completely,
before cutting off the extra material.
By
using any text or images on Free Macrame
Patterns, you are agreeing to ourTerms
of Use